Introduction
Apart from the jitsi default recording, jitsi has introduced a local recording feature. This allows any user to record the meeting to local storage. This is fairly simple to implement. Implementing and using this feature will be discussed in this blog article.
Constraints
- Currently this recording supports only upto 1GB (approximately 100 minutes).
- You can only do local recording or use the default recording at once.
- Any number of participants can do local recording at the same time.
- You do not need to have a jibri server installed.
Implementation
Open the config file in below path and make changes.
Path: /etc/jitsi/meet/{domain}-config.js
localRecording: {
    // Whether to disable local recording or not.
    disable: false,

    // Whether to notify all participants when a participant is recording locally.
    notifyAllParticipants: false,

    // Whether to disable the self recording feature (only local participant streams).
    disableSelfRecording: false,
},
You can change notifyAllParticipants and disableSelfRecording variables to true and change the configurations of the local recording feature according to the given comment above these variables.
NOTE: In previous jitsi meet versions these code lines may not be available. In that case check for the enableLocalRecording variable and make it true.
enableLocalRecording: true,
How to use
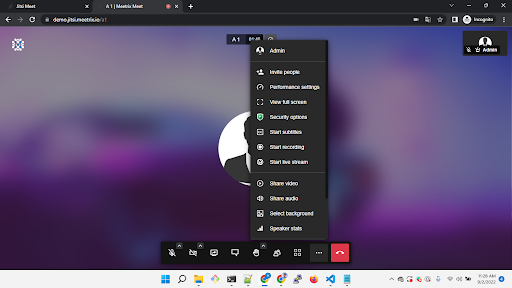
Step 1: Go to more actions -> Start recording
Step 2:
Click on Save recording files locally
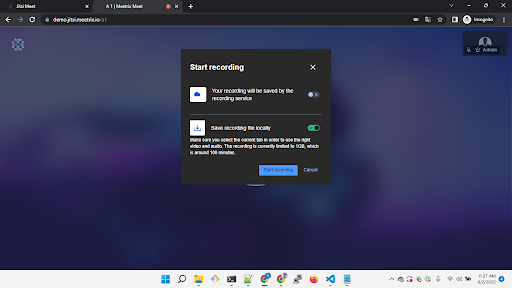
After the meeting has ended or when you stop the recording, the recording file will be downloaded through the browser.
Leave a Comment