JSON Web Token (JWT) is an open standard (RFC 7519) that specifies a compact and self-contained method which can be used for securely sharing information between two parties by authenticating user access.
Once a user is logged in, each future request will contain the JWT, allowing the user to access services and resources that are accessible with that token.
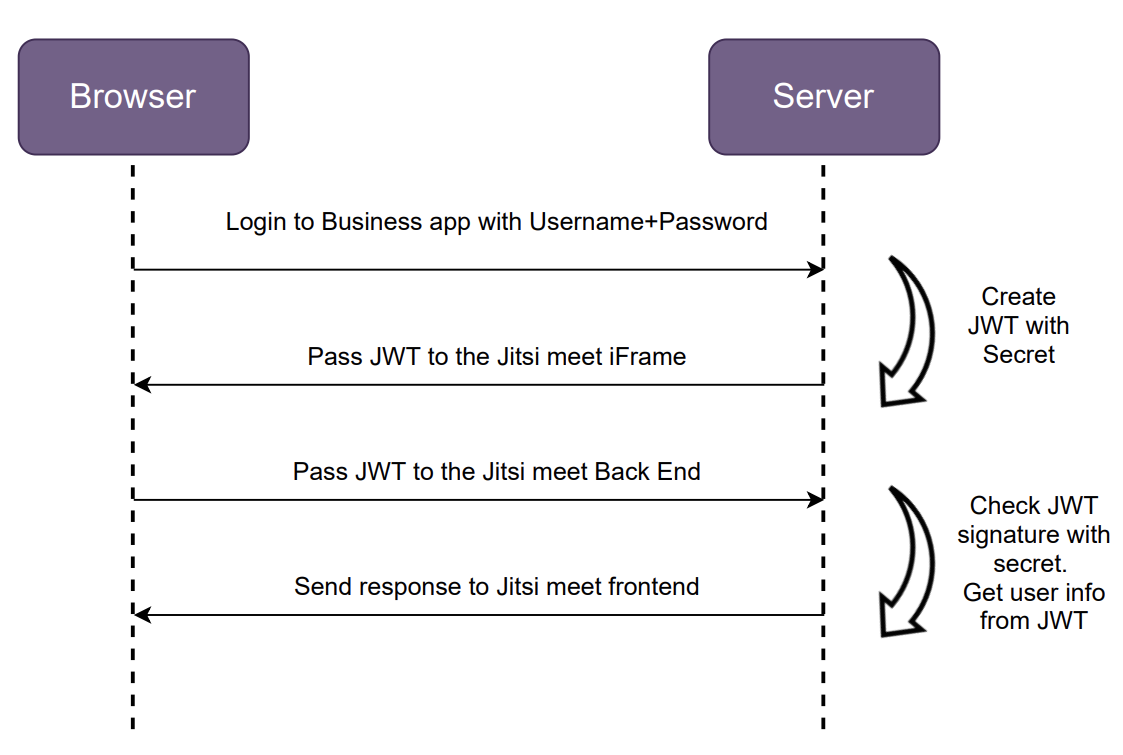
JWT based authentication with Jitsi Meet requires your business application to generate a JSON Web Token when you schedule a meeting that can be sent (attached with the meeting URL and generated token) to the user in order to have a secure audio and video conferencing. Users can join the meeting by simply clicking on the link and join the meeting without waiting at the meeting lobby to be authorized by the Moderator without manually providing any other username or password. This way no zoom bombing sort of users can also join even though they would know the meeting URL as there is a username and password individually protecting your meetings.
The procedure will be as follows:
Enabling jwt authentication with jitsi meet
Step 1: Uninstall old Lua Dependencies
sudo apt-get purge lua5.1 liblua5.1-0 liblua5.1-dev luarocks
Step 2: Updating Sources
- Open the “sources.list” file using a text editor such as nano or vim (path: /etc/apt/sources.list)
sudo nano /etc/apt/sources.list
- Add the following line to the file
deb http://security.ubuntu.com/ubuntu bionic-security main
Step 3: Download packages information from configured source
sudo apt-get -y update
Step 4: Install Lua Dependencies
sudo apt-get install git unzip lua5.2 liblua5.2-0 liblua5.2-dev luarocks libssl1.0-dev
Step 5: install lua cJson
sudo luarocks install luacrypto
mkdir -p /tmp/src
cd /tmp/src
git clone https://github.com/mpx/lua-cjson.git
cd lua-cjson
sed -i 's/lua_objlen/lua_rawlen/g' lua_cjson.c
sed -i 's|$(PREFIX)/include|/usr/include/lua5.2|g' Makefile
sudo luarocks make
sudo luarocks install luajwtjitsi 2.0-0
Step 6: Install basexx
sudo luarocks install basexx
Step 7 : Installing token plugin
sudo apt-get install jitsi-meet-tokens
Step 8 : Configure prosody
- Open
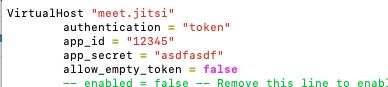
/etc/prosody/conf.avail/YOUR_DOMAIN.cfg.lua - Under your domain configuration change authentication to "token" and provide application ID, secret
VirtualHost "jitsimeet.your_domain.com"
    authentication = "token";
    app_id = "your_app_id";
    app_secret = "your_app_secret";
    allow_empty_token = false;
Step 9 : Restart prosody
sudo systemctl restart prosody
To manage moderator privileges, use the Jitsi Token Moderation plugin. It allows you to control the moderator status for each participant through the JWT token configuration.
Testing
After JWT installation you may ask for a username and password when you are going to initiate a meeting.
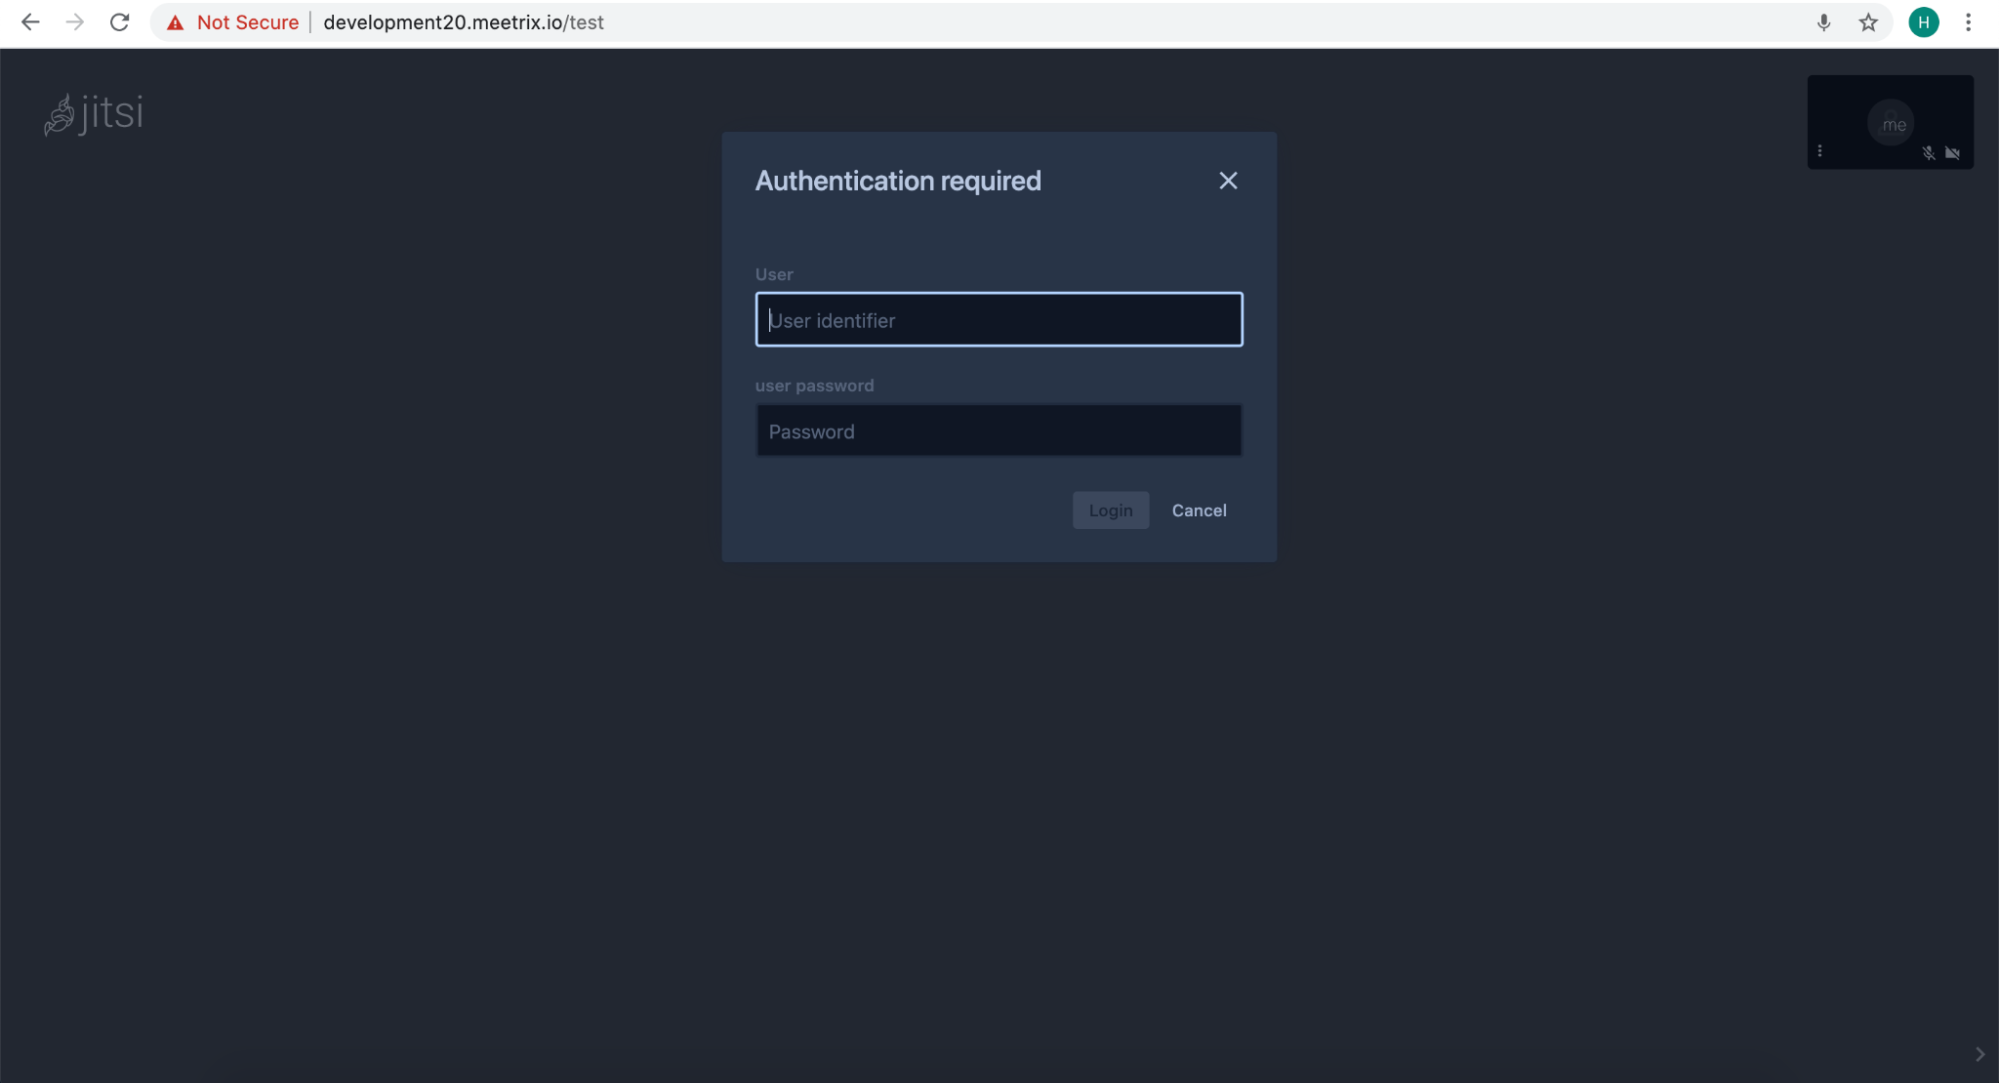
By generating JWT and sending it with your meeting URL as a post request it will allow you to initiate a meeting. It can be checked as follows
Generate a JSON Web Token
For testing your Jitsi with JWT installation you will need a token
Generate your JWT with your domain name, app id and app secret by login https://jwt.io/
-
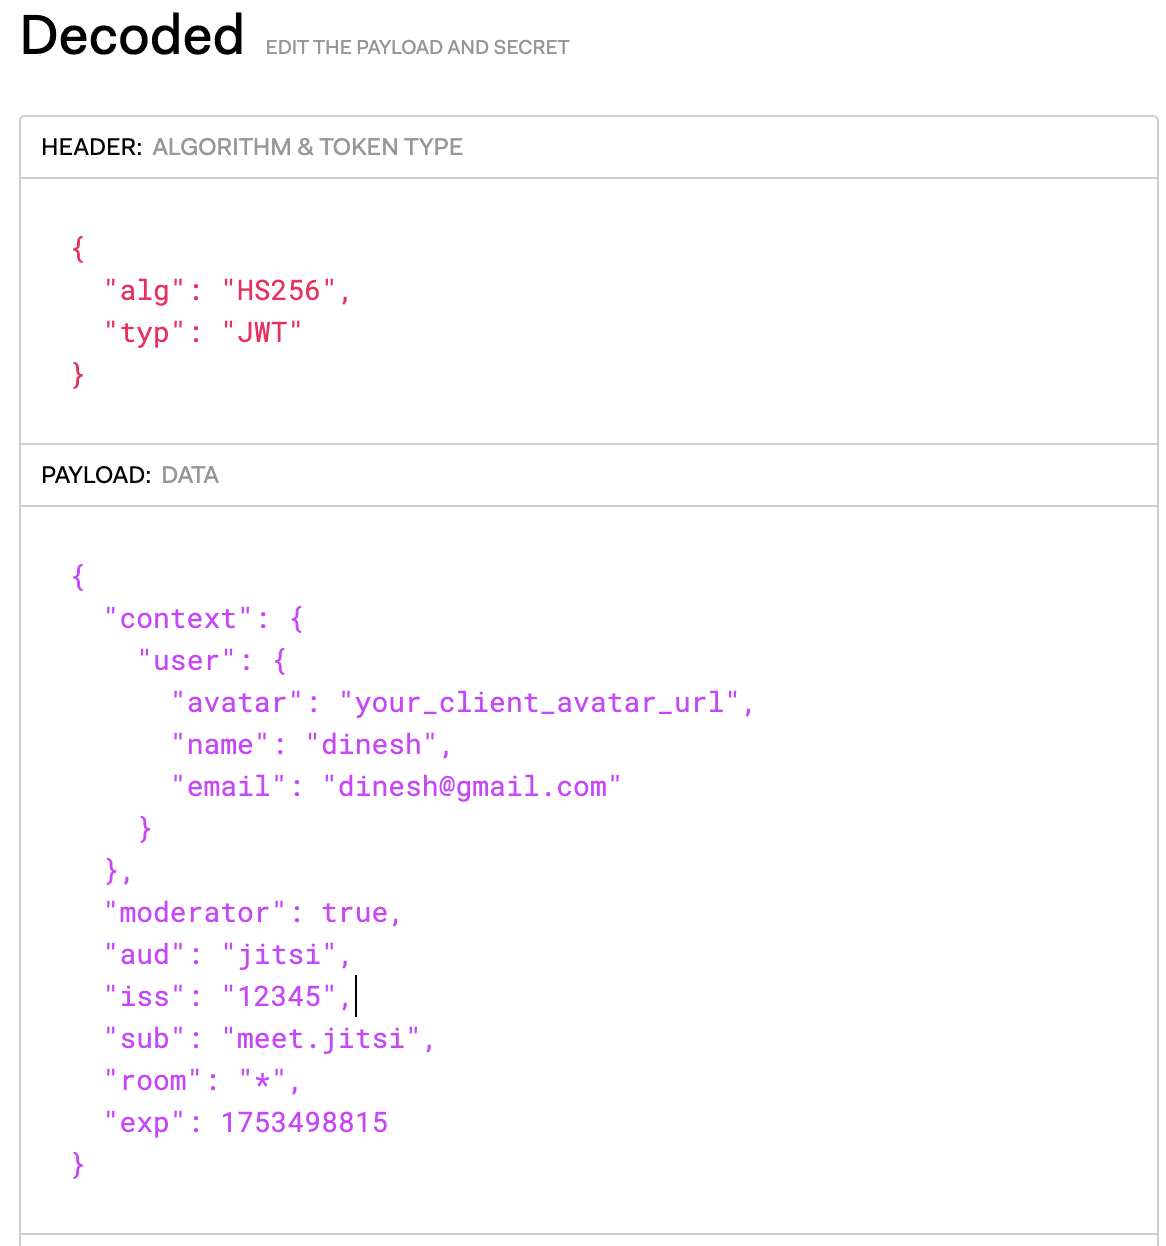
HEADER: ALGORITHM & TOKEN TYPE are included
Leave it as it is -
PAYLOAD: DATA is included. Most of the information consists of the payload section. Token data such as user name, date of token generation or expiry date, user's rights on the application pass through payload
To generate the payload section following parameters should be replaced with your client and application data.Client data: - avatar - add the URL of your client avatar - name - name of your client - email - email of your client Application data: - iss - Your app_id (can be copied from prosody configuration file) - sub - your xmpp domain (can be copied from prosody configuration file) - exp - your token expiration date in unix timestamp standard
{
  "context": {
    "user": {
      "avatar": "your_client_avatar_url",
      "name": "your_client_name",
      "email": "your_client_email"
    }
  },
  "moderator": true,
  "aud": "jitsi",
  "iss": "your_app_id",
  "sub": "jitsimeet.your_domain.com",
  "room": "*",
  "exp": 1753498815
}
-
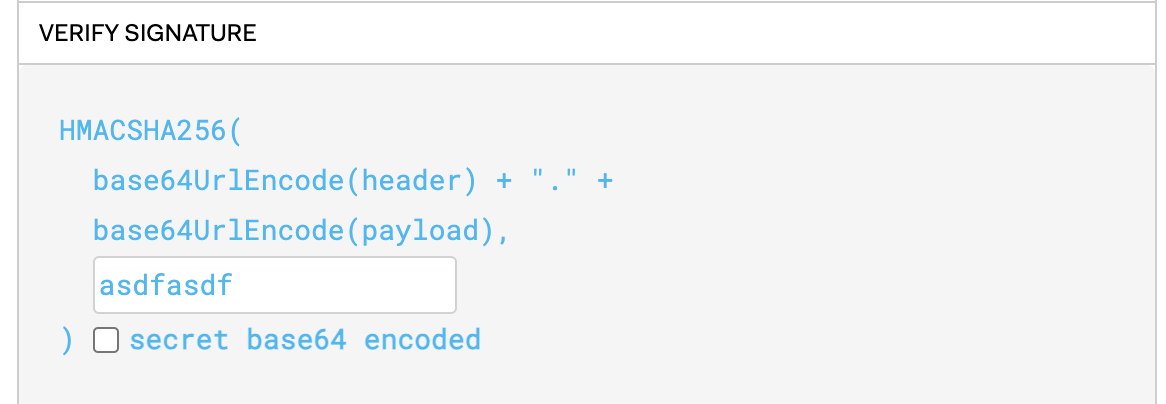
VERIFY SIGNATURE
Replace the placeholder “your-256-bit-secret” with your app secret
Check your access with JWT
- Copy the token that has been generated under the ‘Encoded’ section.
- Now initiate a meeting on Jitsi Meet by sending the generated token with the meeting URL:
https://YOUR_DOMAIN/jwt_test_room?jwt=YOUR_TOKEN
Having trouble setting up JWT tokens for your setup? please contact us via hello@meetrix.io or the contact us
Reach us for more services
Leave a Comment