Learn how to deploy LiveKit Lite on AWS with our step-by-step guide. It walks you through launching the Meetrix LiveKit Lite AMI with CloudFormation, pointing your domain at it, issuing the SSL certificate, signing in as the host, starting your first meeting, and keeping the server healthy once it runs.
LiveKit Lite is a private video meeting platform for your own domain. It pairs LiveKit, the open-source WebRTC media server, with the Meetrix Meet web interface. Hosts and guests join from the browser with camera, microphone, screen sharing, chat and optional end-to-end encryption, and nothing is recorded. The Meetrix image runs LiveKit server 1.13.5 and Meetrix Meet 1.0.2 on Ubuntu 26.04, behind an Nginx reverse proxy with Let's Encrypt SSL, built-in TURN and TURN over TLS, so calls still connect from networks that block UDP. If you are still deciding between the two best-known open-source stacks, our LiveKit vs Jitsi comparison covers the trade-offs, and if you would rather build a LiveKit server by hand, see how to self-host LiveKit on AWS.
Prerequisites
Before you get started with the LiveKit Lite AMI, ensure you have the following prerequisites:
- Basic knowledge of AWS services, including EC2 instances and CloudFormation.
- An active AWS account with appropriate permissions.
- An EC2 key pair in the region you will deploy to.
- A domain name you can point at the server. Browsers only allow camera and microphone access over HTTPS, so meetings need a domain with a valid certificate.
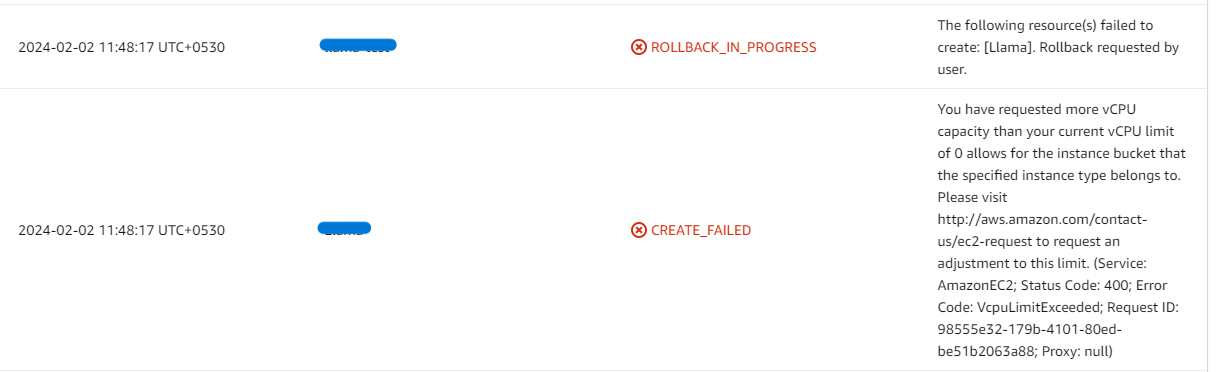
- If you encounter a vCPU quota error when launching the stack, follow https://meetrix.io/blogs/increase-aws-vcpu-quota/ to increase your vCPU limit.
Launching the AMI
Step 1: Find and Select LiveKit Lite AMI
- Log in to your AWS Management Console.
- Navigate to 'LiveKit Lite' in AWS Marketplace.
Step 2: Initial Setup & Configuration
- Click the "Continue to Subscribe" button.
- After subscribing, accept the terms and click "Accept Terms".
- Wait a few minutes until processing completes, then click "Continue to Configuration".
- Select "CloudFormation script to deploy LiveKit Lite" as the fulfillment option and choose your region. Click "Continue to Launch".
- From the "Choose Action" dropdown, select "Launch CloudFormation" and click "Launch".
Create CloudFormation Stack
Step 1: Create a stack
- Ensure the "Template is ready" option is selected under "Prepare template".
- Click "Next".
Step 2: Specify stack options
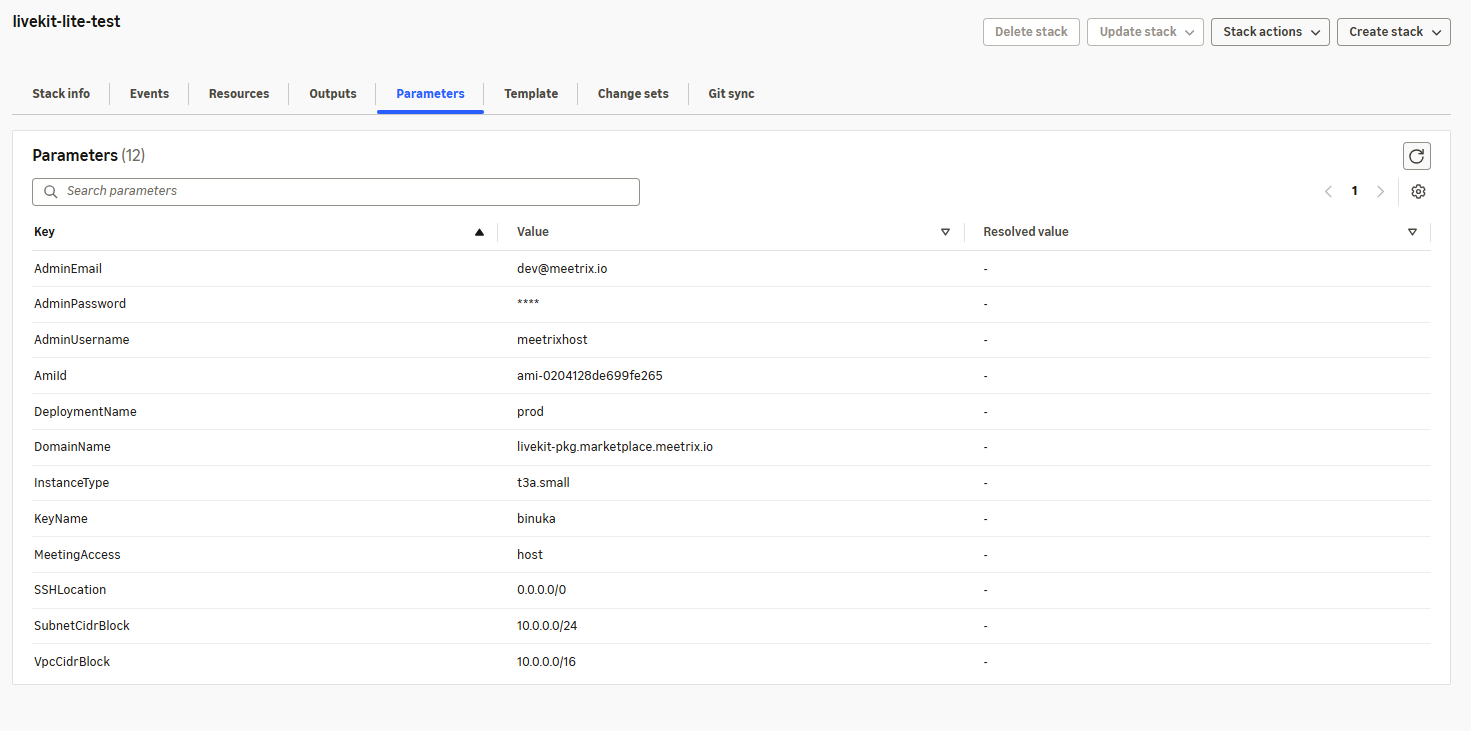
- Provide a unique "Stack name".
- Enter the "AdminEmail" used for SSL certificate generation.
- Enter an "AdminPassword" for the meeting host sign-in. It must be 8 to 64 characters long and can use letters, digits and the characters _ @ # % + = . - only.
- Enter an "AdminUsername" for the meeting host sign-in, or keep admin. It must be 3 to 32 letters, digits or _ . - characters.
- Leave "AmiId" as filled in by AWS Marketplace.
- Enter a value for "DeploymentName".
- Provide a public domain for "DomainName", such as meet.example.com. This is the address hosts and guests will open.
- Choose an instance type "InstanceType" (Recommended: t3a.small for a handful of participants, c6i.large or c6i.xlarge for bigger meetings).
- Select your preferred "KeyName".
- Choose "MeetingAccess". With host, only the signed-in host can start a meeting, and guests who open the link wait until the host joins. With open (public), anyone who can reach the server can create meetings.
- Set "SSHLocation" to your own IP range, such as 203.0.113.10/32, or 0.0.0.0/0 to allow SSH from anywhere.
- Keep "SubnetCidrBlock" as 10.0.0.0/24.
- Keep "VpcCidrBlock" as 10.0.0.0/16.
- Click "Next".
Step 3: Configure stack options
- Choose "Roll back all stack resources" and "Delete all newly created resources" under "Stack failure options".
- Click "Next".
Step 4: Review
Review and verify the parameters you've entered.
- Tick "I acknowledge that AWS CloudFormation might create IAM resources with custom names".
- Click "Submit".

Afterward, you'll be directed to the CloudFormation stacks page. Wait until the stack status shows CREATE_COMPLETE, usually within a few minutes. The server keeps setting itself up for a few minutes after that: on first boot it generates a LiveKit API key and secret for this server only, applies the host login and meeting access you chose, writes your domain into the LiveKit and Meet configuration, and tries to request the SSL certificate.
The stack creates a VPC with a public subnet, the EC2 instance with a 20 GiB gp3 root volume, an Elastic IP, a security group and an IAM role. The role only allows the Route 53 changes used for SSL certificates.
Ports the stack opens
Video meetings need more than HTTPS. The security group opens these ports, and if you replace it or add a firewall in front of the server, keep them open:
| Port | Protocol | Purpose |
|---|---|---|
| 22 | TCP | SSH, from SSHLocation only |
| 80 | TCP | Certificate issuance and the redirect to HTTPS |
| 443 | TCP | The Meet web interface and WebSocket signalling |
| 5349 | TCP | TURN over TLS, for participants on networks that block UDP |
| 7881 | TCP | WebRTC over TCP |
| 3478 | UDP | TURN |
| 50000-60000 | UDP | WebRTC audio and video |
| 30000-40000 | UDP | TURN relay |
Without the UDP ranges, participants can join a meeting but nobody gets audio or video.
Update DNS
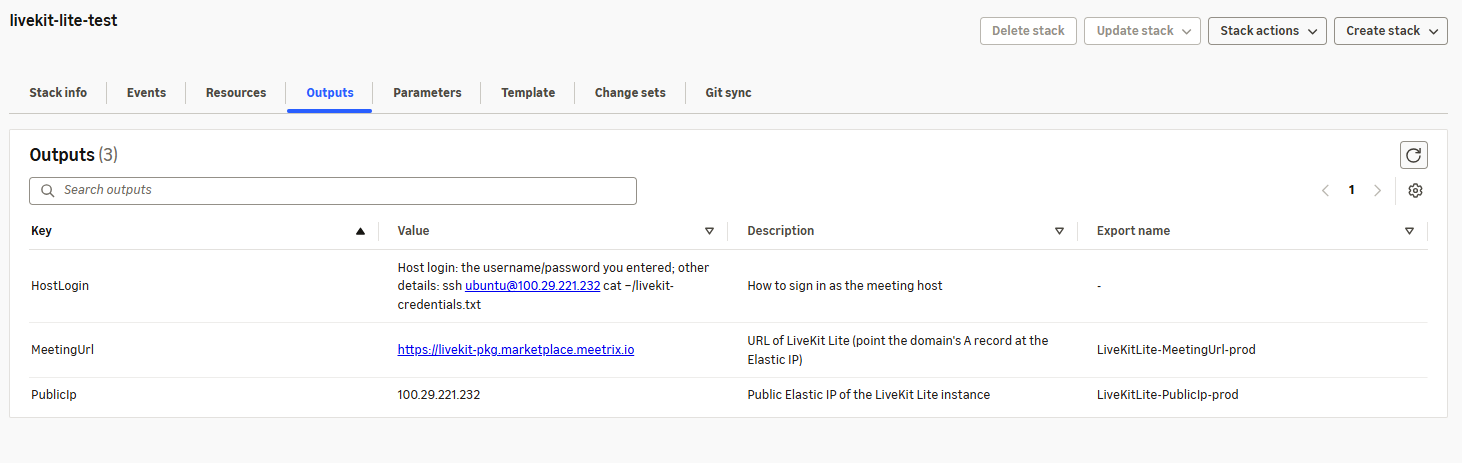
Step 1: Copy IP Address
Copy the public IP labeled "PublicIp" in the "Outputs" tab. The same tab shows the MeetingUrl and a reminder of how to sign in as the host.
Step 2: Update DNS
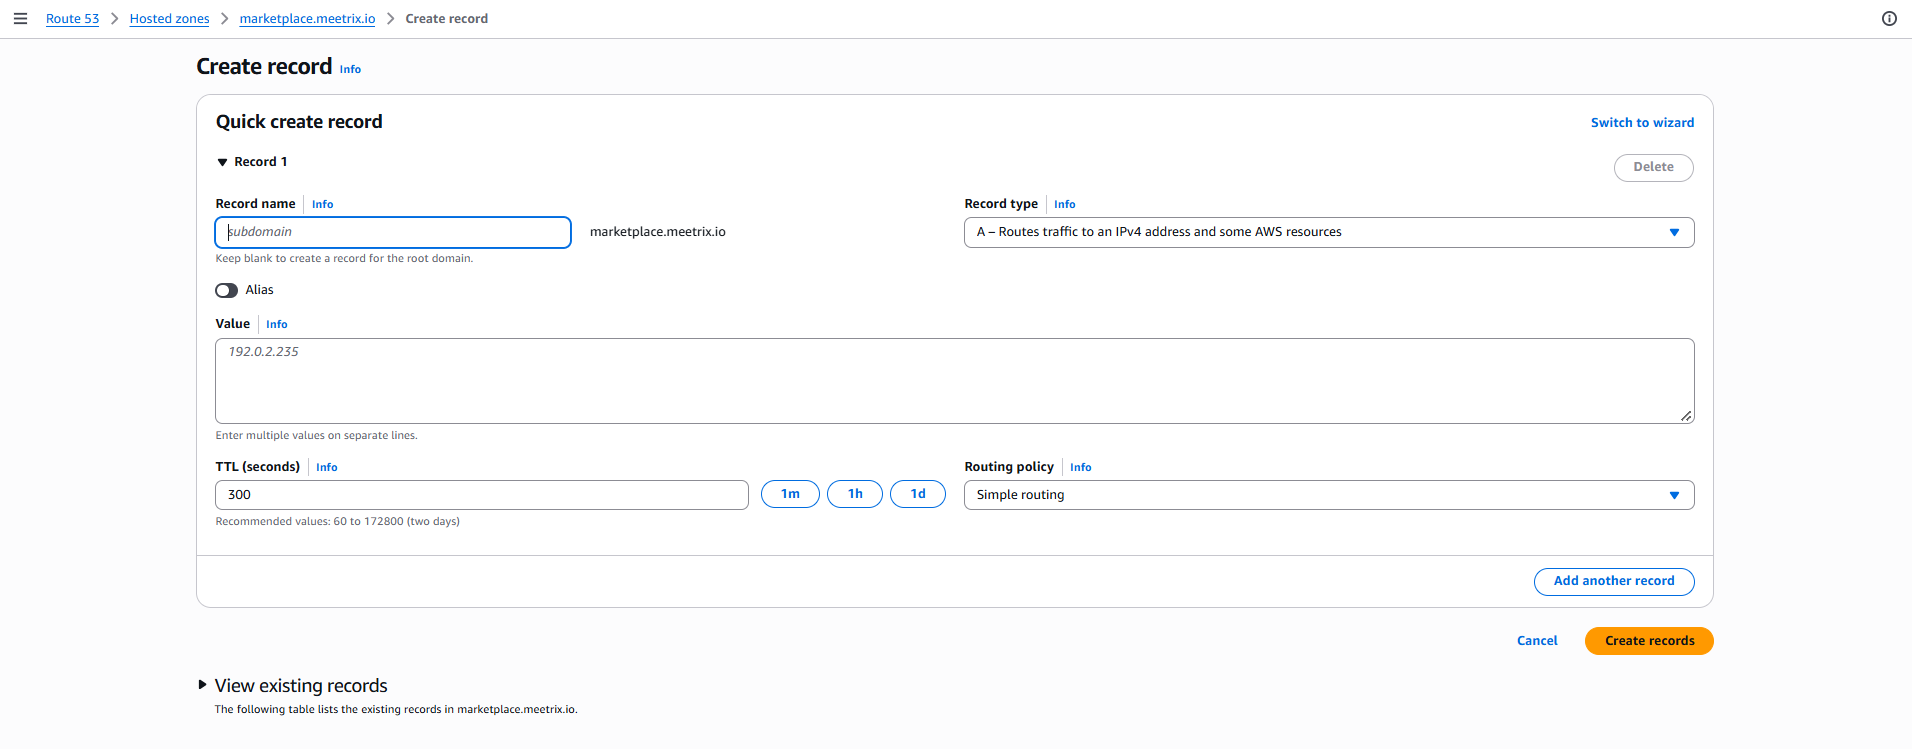
- Go to AWS Route 53 and navigate to "Hosted Zones".
- Click Create record.
- Add a record name matching the DomainName you entered, keep the record type as A, and paste the copied PublicIp into the value textbox.
- Click "Create records".
If your domain is hosted with another DNS provider, create the same A record there.
Issue the SSL Certificate
LiveKit Lite requests a Let's Encrypt certificate on first boot, which only succeeds if your domain already points at the Elastic IP by then. On a new stack the A record usually comes later, because the IP only appears in the Outputs tab once the stack completes. Until the certificate is issued, the server uses a temporary self-signed certificate and your browser warns that the connection is not private.
If you see that warning, issue the certificate once your A record resolves to the PublicIp.
Step 1: Check that DNS resolves
From your own machine, check that the domain returns the PublicIp from the Outputs tab:
nslookup <your LiveKit Lite domain>Step 2: Log in to the server
- Open the terminal and go to the directory where your private key is located.
- Run the following command, replacing the key name and IP address.
- Type "yes" and press Enter to confirm.
ssh -i <your key name> ubuntu@<Public IP address>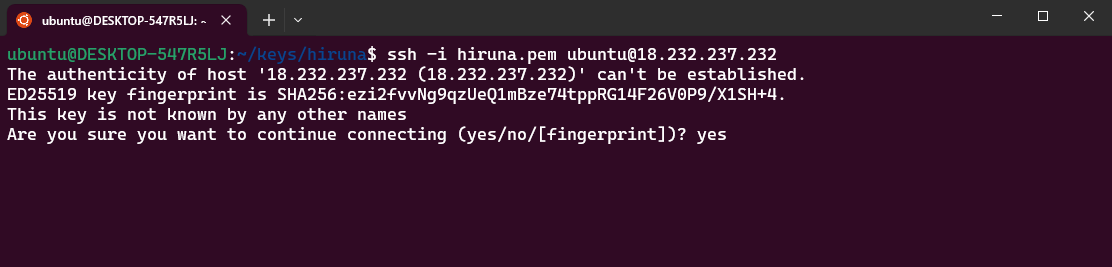
Step 3: Generate SSL
Run both commands together:
sudo bash /root/certificate_generate_standalone.sh && sudo bash /opt/livekit/livekit-lite-cert-sync.shThe first command issues the certificate for the Meet web interface. The second gives the same certificate to LiveKit for TURN over TLS on port 5349 and restarts it. The certificate renews automatically, and every renewal is synced to LiveKit, so you only run this once.
Access LiveKit Lite
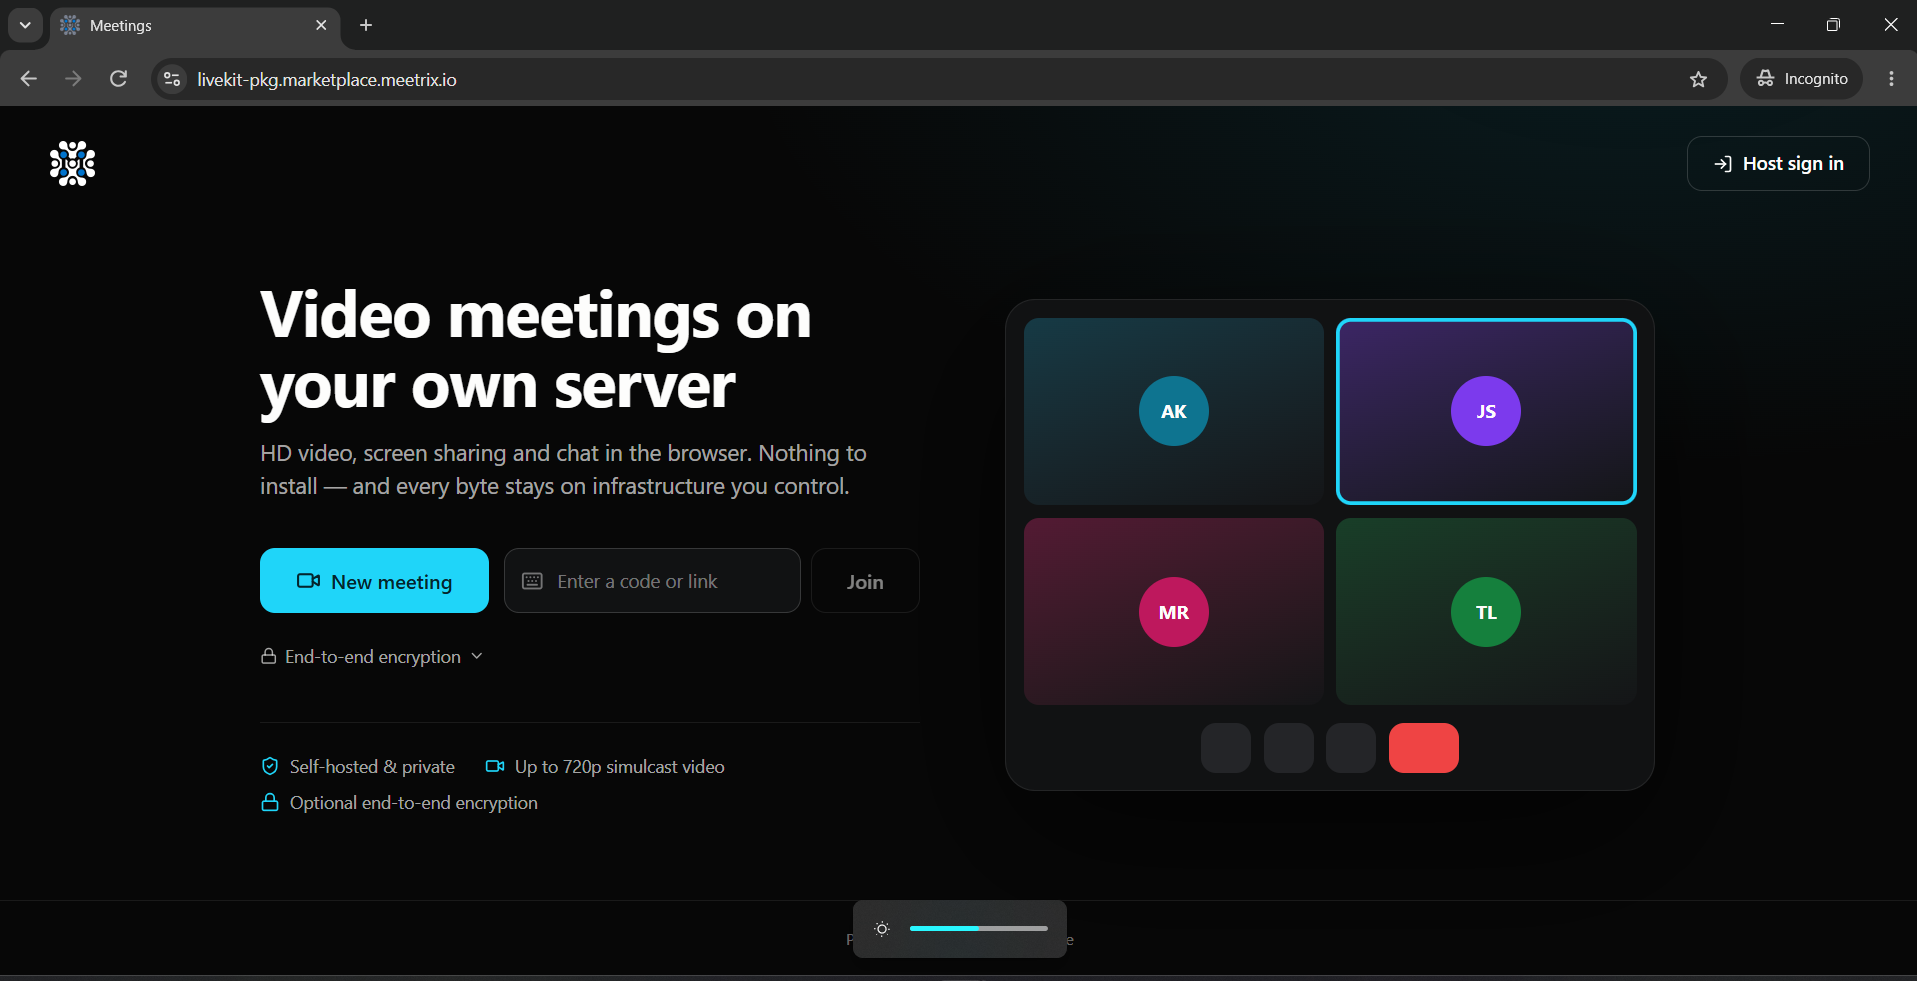
Open the "MeetingUrl" from the Outputs tab, https://<your domain>, in your browser.
Use your domain, not the IP address
Note
The home page lets you start a new meeting, join one with a code or link, and turn on end-to-end encryption.
Sign in as the host
Click "Host sign in" in the top-right corner and enter the AdminUsername and AdminPassword you set in the stack parameters. In host mode, only a signed-in host can start a meeting.
Start your first meeting
- Click "New meeting". To encrypt the meeting end to end, open the "End-to-end encryption" option first.
- Allow camera and microphone access when the browser asks.
- Copy the meeting link and send it to your guests. They open it in their browser, or paste the code or link into the home page and click "Join". No account or app is needed.
Inside the meeting, participants can share their screen and chat. You can also protect a meeting with a password, and in host mode, guests who arrive before you wait until you join.
End-to-end encrypted meetings
Server Credentials and API Keys
On first boot the server writes its URL, host login, meeting access mode and its own LiveKit API key and secret to a file in the ubuntu user's home directory:
cat ~/livekit-credentials.txtYou don't need the API key and secret for meetings in the web interface. They are for custom integrations: building your own client with the LiveKit SDKs, or managing rooms with the lk CLI, pointed at wss://<your domain>. Keep the secret private, because anyone who has it can create tokens for your server.
Change the Host Login or Meeting Access
- Edit HOST_USERNAME, HOST_PASSWORD or MEET_ACCESS (host or open) in the Meet configuration file.
- Restart the Meet web interface.
sudo nano /opt/livekit/meet.env

sudo systemctl restart livekit-meet
Changing the login signs the host out on every device. The restart also clears meeting passwords and anyone waiting for the host, because they are kept in memory, so make the change when no meeting is running.
To change the API key and secret, change them in both /opt/livekit/meet.env and /opt/livekit/livekit.yaml, then restart both services:
sudo systemctl restart livekit livekit-meetCheck Server Logs
Step 1: Log in to the server
ssh -i <your key name> ubuntu@<Public IP address>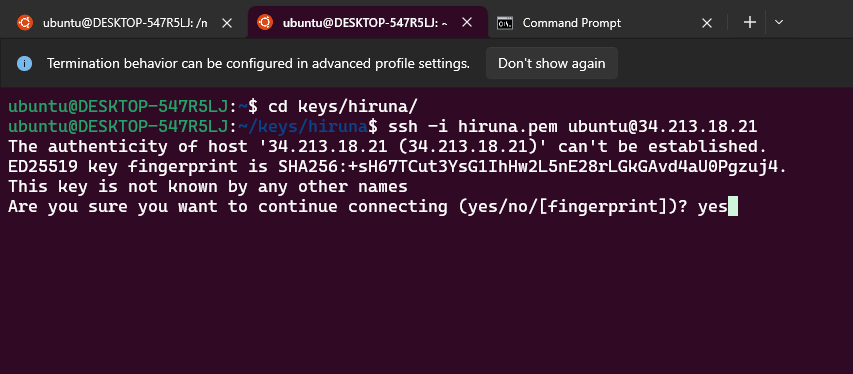
Step 2: Check the logs
LiveKit Lite runs as three services: livekit (the media server), livekit-meet (the Meet web interface) and nginx. Check that they are running, then follow the logs of the first two:
sudo systemctl status livekit livekit-meet nginx

sudo journalctl -u livekit -u livekit-meet -f
Press Ctrl+C to stop following the logs.
Shutting Down LiveKit Lite
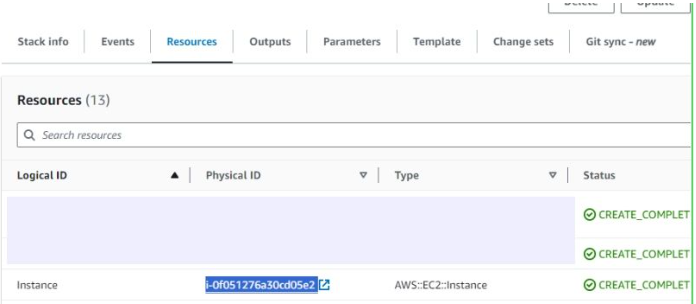
- In CloudFormation, click the link labeled "Instance" in the "Resources" tab to open the EC2 instance.
- Stop the LiveKit Lite instance from the Instance state dropdown. You can restart it later as needed.
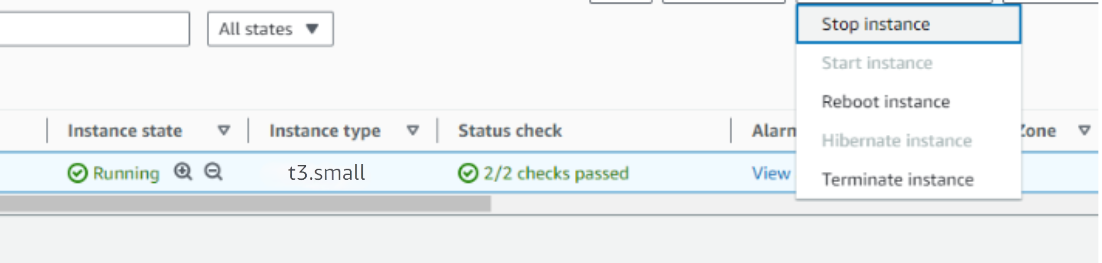
The Elastic IP stays attached while the instance is stopped, so your domain still points at the server when you start it again. Any meeting in progress ends when the instance stops.
Remove LiveKit Lite
Delete the CloudFormation stack from the AWS Management Console under "CloudFormation Stacks" by clicking "Delete". LiveKit Lite stores no recordings and no meeting history, so there is nothing to back up unless you use the API key and secret in an integration. Remove the Route 53 record you created as well.
Upgrades
When a new version is available in AWS Marketplace, launch a new stack with it, point your DNS record at the new PublicIp, and issue the SSL certificate as shown above. Once you've checked the new server, remove the old stack.
The new server generates its own API key and secret. If an integration uses the old ones, either update the integration with the values from the new ~/livekit-credentials.txt, or copy the old key and secret into /opt/livekit/meet.env and /opt/livekit/livekit.yaml on the new server and restart both services.
Troubleshoot
If you face vCPU quota limits, request an increase: How to increase AWS quota.
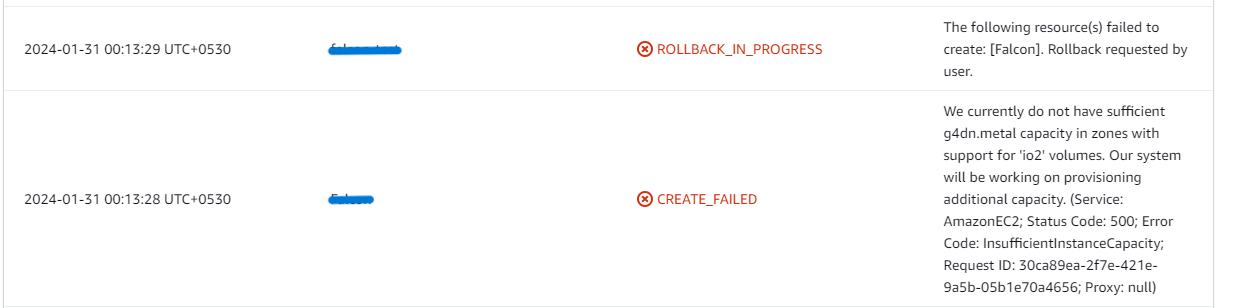
If you face insufficient capacity errors while creating the stack, try another region or time.
If the page shows a 502 Bad Gateway error, Nginx is running but the Meet web interface is not answering. Right after launch, wait a few minutes and retry. Otherwise check the services and logs as shown above.

If the browser does not ask for camera and microphone access, or the call cannot start, check that you opened the HTTPS domain without a certificate warning. If there is a warning, issue the certificate as described in Issue the SSL Certificate.
If participants join but see or hear nobody, check that the UDP ranges in Ports the stack opens are still open in the security group. If only participants on a strict office or hotel network are affected, their network probably blocks UDP, and they connect through TURN over TLS on port 5349. That needs the real certificate, so check which one LiveKit is using:
sudo openssl x509 -in /opt/livekit/certs/fullchain.pem -noout -subject -issuer -enddateIf the subject is not your domain, run sudo bash /opt/livekit/livekit-lite-cert-sync.sh. Our WebRTC troubleshooting guide shows how to inspect a call from the browser side.
Check whether the instance storage is full. Log into the server and run:
df -h
If the root volume is between 90-100%, resize the EBS volume, then reboot and restart the service.
Conclusion
The Meetrix LiveKit Lite Deployment Guide helps you run private video meetings in your AWS environment, on your own domain, with no per-user fees and no recordings kept anywhere. Whether you're running internal team calls, online classes or telehealth sessions, this guide provides step-by-step instructions for a secure setup. See the LiveKit Lite store page for what the Meetrix image includes. If you need meeting recordings, our Jitsi Meet with recordings developer guide covers a stack that records. For a standalone TURN server for your own WebRTC application, see the Coturn developer guide, and for a wider look at the field, our roundup of LiveKit alternatives.
Technical Support
Reach out to Meetrix Support (aws@meetrix.io) for assistance with LiveKit Lite issues.
Frequently Asked Questions
What is LiveKit Lite?
LiveKit Lite is a self-hosted video meeting platform from Meetrix. It runs the open-source LiveKit media server and the Meetrix Meet web interface on a single EC2 instance, so you can hold private video meetings with camera, microphone, screen sharing, chat and optional end-to-end encryption on your own domain. It does not record meetings and needs no Docker or database.
Why do the camera and microphone not work?
Browsers only allow camera and microphone access on a secure HTTPS page. Open LiveKit Lite on your domain, such as https://meet.example.com, after the SSL certificate has been issued. The page loads over http://<Public IP> or with a certificate warning, but a call cannot start.
Do guests need an account or an app?
No. Guests open the meeting link in a modern browser and join. Only the host signs in, with the AdminUsername and AdminPassword set when the stack was created. In the default host mode, guests who open the link wait until the host joins.
Which instance type is recommended?
t3a.small is enough for a handful of participants. Forwarding audio and video is CPU work, so for bigger meetings choose a compute-optimised size such as c6i.large or c6i.xlarge.
Does LiveKit Lite record meetings?
No. Nothing is recorded or stored on the server. If you need recordings, see our Jitsi Meet with recordings developer guide.
Can I connect my own application to the LiveKit server?
Yes. The server's LiveKit API key and secret are in ~/livekit-credentials.txt, and the server answers on wss://<your domain>. Use them with the LiveKit SDKs or the lk CLI to build your own client or integration. Keep the secret private, because anyone who has it can create meeting tokens.
How do I get technical support?
Reach out to Meetrix Support at aws@meetrix.io for assistance with LiveKit Lite issues.
Ready to Deploy Your Own LiveKit Lite?
Get started in minutes with our pre-configured AMI and host private video meetings on your own domain.
Deploy LiveKit Lite from AWS Marketplace