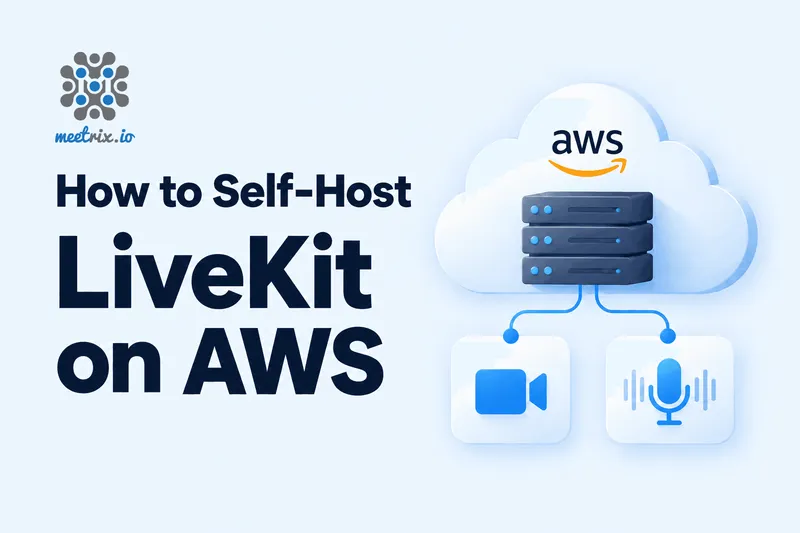
Self-hosting LiveKit on AWS boils down to one EC2 instance, a domain with two DNS records, and a security group that actually lets UDP through. The official config generator handles nearly everything else. The tricky part, and where most deployments stumble, is on the AWS side.
That's worth saying up front, because LiveKit's own "Running LiveKit on AWS" post is from 2021 and carries a note saying it's out of date. The ports it lists no longer match what the server uses. This guide follows the current LiveKit VM deployment docs and fills in the AWS bits they skip: which instance to pick, which subnet to use, which IP to assign, and what it all costs once traffic starts flowing.
The short version
livekit/generate on your laptop, paste the cloud-init file into the EC2 User data field, attach an Elastic IP, open UDP 50000-60000 plus five other ports, and point two DNS records at the instance. Use a compute-optimized instance in a public subnet. Never put the media server behind a NAT gateway or an ALB.
Self-hosted vs LiveKit Cloud
Before you build anything, check that self-hosting is actually the right call. LiveKit Cloud is good, and for plenty of teams it's the cheaper option once you count engineering time.
The LiveKit server is open source under Apache 2.0. The current release as of this writing is v1.13.7, published on 14 September 2026. You get the same core SFU that LiveKit Cloud is built on, but some things stay behind on the Cloud side.
What self-hosting gives you
- No per-minute billing.
- Media that never leaves your AWS account.
- Full control over versions and configuration.
What stays on LiveKit Cloud
- The dashboard and session analytics. Self-hosted gives you a Prometheus metrics endpoint and not much else, so you build your own Grafana boards or grab one of the community dashboards.
- Enhanced noise cancellation. The Krisp-based models LiveKit ships are tied to LiveKit Cloud. Self-hosted voice agents need another option: an ai-coustics licence, or an open source plugin such as the rnnoise plugin proposed for the LiveKit agents repo.
- One room across several servers. On a self-hosted cluster, every room lives on a single node. Adding servers gives you more rooms, not bigger ones.
For voice AI agent stacks, that trade-off is often the whole reason to self-host, and it's also why teams with data residency rules end up here. If you're still choosing a media server, we compared LiveKit with a finished meeting product in LiveKit vs Jitsi, and our LiveKit alternatives roundup covers the wider field, both self-hosted and managed.
The cost maths, honestly
This is the part most "self-host and save" posts skip. Self-hosting removes LiveKit's usage fees. It does not remove bandwidth fees, because AWS charges for data leaving EC2.
The difference per GB is small. So the answer depends on what you're sending.
Voice is cheap to move
An Opus audio stream is roughly 32 kbps, about 0.24 MB per minute in each direction. A month of 100,000 one-to-one voice agent minutes is on the order of 50 GB of egress, which fits inside the AWS free 100 GB. On LiveKit Cloud's Ship plan ($50 a month with 5,000 agent session minutes included, then $0.01 a minute), the same 100,000 minutes of cloud-hosted agent sessions come to roughly $1,000 before WebRTC minutes. A single c7i.xlarge running LiveKit costs about $130 a month on demand in us-east-1. Your agent workers and model APIs cost money either way, so leave them out of the comparison.
Video is not cheap
In LiveKit's own benchmark, a 150-person 720p meeting pushed 93 MBps out of a single 16-core server. At AWS rates that's roughly 335 GB, or about $30, for every hour that meeting runs. Self-hosting still saves the per-minute fees on video, but bandwidth becomes the biggest line on the bill, and it's almost the same number wherever you run it. To run a test like that against your own server, our WebRTC load testing guide covers lk load-test and the client metrics to watch.
Before you start
Prerequisites
- An AWS account with permission to launch EC2 instances, edit security groups, and allocate Elastic IPs.
- If you hit a vCPU quota error when launching a compute-optimized instance, follow our guide to increasing the AWS vCPU quota.
- A domain you control, with two subdomains free: one for LiveKit (e.g.
livekit.example.com) and one for TURN (turn.example.com). Route 53 works, and so does any other DNS provider. - Docker on your own machine, to run the config generator.
- An SSH key pair in the region you deploy to.
Two subdomains, not one
Deploy LiveKit on EC2
Six steps, from an empty folder on your laptop to a server you've load-tested.
Step 1: Generate the configuration
On your own machine, in an empty folder:
docker pull livekit/generate
docker run --rm -it -v$PWD:/output livekit/generate
It asks for your two domains and whether you want Egress or Ingress, then writes a folder containing livekit.yaml, docker-compose.yaml, caddy.yaml, redis.conf, and either init_script.sh or a cloud_init.xxxx.yaml file. It also prints an API key and secret. Save those somewhere safe now, because every token your app issues is signed with them.
Choose the cloud-init option. LiveKit tests it on Ubuntu and Amazon Linux, and on EC2 it means the server installs itself during the first boot.
Step 2: Create the security group
Create a new security group before you launch the instance. These are the ports the generated stack actually listens on:
| Port | Protocol | Used for | Needed |
|---|---|---|---|
| 443 | TCP | HTTPS signalling and TURN/TLS | Always |
| 80 | TCP | Let's Encrypt certificate issuance by Caddy | Always |
| 7881 | TCP | WebRTC over TCP, the fallback when UDP is blocked | Always |
| 3478 | UDP | TURN/UDP | Always |
| 50000-60000 | UDP | WebRTC media | Always |
| 1935 | TCP | RTMP Ingress | Ingress only |
| 7885 | UDP | WHIP Ingress | Ingress only |
| 22 | TCP | SSH | Your IP only |
Ignore the 2021 port list
Step 3: Launch the instance
In the EC2 console:
- Choose Launch instance and pick a current Ubuntu Server LTS AMI.
- Pick a compute-optimized instance type. See the sizing section below; c7i.xlarge is a reasonable first choice.
- Under Network settings, choose a public subnet and attach the security group from Step 2.
- Give the root volume at least 20 GB, or more if you enabled Egress, since recordings are written locally before upload.
- Open Advanced details and paste the full contents of the
cloud_init.xxxx.yamlfile into User data. - Launch.
Then allocate an Elastic IP and associate it with the instance. This is not optional. A normal public IP changes every time the instance stops and starts, and your DNS records and TLS certificates go with it.
Step 4: Point DNS at the Elastic IP
Create two A records, one for each subdomain, both pointing at the Elastic IP. Caddy requests certificates for both names on first boot. If DNS isn't resolving yet, issuance fails and Caddy retries, so it's fine to launch first and add the records straight after.
Step 5: Check it's running
SSH in and look at the service the init script created:
sudo systemctl status livekit-docker
cd /opt/livekit
sudo docker compose ps
sudo docker compose logs -f livekit
You want three containers up (livekit, caddy and redis), and Caddy's log should show a certificate obtained for both domains. Then run LiveKit's connection test against wss://livekit.example.com. It checks signalling, UDP, TCP and TURN separately, so it tells you which path is broken, not just that something is.
Step 6: Test with real load
Install the LiveKit CLI (lk) on your machine, register the server with the key and secret from Step 1, and put some traffic through it:
lk project add --url wss://livekit.example.com --api-key <key> --api-secret <secret> my-aws-livekit
lk load-test --project my-aws-livekit --room test-room --video-publishers 8 --subscribers 20 --duration 2m
Watch htop and the instance's network graph in CloudWatch while it runs. This is how you find out whether the instance size is right, before real users do.
Upgrading later
/opt/livekit/docker-compose.yaml. Change the livekit/livekit-server image tag, then docker compose pull and docker compose up -d. Pin exact versions rather than latest, and read the release notes first. v1.10.0 shipped a bug that broke browser connections on hosts without IPv6. It was fixed, but anyone on latest took the broken build without choosing to.
Sizing the instance
LiveKit's docs say compute-optimized instances suit it best, and on AWS that means the C family. The SFU forwards packets without re-encoding them, so it needs steady CPU and lots of network, and very little memory. A starting point:
c7i.large
2 vCPU, about $0.09 an hour
Development and a handful of rooms.
c7i.xlarge
4 vCPU, 8 GiB, about $0.18 an hour
Production voice agents and small video meetings.
c7i.4xlarge and up
16 vCPU and more
Once a single room goes past a few dozen video participants. The 150-person 720p benchmark ran at 85% CPU on a 16-core machine, so a room of that size needs a big instance.
The trap is network bandwidth
What breaks on AWS
Nearly every AWS-specific failure comes down to one thing: WebRTC needs clients to reach the server's real IP directly over UDP, and several standard AWS patterns get in the way of that. If your install is misbehaving, find the symptom here first.
| Symptom | Likely cause | Fix |
|---|---|---|
| Room joins, no audio or video | UDP 50000-60000 closed, or the instance sits behind a NAT gateway | Open the range; use a public subnet and an Elastic IP |
| Clients get an address they can't reach | use_external_ip is off | Set use_external_ip: true in livekit.yaml |
| Calls break once there are several nodes | Media is going through a load balancer | Load-balance signalling only; send media to each node's public IP |
| Users on corporate networks can't join | Only outbound TCP 443 is allowed | Make sure TURN/TLS on 443 still reaches LiveKit |
The instance is in a private subnet
A common VPC layout puts application servers in private subnets and sends outbound traffic through a NAT gateway. That does not work for an SFU. Clients can't start UDP flows inward through a NAT gateway, and LiveKit's external IP discovery can end up advertising the NAT gateway's address, which nothing can connect to. There's a documented LiveKit issue showing this happens even with use_external_ip set to false when TURN servers are configured: LiveKit discovers the NAT gateway's public IP via TURN reflection and advertises it as an srflx candidate anyway.
Fix: Put LiveKit nodes in a public subnet with their own public IPs.
use_external_ip is off
On EC2 the instance only sees its private address. Your public IP is mapped to it outside the VM. With use_external_ip: true in livekit.yaml, LiveKit uses STUN to find its public address and advertises that to clients. The generated config sets it for you. If you write your own config, this is the line people most often leave out:
rtc:
  tcp_port: 7881
  port_range_start: 50000
  port_range_end: 60000
  use_external_ip: true
Media behind a load balancer
An Application Load Balancer only handles HTTP and WebSockets. That's fine for signalling and useless for media. A Network Load Balancer can pass UDP, but WebRTC media has to reach the specific node hosting the room, so a load balancer that spreads it across nodes breaks calls. This is also why the LiveKit Kubernetes docs require host networking, one LiveKit pod per node, and no private clusters. For how that compares with Docker and plain instances, see Docker vs Kubernetes for self-hosted video conferencing.
Fix: Load-balance signalling if you want to, and let media go directly to each node's public IP.
Users on strict corporate networks can't join
Some networks allow only outbound TCP 443. For those users, TURN/TLS on 443 is the only path. The generated stack handles this by letting Caddy route TLS traffic for the TURN hostname to LiveKit's built-in TURN server.
Fix: If you've replaced Caddy with your own proxy, make sure that routing still works. For large deployments, some teams run a dedicated TURN tier instead. Coturn works with LiveKit like any other standard TURN server, and we keep a ready-made Coturn image for that setup.
Scaling past one server
A single server takes you further than you might expect. When you need more, LiveKit scales out by adding nodes that share one Redis. These are the four pieces to plan.
Redis
Point every node at the same Redis. On AWS that's usually ElastiCache in the same VPC, which also takes Redis off the media node. LiveKit uses it to route each new room to a node and to find which node hosts an existing room.
Nodes
Each node is a copy of the Step 3 instance, with its own Elastic IP and the same keys. An Auto Scaling group works, as long as scale-in waits for rooms to finish. LiveKit's Helm chart sets a five-hour termination grace period for exactly that reason.
Egress
Recording and streaming run as a separate service. LiveKit recommends at least 4 CPUs and 4 GB of memory for each Egress instance, and a RoomComposite recording can use anywhere from 2 to 6 CPUs. Give Egress its own instances so a recording can't take CPU from live calls.
EKS
The official Helm chart works on EKS with the AWS Load Balancer Controller for signalling. ACM can terminate TLS for the main domain, but LiveKit's docs still call for a separate certificate that the embedded TURN/TLS server loads itself. Only move to Kubernetes if you already run it. For two or three nodes, plain EC2 is easier to operate.
More nodes means more rooms, not bigger rooms
If you want LiveKit on AWS without owning the ports, Redis, TURN and upgrades yourself, our WebRTC consulting team builds and runs LiveKit deployments as well as Jitsi. For background on why the SFU model behaves the way it does, see our WebRTC architecture explainer and the wider comparison of open source WebRTC media servers.
Frequently Asked Questions
Can you self-host LiveKit?
Yes. The LiveKit server is Apache 2.0 licensed, and the current release is v1.13.7 (September 2026). You run the same core SFU that LiveKit Cloud uses.
What ports does self-hosted LiveKit need?
The generated stack needs TCP 443, TCP 80, TCP 7881, UDP 3478, and UDP 50000-60000. Ingress adds TCP 1935 and UDP 7885. SSH on TCP 22 should be restricted to your IP.
Is self-hosting LiveKit cheaper than LiveKit Cloud?
It depends on volume and what you're sending. For voice, a c7i.xlarge at about $130 a month handles a lot of concurrent calls, and voice egress is small enough to fit inside AWS's free tier. For video, bandwidth dominates the bill and self-hosting's savings are slimmer.
What EC2 instance should I use for LiveKit?
A c7i.xlarge (4 vCPU, 8 GiB) is a reasonable production starting point for voice agents and small video meetings. Size for the instance's baseline bandwidth (1.56 Gbps for c7i.xlarge), not the "up to 12.5 Gbps" burst figure.
Can I run LiveKit behind an AWS load balancer?
Only for signalling. WebRTC media must reach the specific node hosting the room, so an ALB or NLB that spreads media across nodes will break calls. Send media directly to each node's public IP.
What features do I lose by self-hosting LiveKit?
The dashboard and session analytics, Krisp-based enhanced noise cancellation (which requires LiveKit Cloud auth), and multi-node rooms (a single room must fit on one node). Everything else, including the SFU, Egress, Ingress and SIP, is available self-hosted.
Why does my self-hosted LiveKit connect but show no video?
Almost always blocked UDP. Check that UDP 50000-60000 is open, that use_external_ip: true is set in livekit.yaml, and that the instance is in a public subnet with an Elastic IP, not behind a NAT gateway.
Need LiveKit Running on AWS, Properly?
We design, deploy and support self-hosted LiveKit and Jitsi on AWS: sizing, TURN, Redis, recording and upgrades, in your own account.
Talk to Our WebRTC Engineers