Welcome to the Meetrix Rancher developer guide for Google Cloud Platform! Rancher is an open-source Kubernetes management platform from SUSE. From one dashboard you can create new clusters, import existing ones such as Google Kubernetes Engine, manage users and access, and deploy apps across all of them. The Meetrix GCP image installs Rancher with the official Helm chart on a single-node K3s cluster, behind Nginx with automated SSL, so you get a working management server in minutes.
This guide walks you through finding the product on GCP Marketplace, configuring the deployment, pointing DNS, logging in for the first time, and managing the server. For what the image includes and the AWS option side by side, see the Rancher store page, or our Rancher on AWS Marketplace article for how it compares to OpenShift.
Prerequisites
Before you begin, make sure you have the following:
- Basic Google Cloud Platform knowledge.
- An active Google account with a GCP project and billing enabled.
- A domain name you can manage DNS records for.
Launch Rancher from GCP Marketplace
Step 1: Find the Product
- Log in to your Google account.
- Go directly to the product page: Rancher Kubernetes Management on GCP Marketplace
- You can also browse all Meetrix products at the Meetrix Solutions Page.
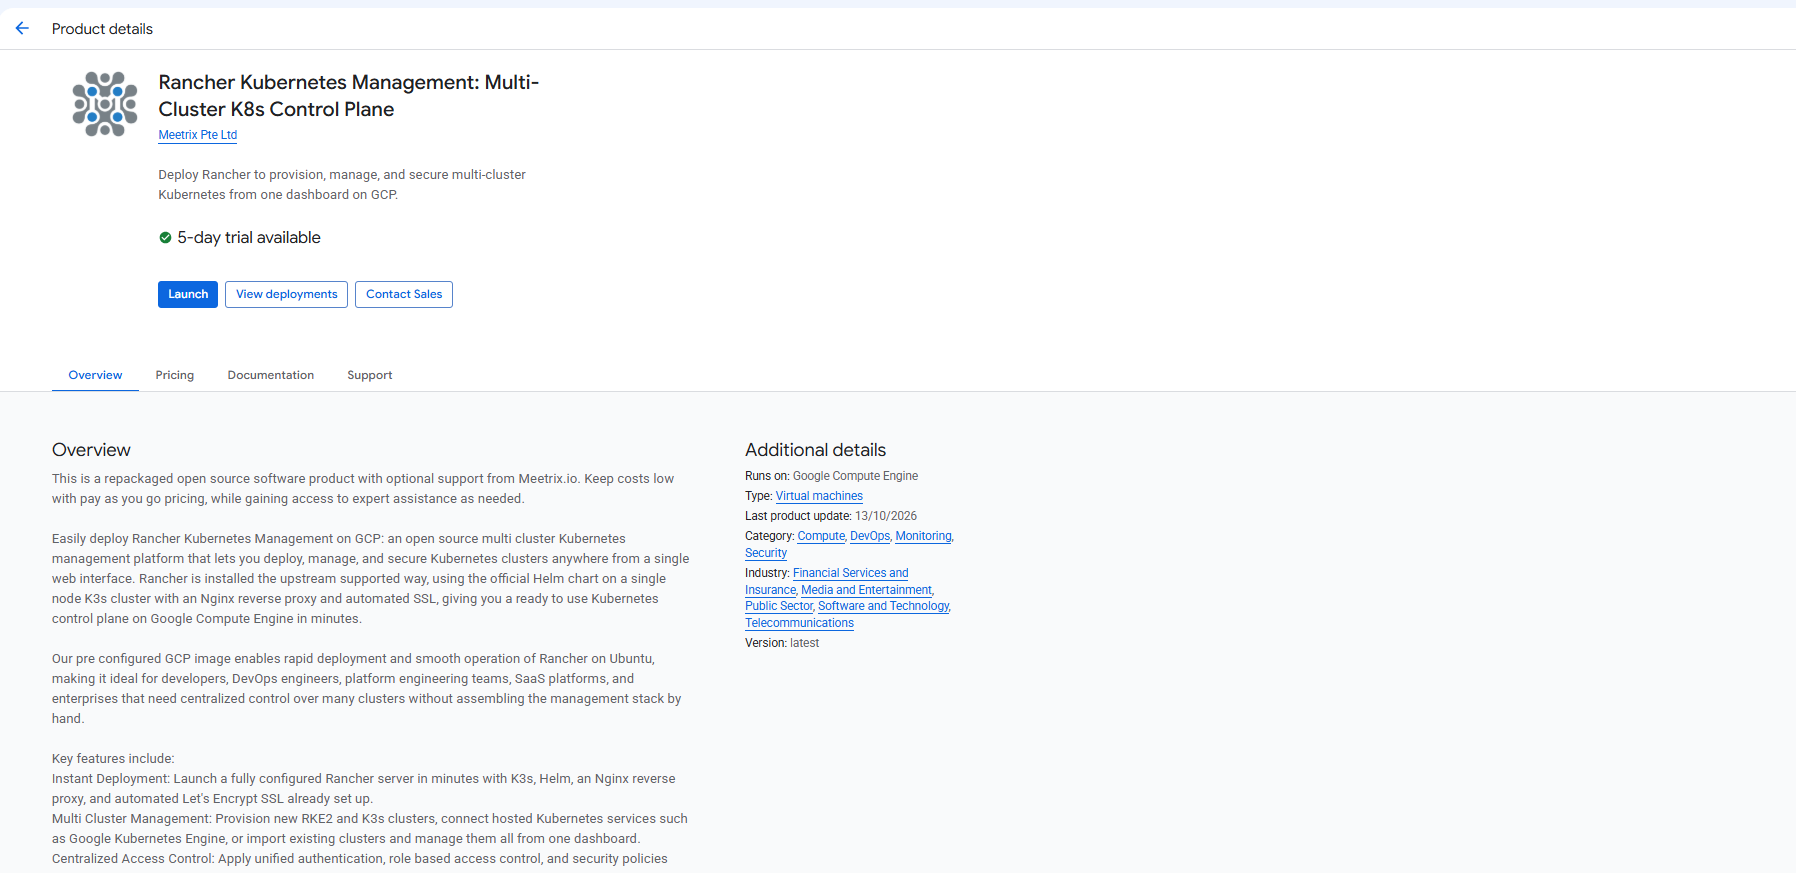
- You will see the following product listing page. Click Launch.
Step 2: Accept the Agreement
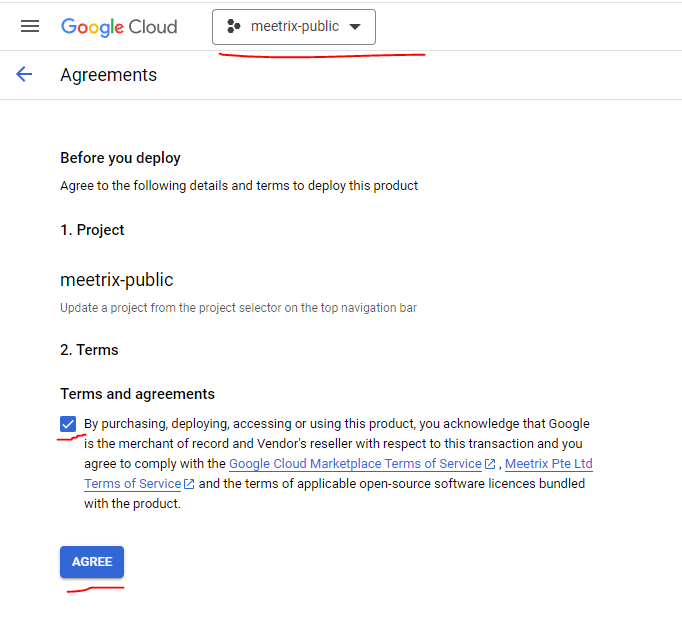
- Select your GCP project from the project selector at the top.
- Tick the terms and agreements checkbox.
- Click AGREE.
Free Trial
This product includes a 5-day free trial with up to USD 50.00 in licence fee credits. To activate it, tick I accept the solution trial Terms and Conditions at the bottom of the deployment form before you click Deploy.

Trial note
Configure Your Rancher Deployment on GCP
You will see the deployment configuration form. Fill in the fields across the following sections:
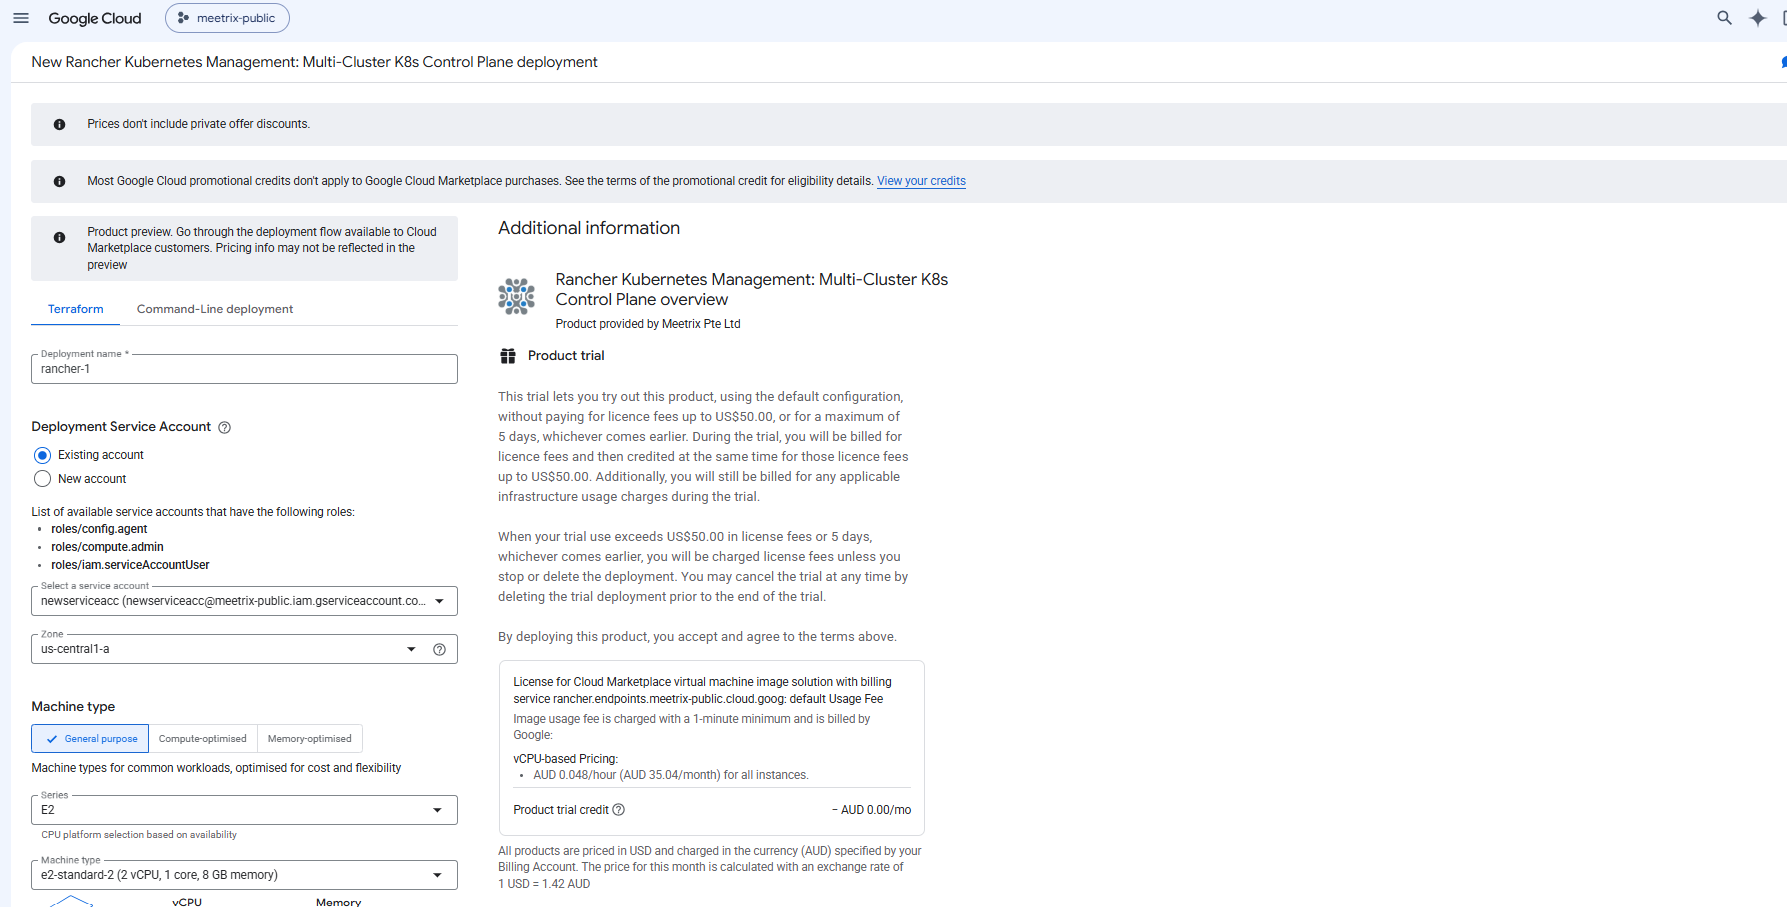
General
- Deployment name: A unique name for this deployment.
- Deployment Service Account: Use an existing account with the required roles, or create a new one.
- Zone: Select the GCP zone closest to you or to the clusters Rancher will manage.
- Machine type: The default
e2-standard-2(2 vCPU, 8 GB memory) runs Rancher and its K3s cluster comfortably. Go larger if Rancher will manage many downstream clusters or nodes.
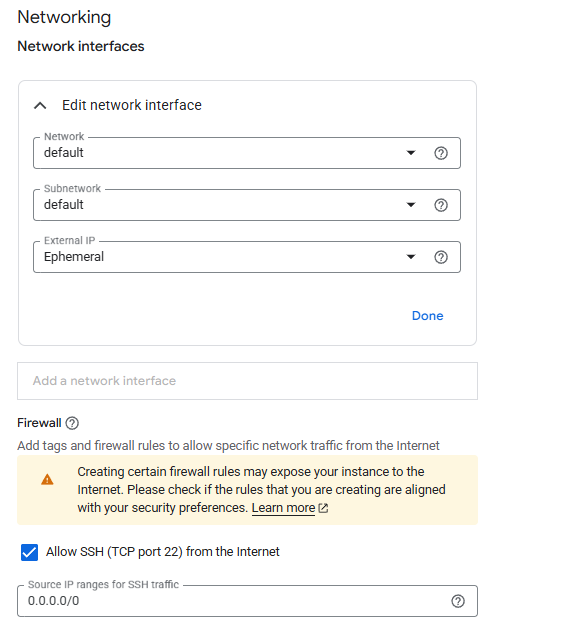
Networking
- Network / Subnetwork: Leave as
defaultunless you have a custom VPC. - External IP: Leave as
Ephemeralso the dashboard and your downstream clusters can reach the server. - Allow SSH (TCP port 22): Enabled by default. Restrict the source IP range if you want to limit SSH access to specific IPs.
Application Settings
- Domain name: The domain for your Rancher server (e.g.
rancher.yourdomain.com). Point your DNS A record to the instance IP before or shortly after deploying. - Admin email: Used for SSL certificate registration via Let's Encrypt.
- Admin password: The bootstrap password you use for the first login to Rancher. Store it securely.
Click Deploy and wait a few minutes for the deployment to complete.
Point DNS to Your Rancher Server
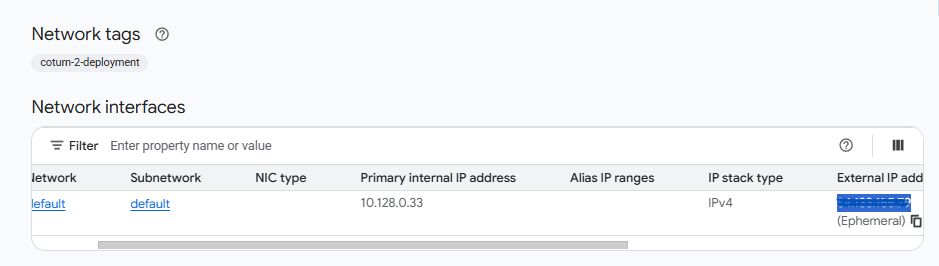
Step 1: Get the External IP
- Once deployment is complete, click the VM instance resource name in the deployment details.
- Copy the External IP from the Network interfaces section.
Step 2: Create a DNS A Record
- Go to your DNS provider.
- Add an A record pointing your Rancher domain (e.g.
rancher.yourdomain.com) to the copied external IP. - Wait for DNS propagation before proceeding (typically a few minutes to 1 hour).
DNS must propagate first
Access Rancher
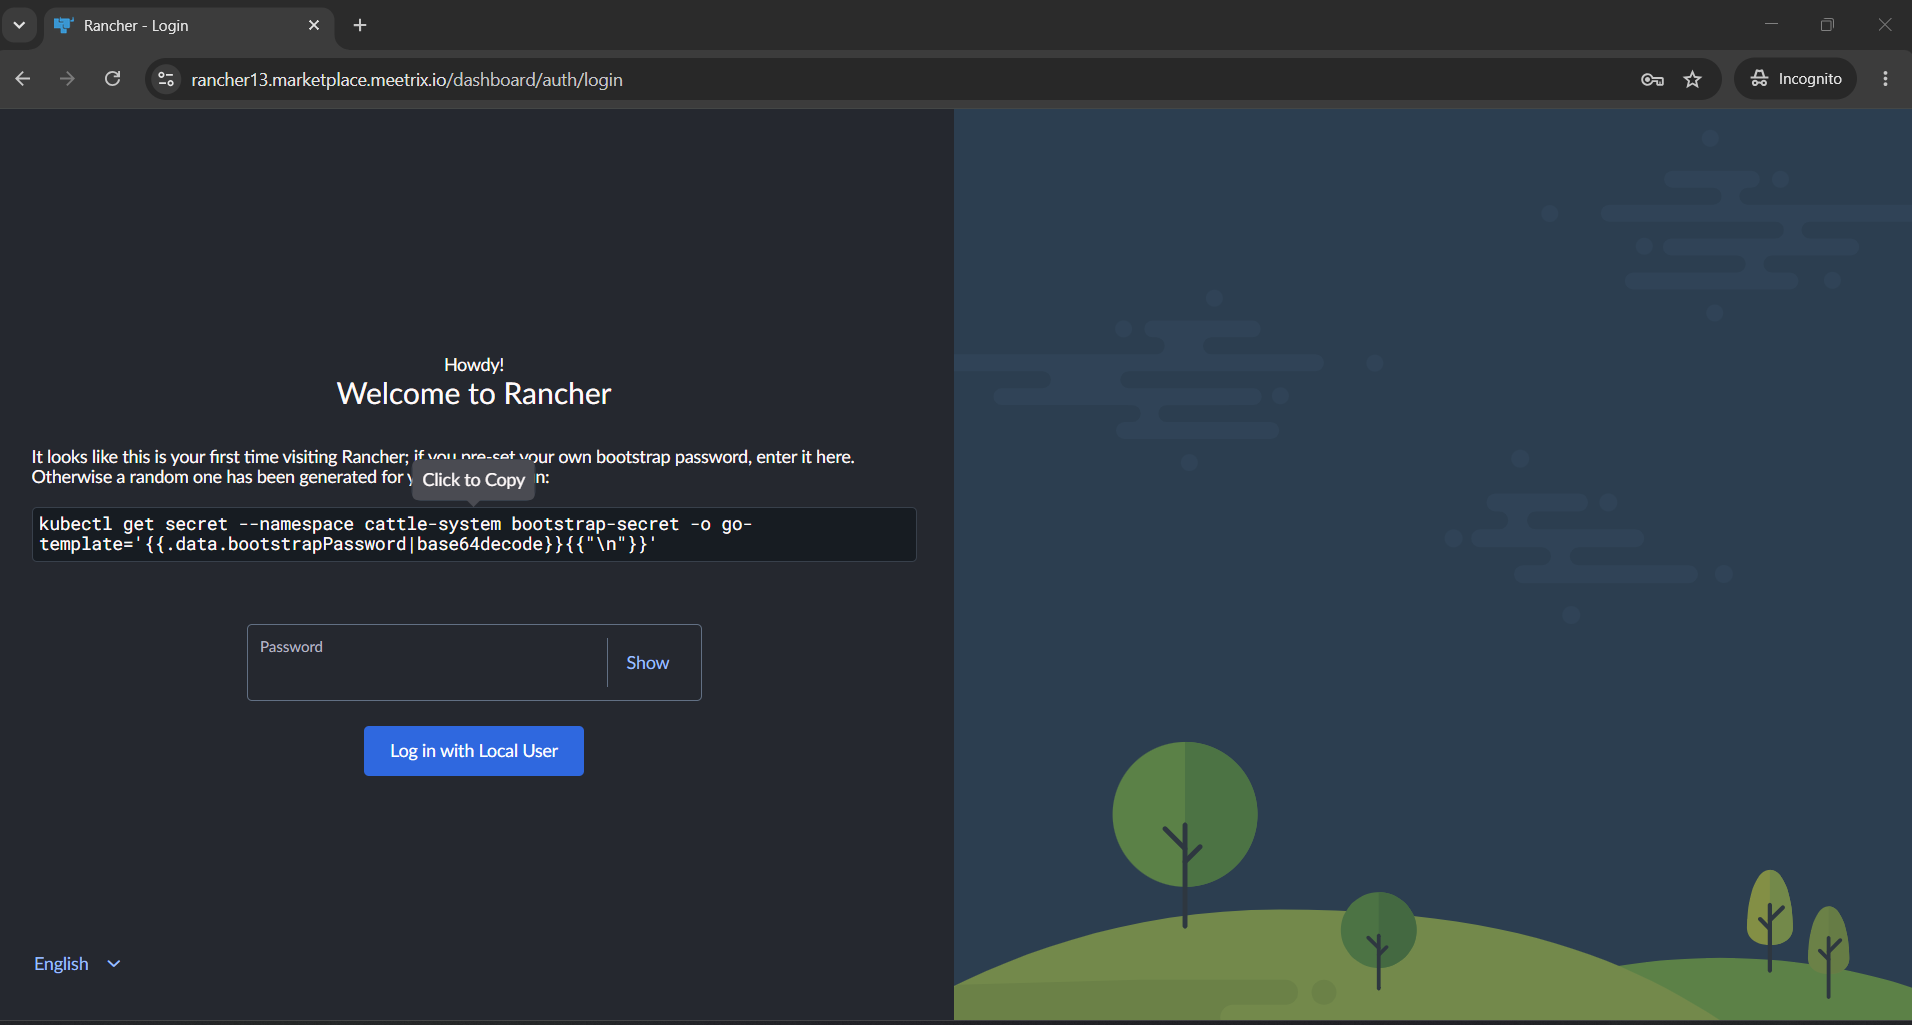
Once DNS has propagated and SSL has been issued, visit your domain. On the first visit, Rancher shows a Welcome to Rancher screen asking for a bootstrap password. Enter the Admin password you set in the Application Settings and click Log in with Local User. You do not need to run the kubectl command shown on the screen.
502 Bad Gateway Error?
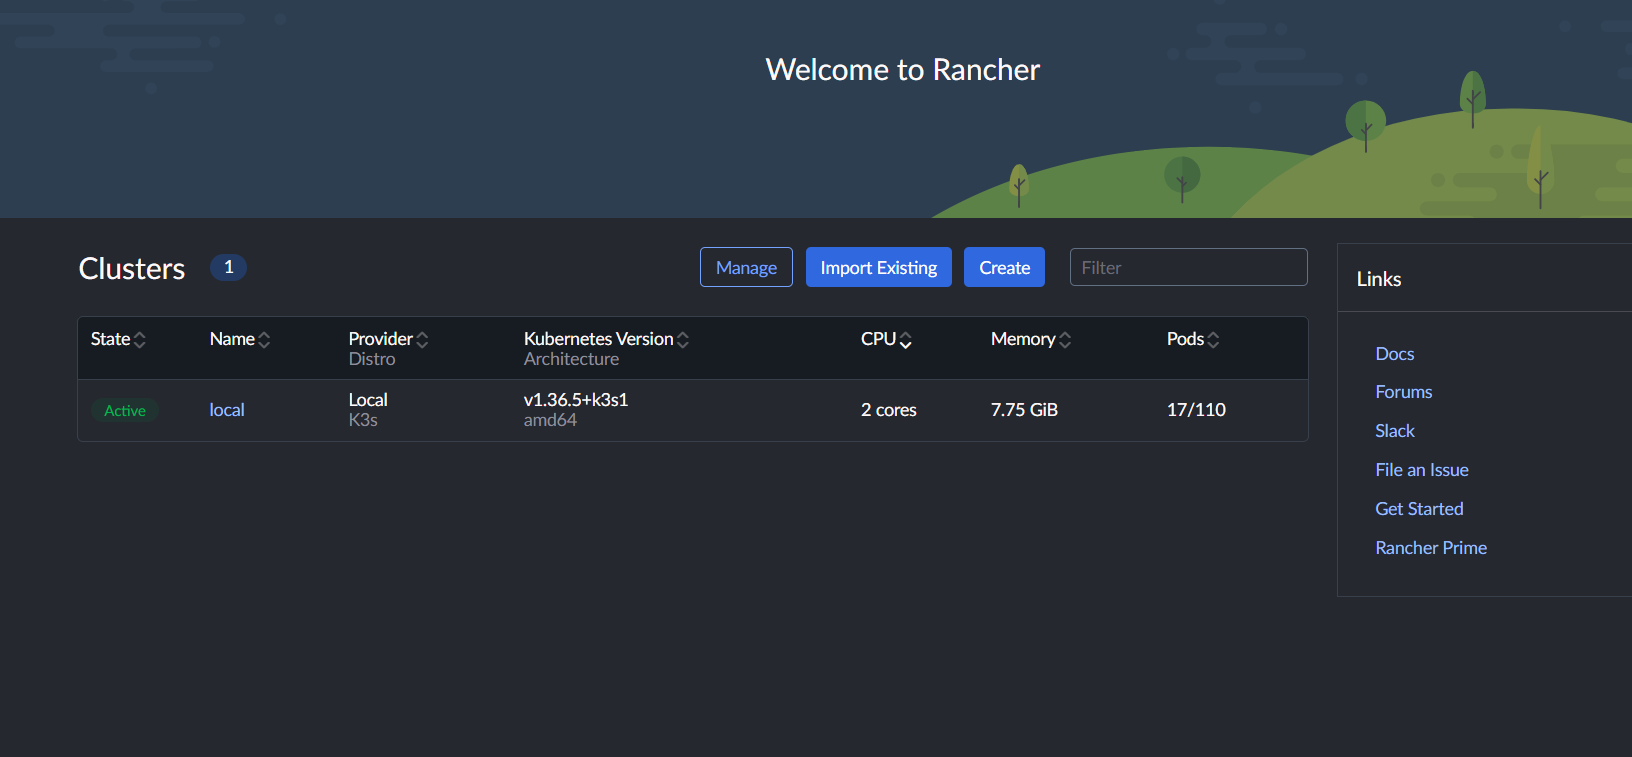
Follow the prompts to confirm the Server URL (your domain) and accept the terms. You then land on the Rancher home page, where the local K3s cluster that Rancher runs on is already listed as Active. From here you can Create a new cluster or Import Existing ones, including GKE clusters in the same project. The Rancher documentation covers each cluster type in detail.
If you plan to run model serving on a managed cluster, our guide to running open-weight LLMs on GKE and the article on GPU scheduling in Kubernetes pair well with a Rancher-managed GKE cluster.
Generate an SSL Certificate for Rancher Manually
Rancher automatically tries to issue SSL for the domain name you provided during deployment. If that fails, for example because DNS had not propagated yet, generate it manually.
Step 1: SSH into the Server
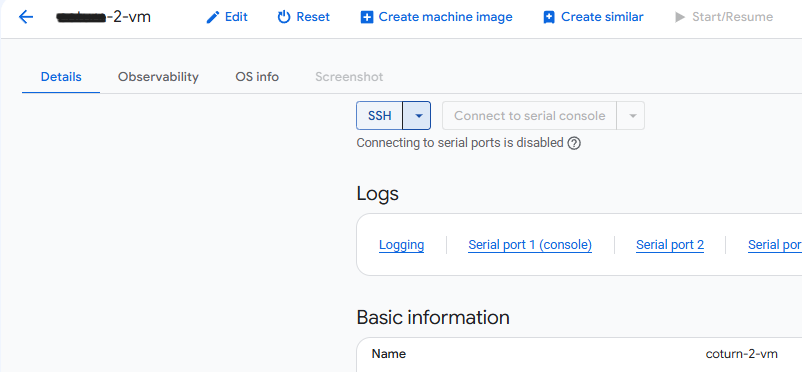
- Go to the VM instance page in the GCP console.
- Click SSH to open a browser-based terminal and authorize access.
Step 2: Run the Certificate Script
The image includes a pre-configured certificate script. Run it with:
sudo bash /root/certificate_generate_standalone.shThis script runs certbot using the domain name and admin email you provided during deployment.
Check Rancher Server Logs
SSH into the server as shown above. Rancher runs as pods in the cattle-system namespace of the local K3s cluster. List them with:
sudo k3s kubectl get pods -n cattle-systemThen check the Rancher logs:
sudo k3s kubectl logs -n cattle-system -l app=rancher --tail=100Nginx sits in front of Rancher and terminates SSL. If the dashboard does not load at all, check it too:
sudo systemctl status nginxManage Your Rancher Deployment on GCP
Shut Down the VM
To stop the VM without deleting it, go to Compute Engine → VM Instances in the GCP console, select your instance, and click Stop. You can restart it later by clicking Start/Resume.
Note
Delete the Deployment
To fully remove the deployment and stop all billing:
- Go to Solution deployments in the GCP console.
- Find your Rancher deployment.
- Click Delete to remove all associated resources.
Downstream clusters that Rancher created in your project, such as GKE clusters, are separate resources. Remove them first if you no longer need them.
Upgrades
When there is an upgrade, we update the product with a newer version. You can check the product version in GCP Marketplace. If a newer version is available, back up your server data, delete the current deployment, and launch the product again using the newer version.
Troubleshoot Rancher on GCP
Insufficient Capacity Error
If you see an error stating there is not sufficient capacity for the selected machine type while deploying, try a different zone or try again later.
502 Bad Gateway
If you see a 502 Bad Gateway error when accessing your domain, Rancher is still starting up. Wait 5-10 minutes and try again. If it persists, check the Rancher pod status and logs as shown above.
Storage Full Error
Container images and logs on the local K3s cluster can fill the boot disk over time. If the dashboard becomes unresponsive, SSH into the server and run:
df -hIf the root volume is between 90-100%, resize the boot disk from the Compute Engine console, then reboot the instance.
Conclusion
You now have a self-hosted Rancher server running in your own GCP project, with SSL and your own domain. From here, import your existing clusters, create new ones, and set up users and role-based access. If you want to monitor the clusters Rancher manages, our Grafana developer guide shows how to launch Grafana from a Meetrix image.
Technical Support
If you run into any issues, our support team is here to help. Reach out to us at support@meetrix.io and we will respond within 12 hours.
Frequently Asked Questions
What is Rancher?
Rancher is an open-source Kubernetes management platform from SUSE. It gives you one web dashboard to create, import and operate Kubernetes clusters across clouds and on-premises, with central authentication, role-based access control, monitoring and app catalogs.
What does the Meetrix Rancher GCP image include?
The image installs Rancher the upstream way, with the official Helm chart on a single-node K3s cluster, behind an Nginx reverse proxy. You fill in a domain name, admin email and admin password during deployment, and the image requests a Let's Encrypt certificate for that domain.
What is the initial password for the Rancher dashboard?
The first login screen asks for a bootstrap password. Enter the admin password you set in the Application Settings section of the deployment form. You do not need to run the kubectl command shown on that screen.
Which machine type should I choose for Rancher on GCP?
The default e2-standard-2 (2 vCPU, 8 GB memory) is a good baseline for a Rancher server managing a handful of clusters. Choose a larger machine type if Rancher will manage many downstream clusters or nodes.
Can Rancher manage Google Kubernetes Engine (GKE) clusters?
Yes. From the Rancher home page you can import an existing GKE cluster or create a new one with Rancher's GKE driver, alongside RKE2, K3s, EKS and AKS clusters.
Is there a free trial?
Yes. The Meetrix Rancher listing includes a 5-day free trial with up to USD 50.00 in licence fee credits. Infrastructure charges for the VM and disk still apply during the trial.
How do I get technical support?
Reach out to Meetrix Support at support@meetrix.io for help with the Rancher GCP deployment.
Deploy Rancher on GCP in Minutes
Launch a production-ready Rancher server on Google Cloud with a pre-configured Meetrix image and manage all your Kubernetes clusters from one dashboard.
Get Started on GCP Marketplace