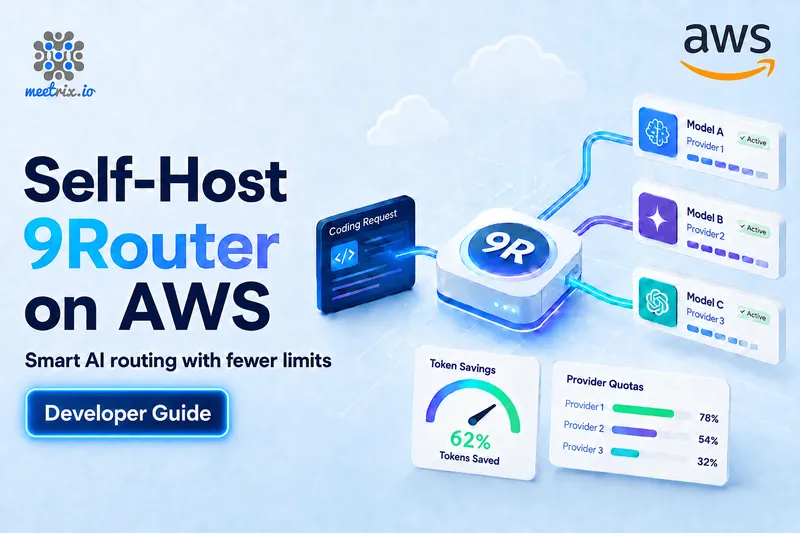
Welcome to the Meetrix 9Router developer guide for AWS! 9Router is a self-hosted AI routing proxy that connects Claude Code, Codex, Cursor, Cline, Copilot, and other CLI tools to 40+ LLM providers behind a single OpenAI-compatible endpoint. It translates request formats between OpenAI, Claude, and Gemini, tracks quota, auto-refreshes tokens, and falls back from subscription to cheap to free providers so you never stop coding. The built-in RTK token saver compresses tool output to cut input tokens by roughly 20-40%.
With the Meetrix pre-configured 9Router AMI, you can deploy a production-ready 9Router instance on your own AWS account in minutes using a CloudFormation stack. This guide walks you through finding the product on AWS Marketplace, launching the stack, pointing DNS and issuing SSL, connecting your first provider, and wiring a CLI tool to your new endpoint.
Prerequisites
Before you get started with the 9Router AMI, ensure you have the following prerequisites:
- Basic knowledge of AWS services, including EC2 instances and CloudFormation.
- An active AWS account with permission to create EC2, VPC, IAM, and CloudFormation resources.
- An existing EC2 key pair for SSH access to the instance.
- Optionally, a domain name and a Route53 hosted zone if you want automatic SSL.
- If you encounter a vCPU quota error when launching the stack, follow https://meetrix.io/blogs/increase-aws-vcpu-quota/ to increase your vCPU limit.
What You Get
The AMI ships a fully wired 9Router stack so you do not have to assemble it yourself:
- 9Router v0.5.59 running as a Docker container (
decolua/9router:0.5.59) on Ubuntu 26.04 LTS. - Docker and Docker Compose, with the image pre-pulled for a fast first boot.
- Nginx reverse proxy for HTTP and HTTPS, tuned for Server-Sent Events streaming (no buffering, long timeouts).
- Automatic SSL via Let's Encrypt using the Route53 DNS-01 challenge.
- SQLite data on a persistent gp3 EBS volume, with an optional daily backup to S3.
- A pre-hardened base image with ufw, unattended-upgrades, and the SSM agent.
Launching the AMI
Step 1: Find and Select the 9Router AMI
- Log in to your AWS Management Console.
- Navigate to the 9Router listing in AWS Marketplace.
Step 2: Initial Setup & Configuration
- Click the "Continue to Subscribe" button.
- After subscribing, accept the terms and click "Accept Terms".
- Wait a few minutes until processing completes, then click "Continue to Configuration".
- Select "CloudFormation script to deploy 9Router" as the fulfillment option and choose your region. Click "Continue to Launch".
- From the "Choose Action" dropdown, select "Launch CloudFormation" and click "Launch".
Create the CloudFormation Stack
Step 1: Create a stack
- Ensure the "Template is ready" option is selected under "Prepare template".
- Click "Next".
Step 2: Specify stack options
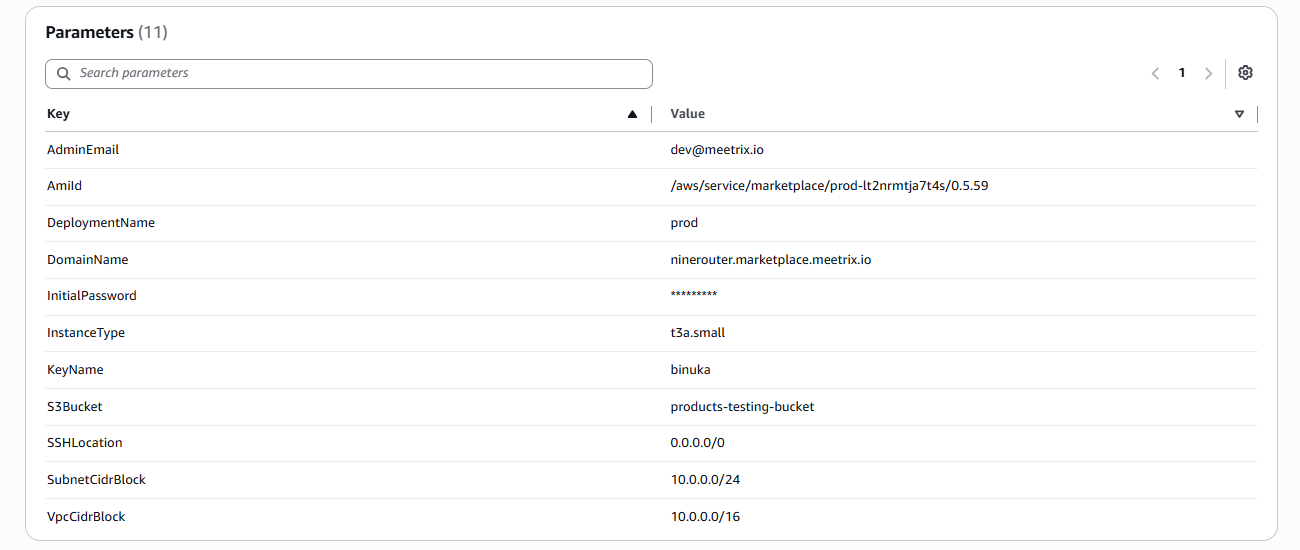
Provide a unique "Stack name", then fill in the stack parameters:
- AmiId - pre-filled automatically from AWS Marketplace. Leave this as the default value.
- InstanceType - the EC2 instance type (Recommended: t3a.small).
- KeyName - your preferred EC2 key pair, used for SSH access.
- DomainName - the public domain for your 9Router dashboard and API (for example
9router.yourdomain.com). Leave the default if you want to access the instance by IP address instead of a real domain. - AdminEmail - the email address used when requesting the Let's Encrypt SSL certificate.
- InitialPassword - the password for your first dashboard login. This is required, has no default, and must be 6 to 64 characters. Change it from the dashboard after logging in.
- S3Bucket - an S3 bucket in your account that the on-instance database backup helper script uploads snapshots to. Leave the default if you are not using S3 backups.
- SSHLocation - set to
0.0.0.0/0, or restrict it to your own IP range. - DeploymentName - a short identifier for this deployment (for example
prod). Useful when you run more than one stack. - SubnetCidrBlock - keep as
10.0.0.0/24. - VpcCidrBlock - keep as
10.0.0.0/16.
Click "Next".
Step 3: Configure stack options
- Choose "Roll back all stack resources" and "Delete all newly created resources" under "Stack failure options".
- Click "Next".
Step 4: Review
Review and verify the details you've entered. Here's an example of a completed set of stack parameters:
Tick "I acknowledge that AWS CloudFormation might create IAM resources with custom names", then click "Submit".

Afterward, you'll be directed to the CloudFormation stacks page. Please wait for 3-5 minutes until the stack has been successfully created.
Point DNS to Your 9Router Server
Skip this section if you kept the default domain and plan to use the Elastic IP directly.
Step 1: Get the Stack Outputs
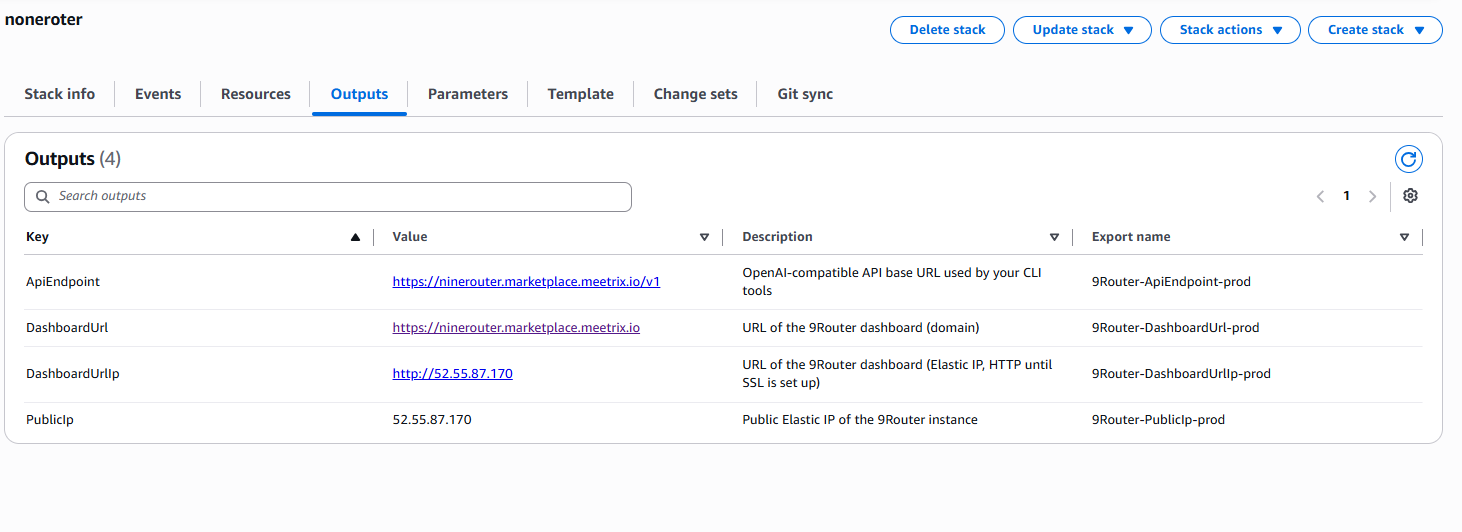
Open the "Outputs" tab of your stack. You'll see four values:
- DashboardUrl - the HTTPS dashboard URL at your domain.
- DashboardUrlIp - the HTTP dashboard URL at the Elastic IP, usable until SSL is set up.
- ApiEndpoint - the OpenAI-compatible API base URL your CLI tools will use.
- PublicIp - the public Elastic IP of the instance.
Step 2: Create a DNS Record
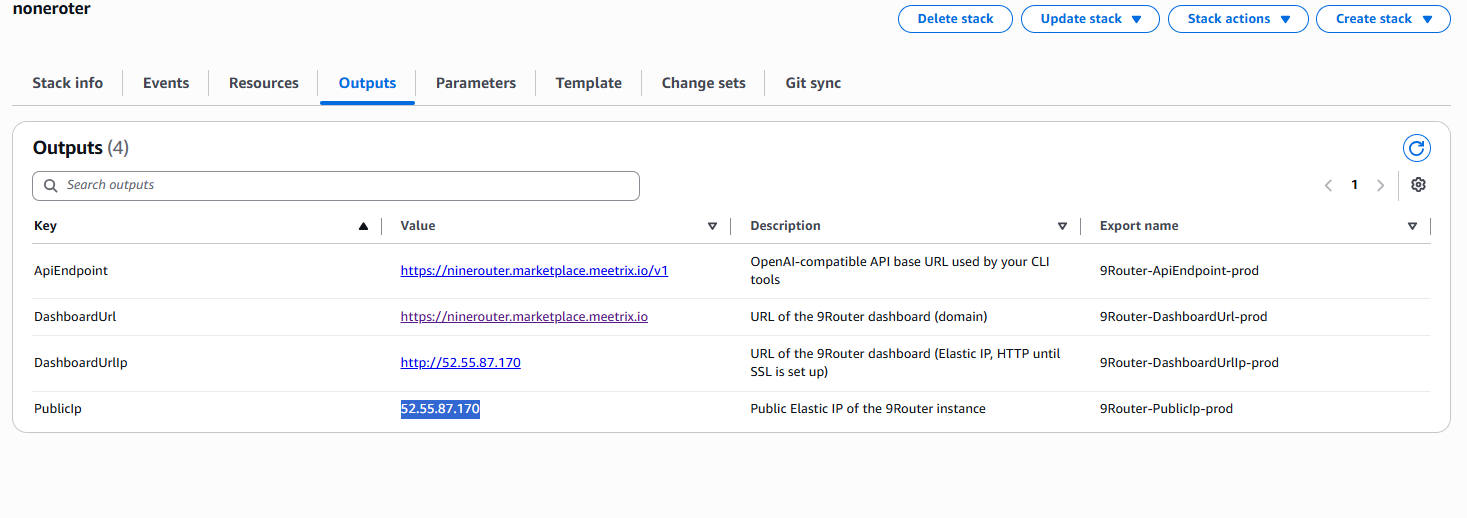
- Copy the value labeled "PublicIp".
- Go to AWS Route 53 and navigate to "Hosted Zones".
- Click Create record.
- Add a record name matching the domain you set in DomainName, and paste the copied PublicIp into the value textbox.
- Click "Create records".
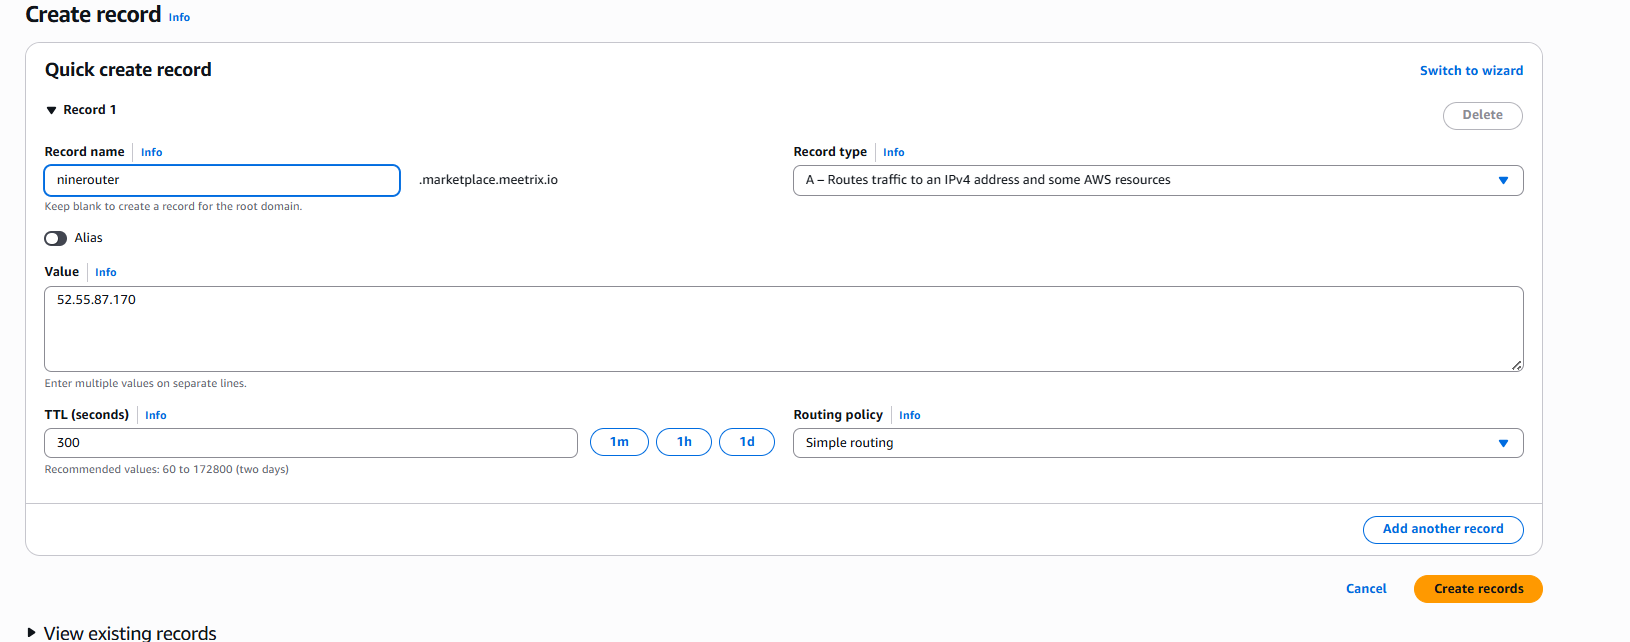
DNS challenge and hosted zones
Access 9Router
Open the DashboardUrl (or DashboardUrlIp if you are using the IP address) from the Outputs tab. Log in with the InitialPassword you set as a stack parameter. The username field is not used.
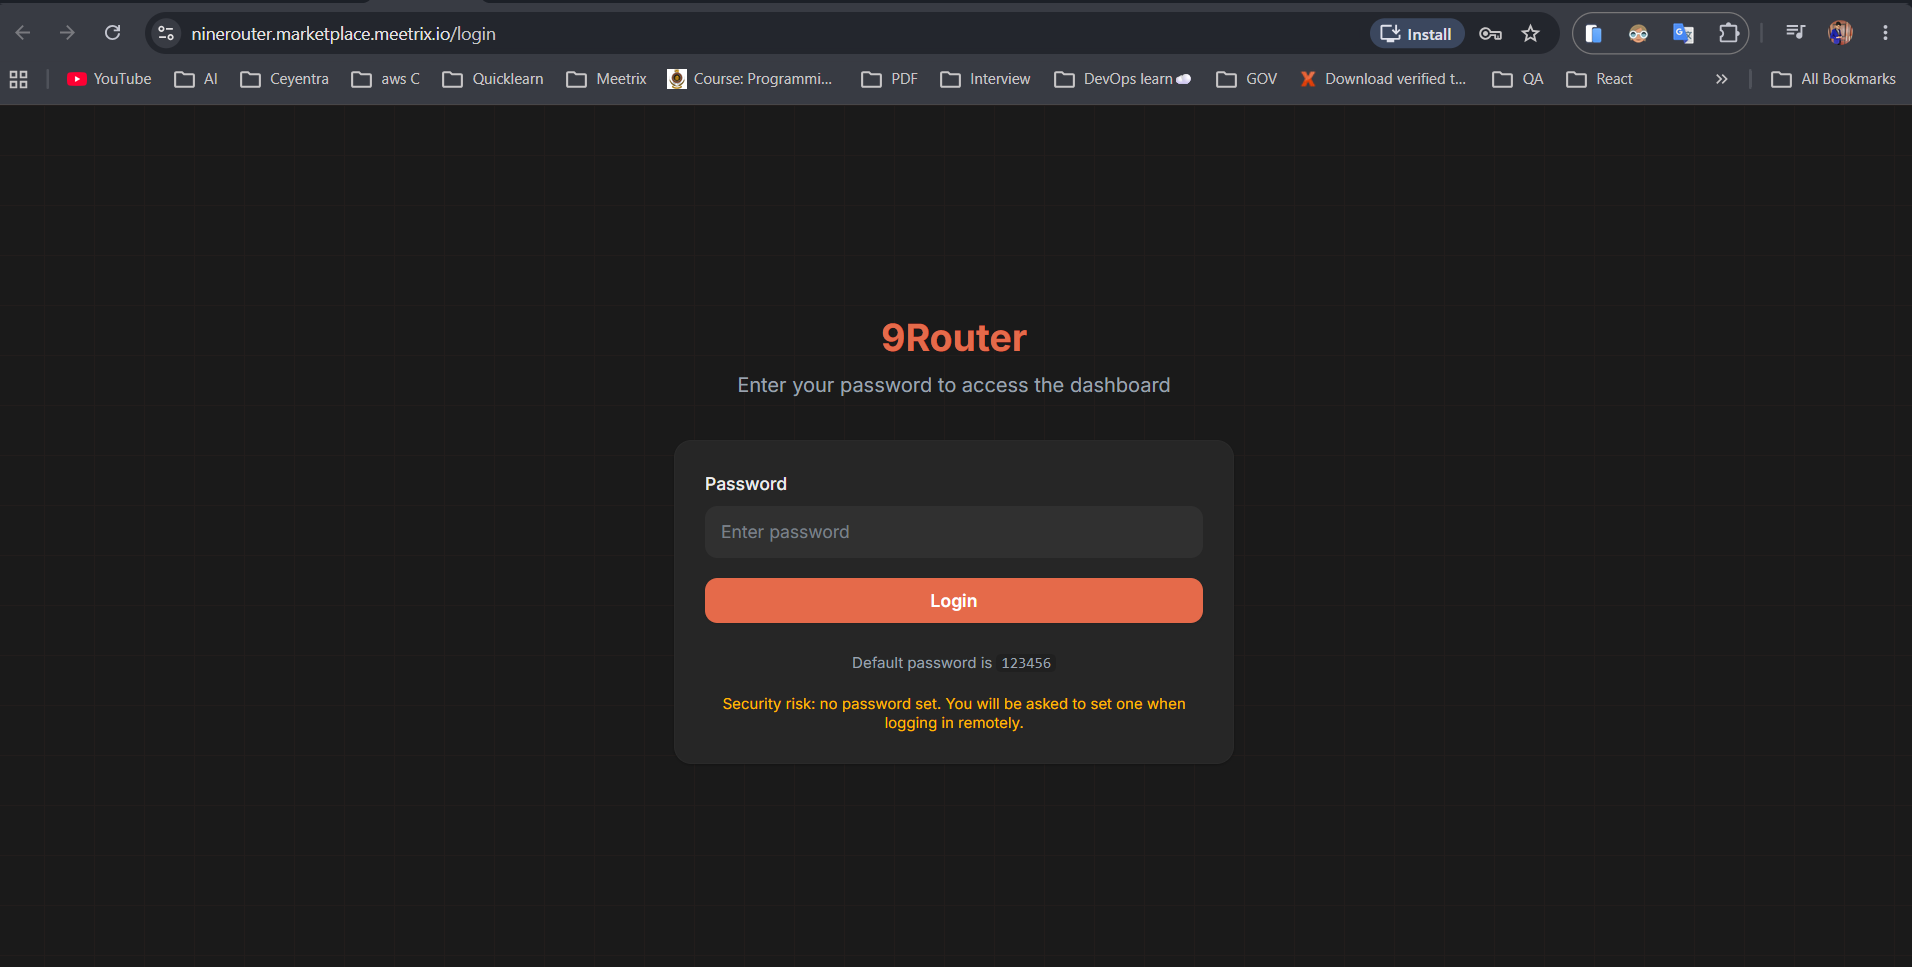
Note
Once you are in, change the password from the dashboard and keep it somewhere safe.
Connect a Provider
9Router does nothing until it has at least one provider to route to.
- Go to Providers in the dashboard.
- Connect at least one provider. You can start with a free tier such as Kiro AI or OpenCode Free, connect a paid subscription, or paste in your own API key for a provider like Anthropic, OpenAI, or Google.
- Add more providers if you want fallback. 9Router routes subscription first, then cheap, then free, so requests keep succeeding when one provider is rate-limited or out of quota.
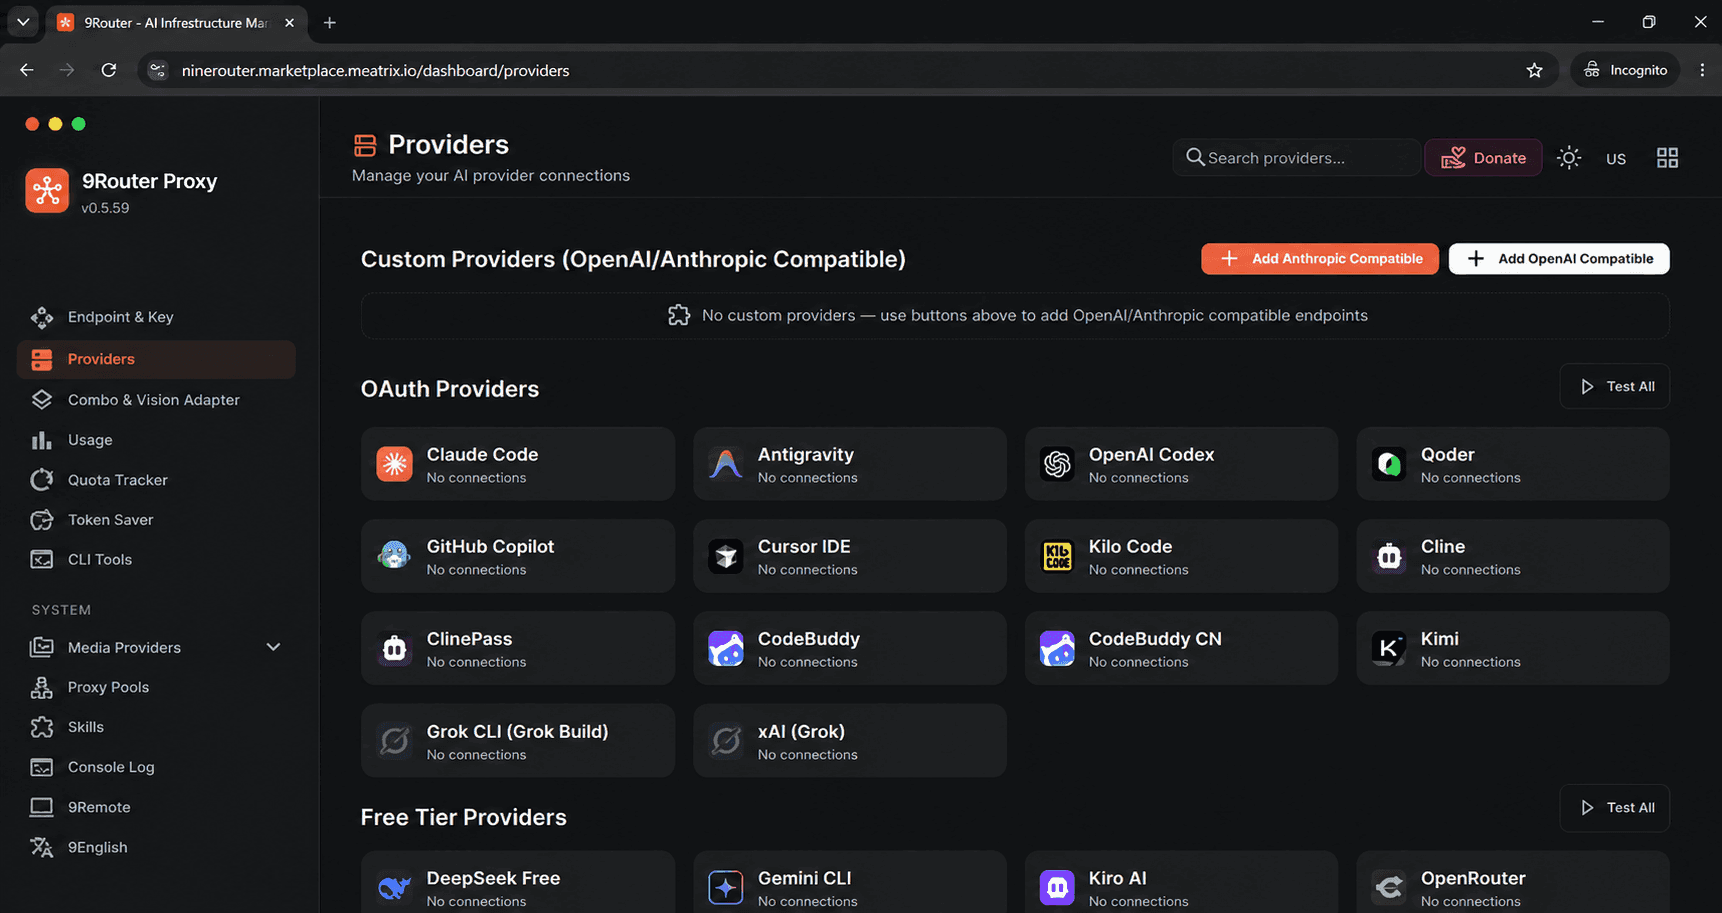
Point Your CLI Tool at 9Router
- In the dashboard, open Endpoint and copy your API key.
- Configure your CLI tool with these values:
Endpoint: https://<your-domain>/v1
API Key:  <key from the dashboard>
Model:    <provider>/<model>, for example kr/claude-sonnet-4.5
This works with any OpenAI-compatible client, including Claude Code, Codex, Cursor, Cline, and Copilot. Requests are translated to the target provider's format automatically, so you can keep the same tool while switching the model behind it.
Generate an SSL Certificate Manually
9Router tries to issue SSL automatically on first boot for the domain you passed as DomainName. If that fails, for example because DNS had not propagated yet, you can generate it manually.
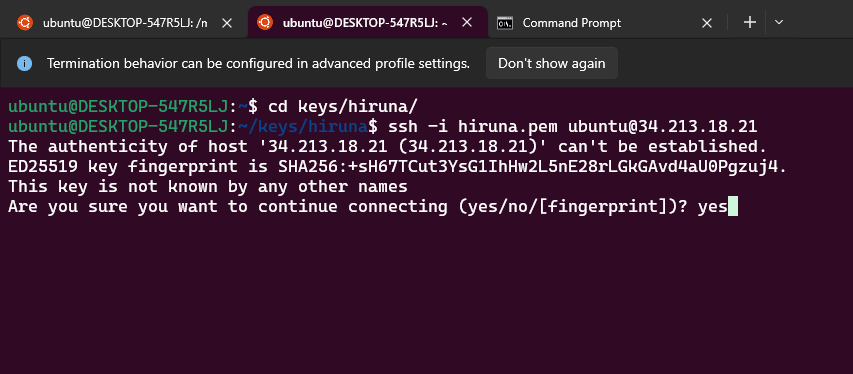
Step 1: Log in to the Server
- Open a terminal and go to the directory where your private key is located.
- Run the command below, replacing the placeholders with your key file and the Elastic IP.
- Type "yes" and press Enter to confirm the host's authenticity.
ssh -i /path/to/your-key.pem ubuntu@<ELASTIC_IP>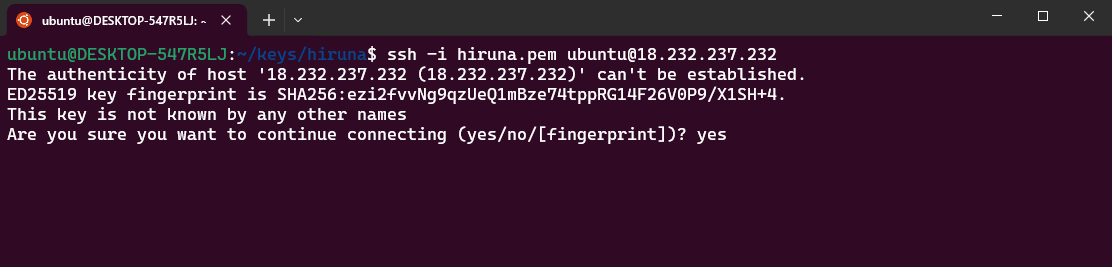
Step 2: Re-issue the Certificate
If your domain's hosted zone is on Route53, use the DNS challenge:
sudo bash /root/certificate_generate_dns.shIf DNS already points at the Elastic IP, you can use the standalone challenge instead:
sudo bash /root/certificate_generate_standalone.shThen reload nginx:
sudo systemctl reload nginxCheck Server Logs
Step 1: Log in to the Server
ssh -i /path/to/your-key.pem ubuntu@<ELASTIC_IP>Step 2: Inspect the Container
The application runs from /opt/9router. Check its status and follow the logs:
docker ps
docker logs -f 9router
Configuration lives in /opt/9router/.env and /opt/9router/docker-compose.yml. The SQLite database is in the Docker volume 9router-data, mounted at /app/data, with the file at db/data.sqlite.
Backups
The SQLite database is stored on the persistent EBS volume, so it remains available after instance stops or restarts. If you want to back up the database to S3, simply run:
/opt/scripts/dbbackup.shManage the Deployment
Stop the Instance
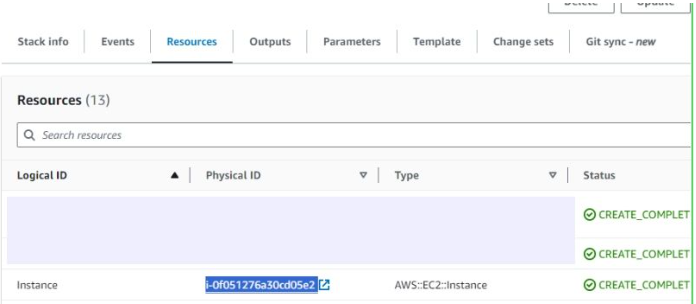
- In CloudFormation, open the "Resources" tab and click the link next to the "Instance" resource to open the EC2 instance.
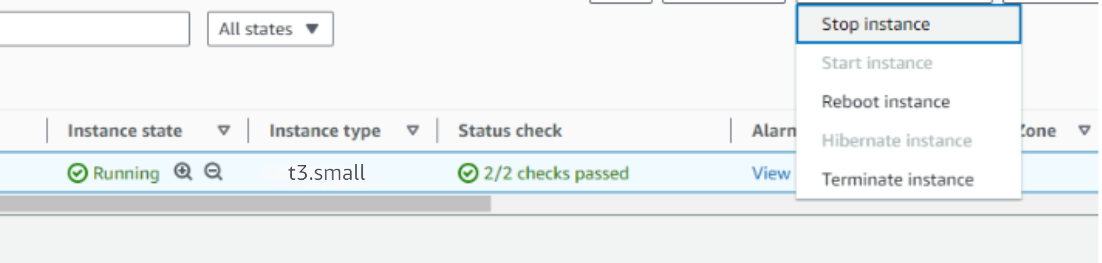
- Stop the 9Router instance from the Instance state dropdown. You can restart it later as needed. The Elastic IP and the EBS data volume are retained while the instance is stopped.
Remove 9Router
Delete the CloudFormation stack from the AWS Management Console under "CloudFormation Stacks" by clicking "Delete". Back up the SQLite database first if you want to keep your provider connections and settings.
Upgrades from AWS Marketplace
When a new version is available in AWS Marketplace, back up your data, remove the previous deployment, and relaunch with the new version.
Troubleshoot
vCPU Quota Errors
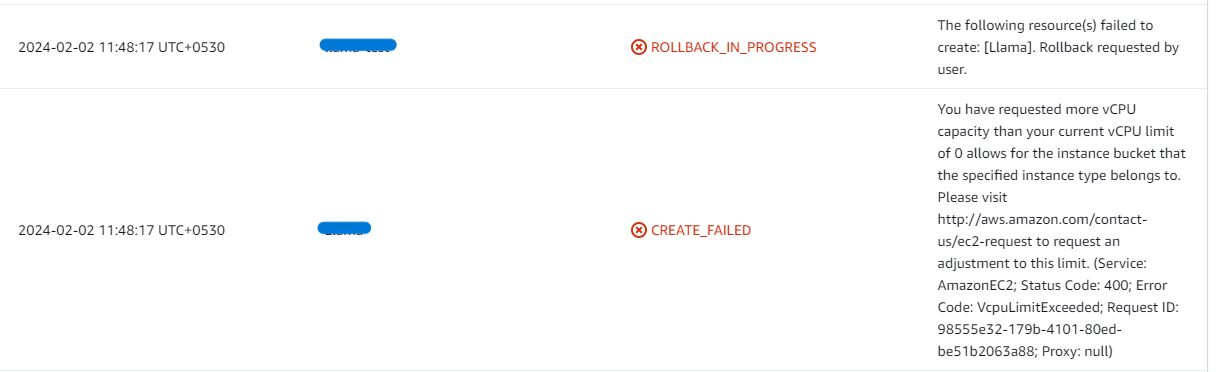
If you hit vCPU quota limits, the stack fails with a VcpuLimitExceeded error and rolls back. Request an increase by following How to increase AWS quota.
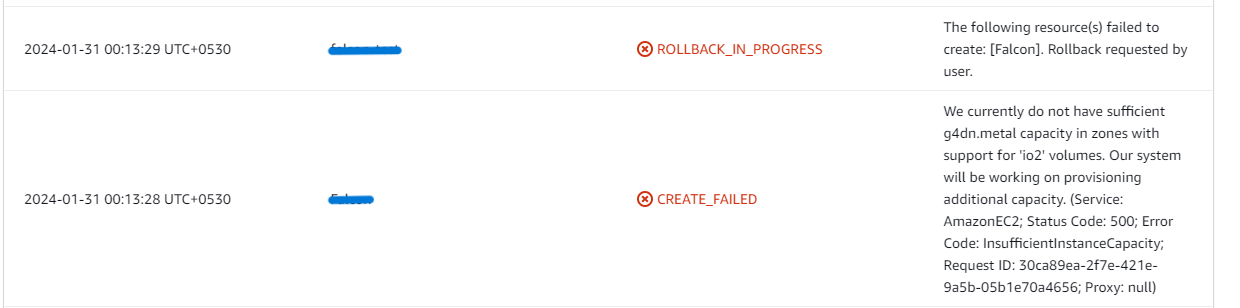
Insufficient Capacity Errors
If you see an InsufficientInstanceCapacity error while creating the stack, try a different instance type, Availability Zone, or region.
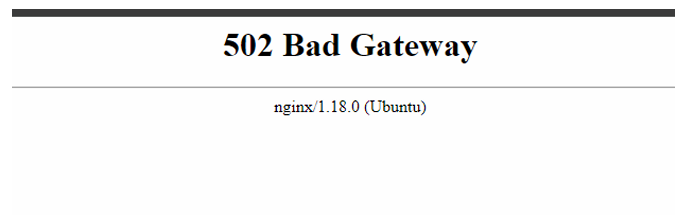
502 Bad Gateway
If the dashboard is temporarily inaccessible, wait 5-10 minutes and retry. The container is likely still starting up.
SSL Did Not Issue
Confirm your DNS record points at the Elastic IP and has propagated, then re-run the certificate script from the "Generate an SSL Certificate Manually" section.
Disk Space
If 9Router becomes unresponsive, check whether the instance storage is full:
df -h
If the root volume is between 90-100%, resize the EBS volume (per AWS docs), then reboot and restart the service.
Conclusion
The Meetrix 9Router Deployment Guide gets a self-hosted AI routing proxy running on your own AWS account in minutes. Once it is up, you point every AI coding tool at one endpoint, connect as many providers as you like, and let 9Router handle format translation, quota tracking, fallback, and token savings behind the scenes. Running your infrastructure on Google Cloud instead? 9Router on GCP Marketplace covers the same product, with pricing and how it stacks up against OpenRouter and LiteLLM.
Technical Support
Reach out to Meetrix Support (support@meetrix.io) for assistance with 9Router issues.
Frequently Asked Questions
What is 9Router?
9Router is an open-source smart router that sits between your AI coding tools and dozens of model providers. It exposes a single OpenAI-compatible endpoint, translates request formats between OpenAI, Claude, and Gemini, tracks quota, auto-refreshes tokens, and falls back from subscription to cheap to free providers so your CLI tools keep working. A built-in RTK token saver compresses tool output to cut input tokens.
What are the prerequisites for installing 9Router on AWS?
You need basic knowledge of AWS services (EC2, CloudFormation), an active AWS account with permission to create EC2, VPC, IAM, and CloudFormation resources, an EC2 key pair, and a sufficient vCPU limit to launch the required instance type. A domain with a Route53 hosted zone is optional but needed for automatic SSL.
Which instance type should I choose?
t3a.small is the recommended default and is enough for a single user or a small team. Choose a larger instance type if you expect heavy concurrent traffic through the proxy.
How do I log in for the first time?
Open the dashboard URL from the stack Outputs tab and log in with the InitialPassword you set as a stack parameter. The username field is not used. Change the password from the dashboard after your first login.
Which providers can I connect?
9Router supports 40+ LLM providers. You can start with a free tier such as Kiro AI or OpenCode Free, connect a paid subscription, or paste in your own API key for providers like Anthropic, OpenAI, or Google. 9Router then routes requests across whatever you have connected, with automatic fallback.
How do I point my CLI tool at 9Router?
In the dashboard, open Endpoint and copy your API key. Then set your tool's base URL to https://
Where is my data stored, and can I back it up?
9Router keeps its state in a SQLite database on a persistent gp3 EBS volume, in the Docker volume 9router-data at /app/data/db/data.sqlite, and it survives instance stops and restarts. The instance includes a helper script, /opt/scripts/dbbackup.sh, that uploads a gzipped copy to the bucket you set as S3Bucket. It is not scheduled by default, so run it manually or add a cron entry for regular backups.
How do I get technical support?
Reach out to Meetrix Support at support@meetrix.io for assistance with 9Router issues.
Deploy 9Router on AWS in Minutes
Launch a production-ready, self-hosted 9Router proxy on AWS with a pre-configured Meetrix image and route every AI coding tool through one endpoint.
Get Started on AWS Marketplace