
Welcome to the Meetrix Supabase developer guide for Google Cloud Platform! Supabase bundles a PostgreSQL database, Auth, Storage, Realtime, Edge Functions, and the Studio dashboard into a single self-hosted backend, the open-source alternative to Firebase without the per-document billing. With the Meetrix pre-configured GCP image, the whole stack is installed and wired together the moment the VM boots.
This guide walks you through finding the product on GCP Marketplace, configuring the deployment, reserving a static IP, pointing DNS at your server, and signing in to Studio to start building.
Prerequisites
Before you begin, make sure you have the following:
- Basic Google Cloud Platform knowledge.
- An active Google account with a GCP project and billing enabled.
- A domain name you can manage DNS records for. Supabase needs a real domain for SSL to issue correctly, an IP address on its own will not work.
Launch the Product
Step 1: Find the Product
- Log in to your Google account.
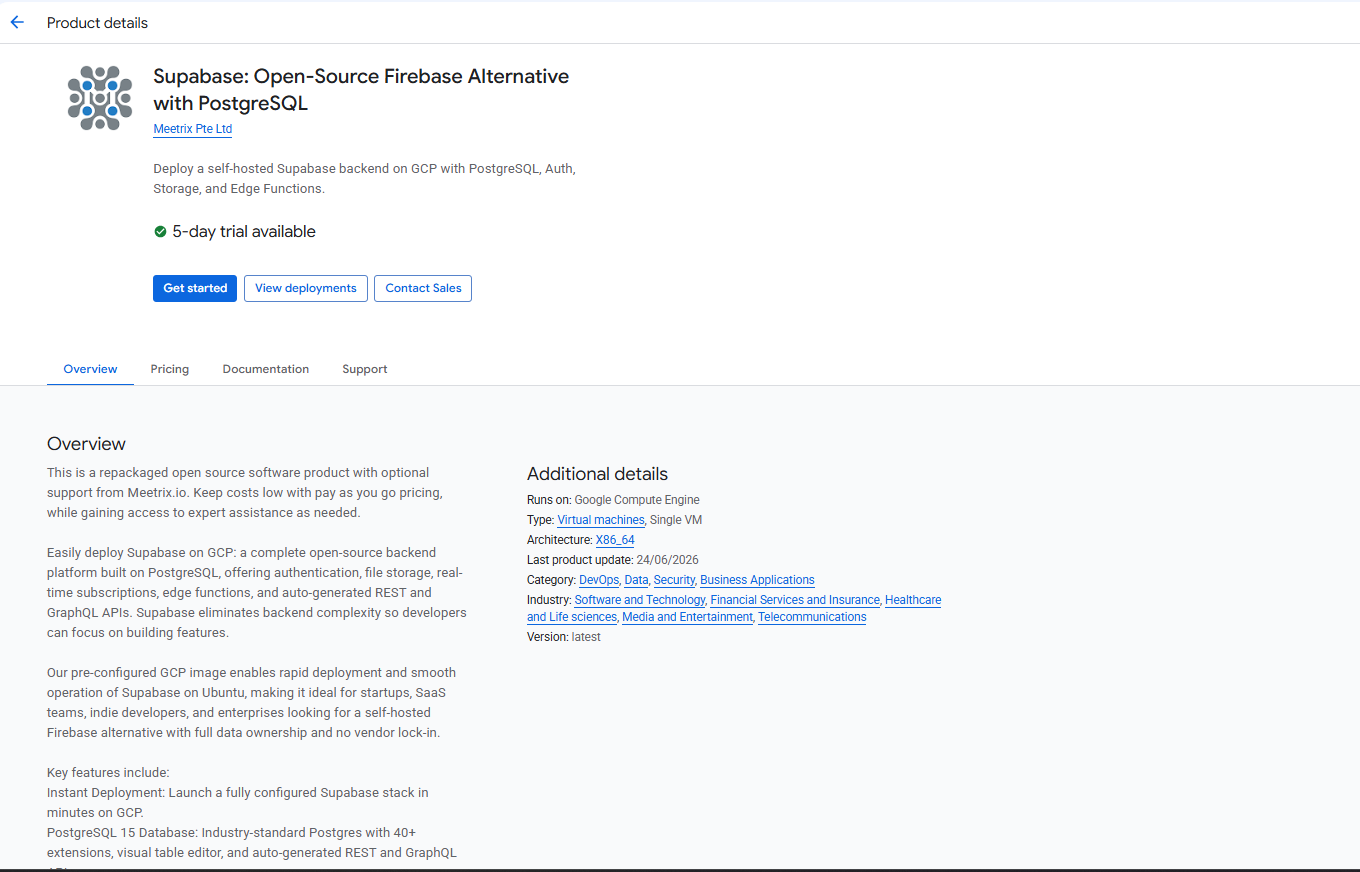
- Go directly to the product page: Supabase: Open-Source Firebase Alternative with PostgreSQL
- You can also browse all Meetrix products at the Meetrix Solutions Page.
- You will see the product listing page. Click Get started.
Step 2: Accept the Agreements
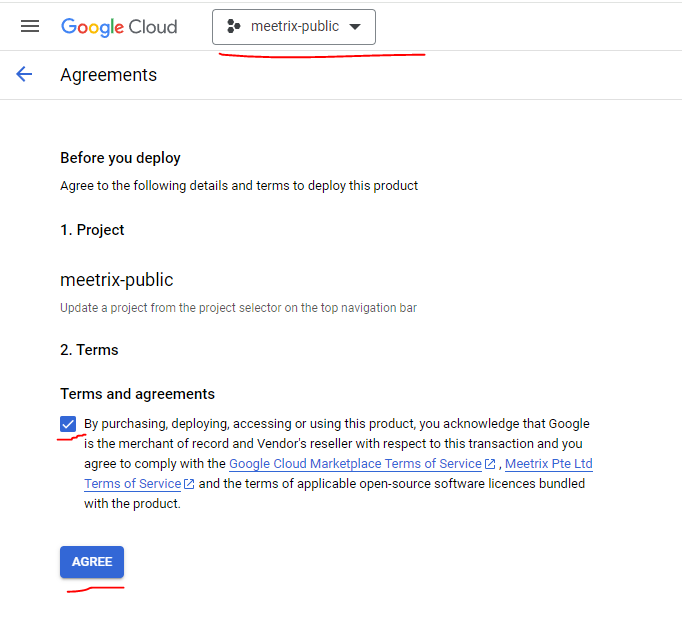
- Confirm your GCP project is selected.
- Tick the box under Terms and agreements to accept the Google Cloud Marketplace and Meetrix Pte Ltd terms of service.
- Click AGREE.
Free Trial
This product includes a 5-day free trial with up to USD 50.00 in licence fee credits. To activate it, tick I accept the solution trial Terms and Conditions on the launch screen before proceeding.

Trial note
Step 3: Configure the Deployment
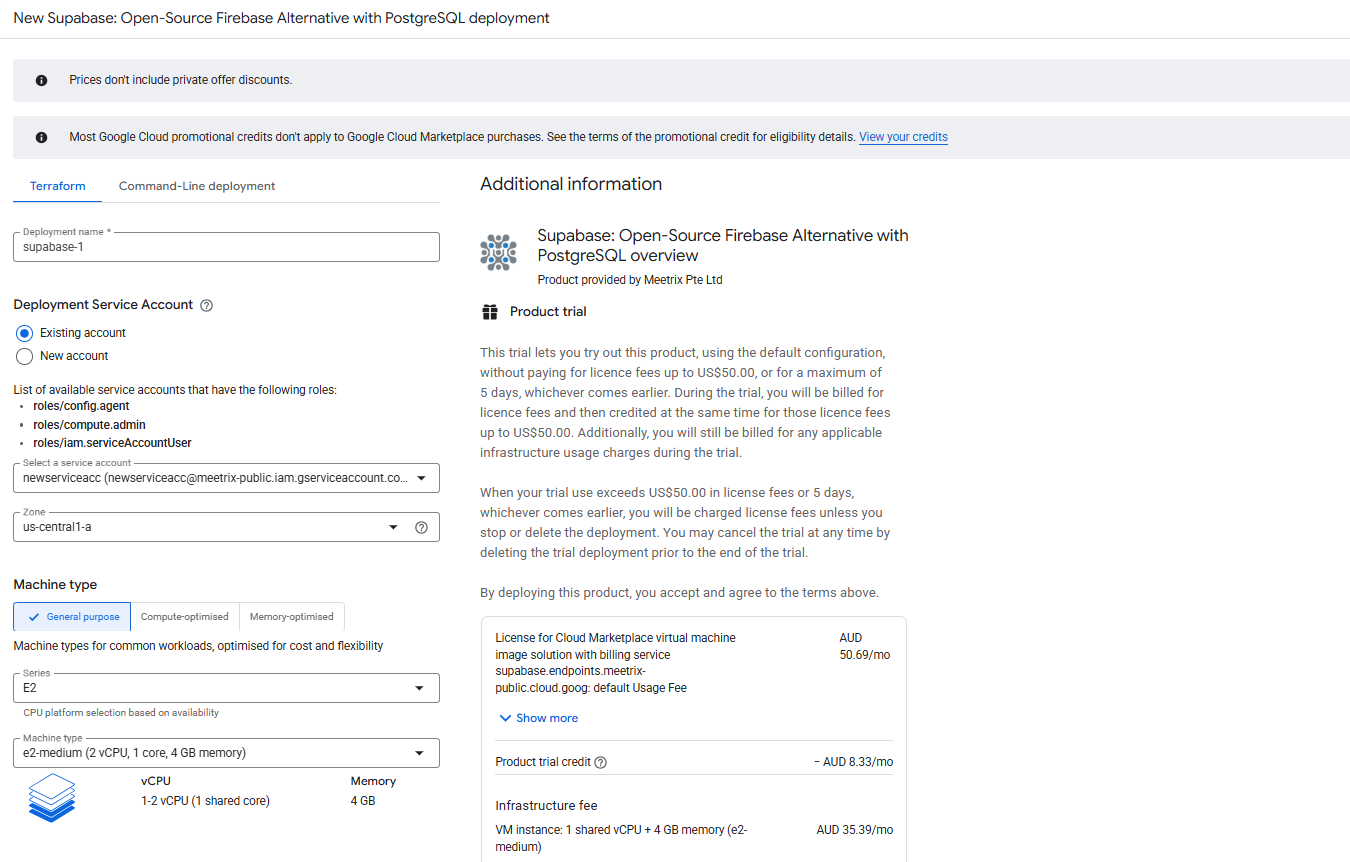
You will see the deployment configuration form, with Terraform and Command-Line deployment tabs. Fill in the fields across the following sections:
General
- Deployment name - A unique name for this deployment (e.g.
supabase-1). - Deployment Service Account - Use an existing service account with the
config.agent,compute.admin, andiam.serviceAccountUserroles, or create a new one. - Zone - Select the GCP zone closest to your users (e.g.
us-central1-a). - Machine type - Default
e2-medium(2 vCPU, 4 GB RAM) works for early development. Scale up if you expect heavier query load or a larger Postgres database.
Boot Disk
Keep the default persistent disk settings unless you expect a large database or heavy Storage usage, in which case increase the disk size accordingly.
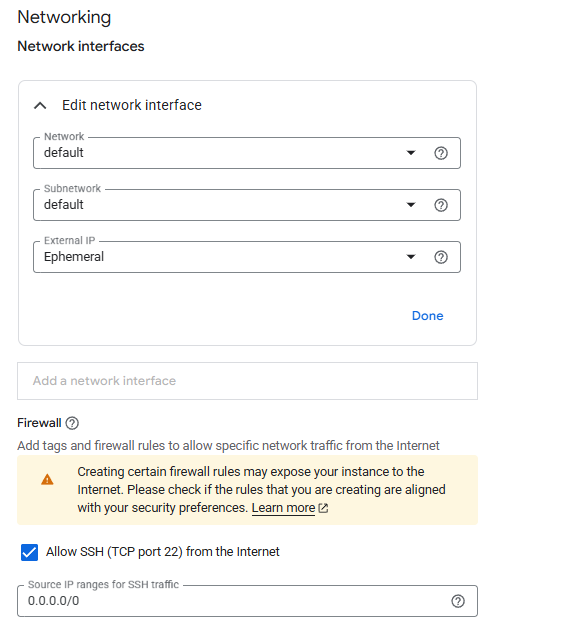
Networking
- Network / Subnetwork - Leave as
defaultunless you have a custom VPC. - External IP - Leave as
Ephemeralfor now. You will reserve a static IP before pointing DNS at the server. - Allow SSH (TCP port 22) - Enabled by default. Restrict the source IP range if you want to limit SSH access to specific IPs.
Application Settings
- Domain name - The domain for your Supabase instance (e.g.
backend.yourdomain.com). Point your DNS A record to the instance IP before or shortly after deploying. - Admin email - Used for SSL certificate registration via Let's Encrypt.
- Dashboard username / password - Credentials that protect the Studio dashboard behind HTTP Basic Auth, separate from any Supabase Auth users you create later.
Once the fields are filled in, follow the on-screen instructions in your chosen tab (Terraform or Command-Line deployment) to deploy, and wait a few minutes for the deployment to complete.
Reserve a Static IP
Do this before pointing DNS at the server
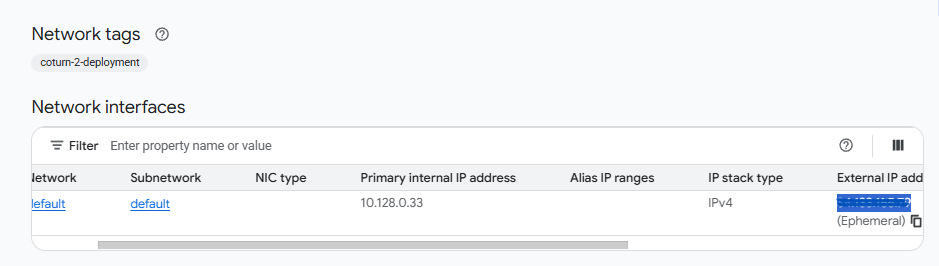
- Open the VM instance created by the deployment and note the External IP under Network interfaces - it is marked
(Ephemeral). - In the GCP console, go to VPC network → IP addresses, find that same address, and click Reserve Static Address (or promote it directly from the VM instance details page).
- Copy the reserved external IP - you will use it for your A record.
Point DNS to the Server
- Add an A record pointing your chosen domain (e.g.
backend.yourdomain.com) to the reserved static IP. - Wait for DNS propagation before proceeding (typically a few minutes to 1 hour).
SSH into the Server
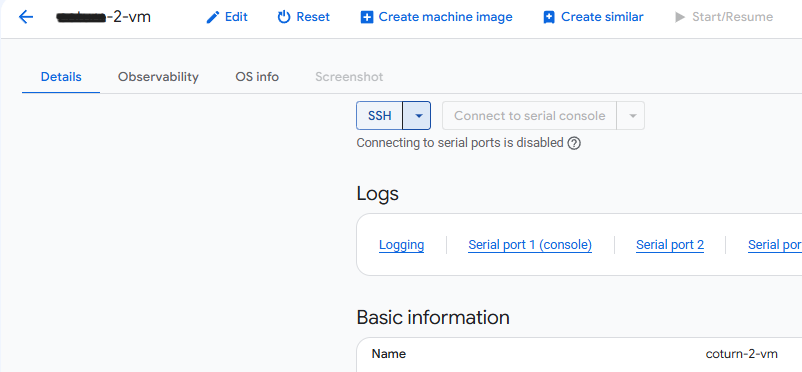
- Go to the VM instance page in the GCP console.
- Click SSH to open a browser-based terminal and authorize access.
Access Supabase
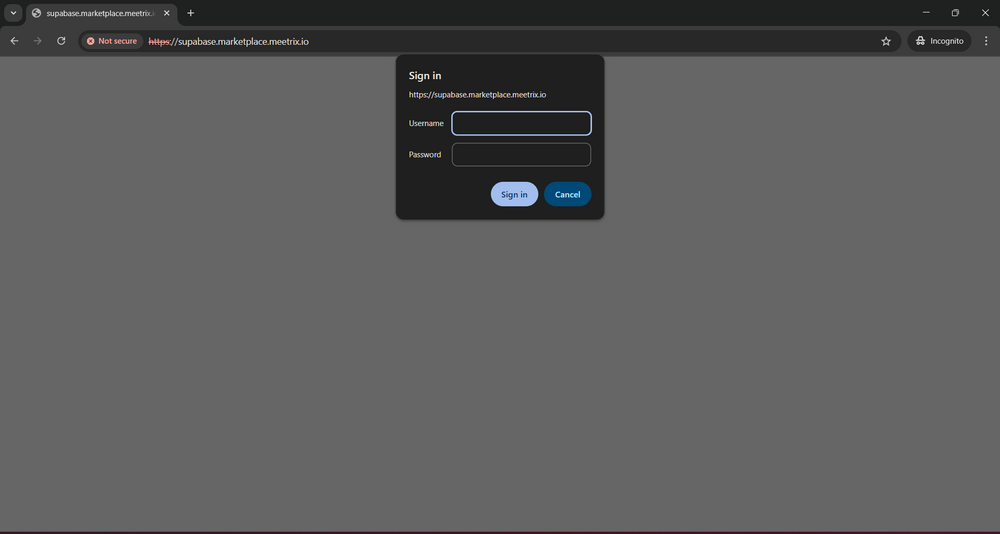
Once DNS has propagated and the instance has issued its SSL certificate, open your domain in the browser. You will be prompted to sign in with the dashboard username and password you set during deployment.
502 Bad Gateway or certificate warning?
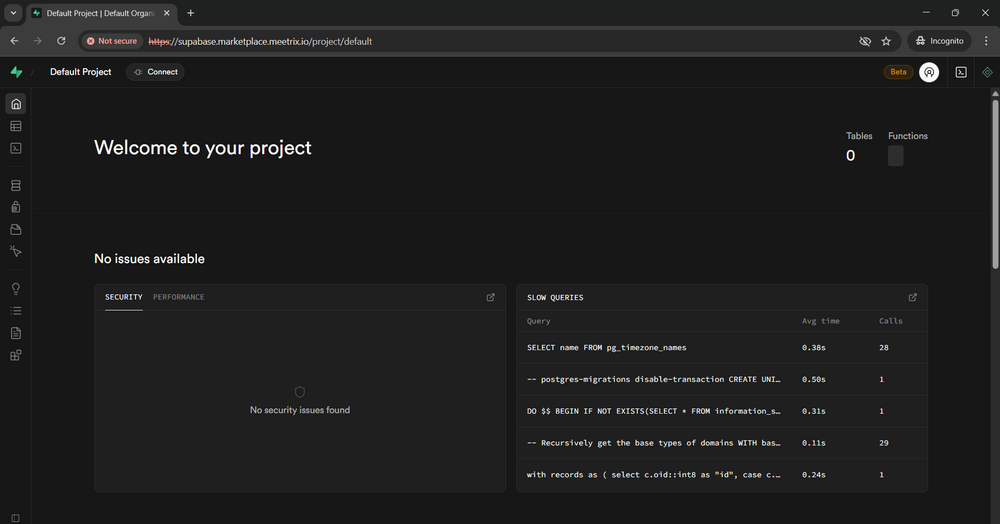
After signing in, you land on the Studio home screen for your default project, showing table and function counts, security and performance checks, and any slow queries.
Manage the Server
Check Running Containers
sudo docker psShut Down the VM
To stop the VM without deleting it, go to Compute Engine → VM Instances in the GCP console, select your instance, and click Stop.
Delete the Deployment
To fully remove the deployment and stop all billing:
- Go to Solution deployments in the GCP console.
- Find your Supabase deployment.
- Click Delete to remove all associated resources.
Troubleshoot
Check the Service Logs
Supabase runs on Docker. Find the running containers and check their logs:
sudo docker ps
sudo docker logs <container_id>
Instance Storage Full
Check disk usage on the server:
df -hIf the root volume is between 90-100%, resize the persistent disk in the GCP console and reboot the instance.
Conclusion
The Meetrix Supabase developer guide helps you get a self-hosted backend running on GCP without a weekend lost to Docker Compose files and certificate renewals. Reserve a static IP, point your domain at it, sign in to Studio, and you have a real PostgreSQL-backed alternative to Firebase running on infrastructure you control.
Technical Support
If you run into any issues, our support team is here to help. Reach out to us at support@meetrix.io and we will respond within 12 hours.
Frequently Asked Questions
What is Supabase?
Supabase is an open-source backend platform built on PostgreSQL. It bundles a database, authentication, file storage, realtime subscriptions, and auto-generated REST and GraphQL APIs into one project, which is why it's often described as the open-source Firebase alternative.
What are the prerequisites for deploying Supabase on GCP with this guide?
You need basic knowledge of Google Cloud Platform, an active Google account with a GCP project and billing enabled, and a domain name you can manage DNS records for, since Supabase needs a real domain for SSL to issue correctly.
Do I need a static IP for Supabase on GCP?
It is strongly recommended if you plan to point a domain at the instance. An ephemeral IP can change if the VM restarts, which breaks your A record and the SSL certificate tied to it.
Why can't I access Studio right after deploying?
SSL and the Supabase stack both need a moment to finish setting up. If you see a "502 Bad Gateway" error or a certificate warning immediately after deployment, wait about 5 minutes and refresh.
Is the Supabase Studio dashboard protected by a password?
Yes. Studio sits behind HTTP Basic Auth using the dashboard username and password you set during deployment, in addition to any user accounts you create through Supabase Auth itself.
How do I handle upgrades?
When a new version is available on GCP Marketplace, deploy a fresh instance with the updated image and migrate your database. Back up your PostgreSQL data before decommissioning the old instance.
How do I get technical support?
You can reach out to Meetrix Support at support@meetrix.io for assistance with your Supabase deployment on GCP.
Deploy Supabase on GCP in Minutes
Launch a production-ready, self-hosted Supabase backend on Google Cloud with a pre-configured Meetrix image.
Get Started on GCP Marketplace