Setting Billing Alert In AWS
AWS offers numerous services and resources. It has so many features available to make it a complete cloud platform. But with such diverse options, there are many chances to make a small mistake and generate unexpected bills. There is one way to protect ourselves from this, using cloudwatch and setting up billing alarm.
if you are an expert developer, administrator or just starting with AWS, you should always keep eye on your AWS usage and its bills.
Steps for creating billing alarms in AWS
Step 1:
Go to Cloudwatch and Check current AWS Region
For setting up billing alerts, first go to cloudwatch from your AWS console select you timezone to N. Verginia region irrespective of region you use to set up AWS resources.
Step2:
Creating AWS Billing Alarm
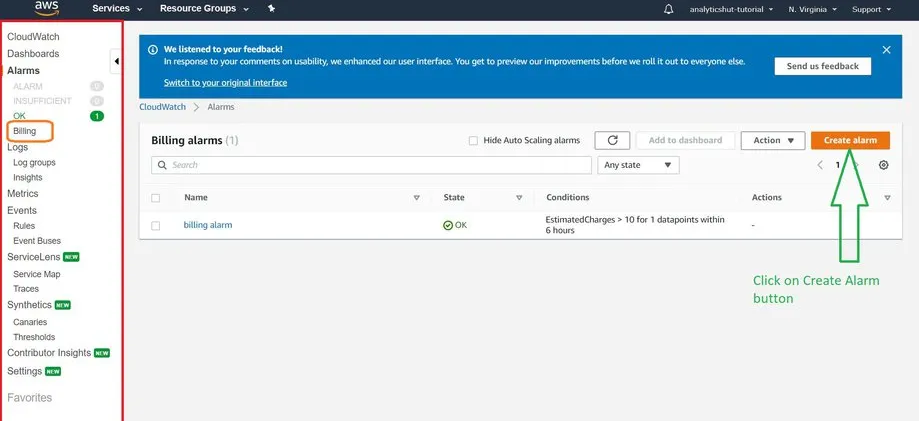
Once you finished with the setting region, click on alarms under Alarms in the left pane on Cloudwatch dashboard. Next, click on "Create alarm" button which should be on the right side as shown in below image:
Step 3:
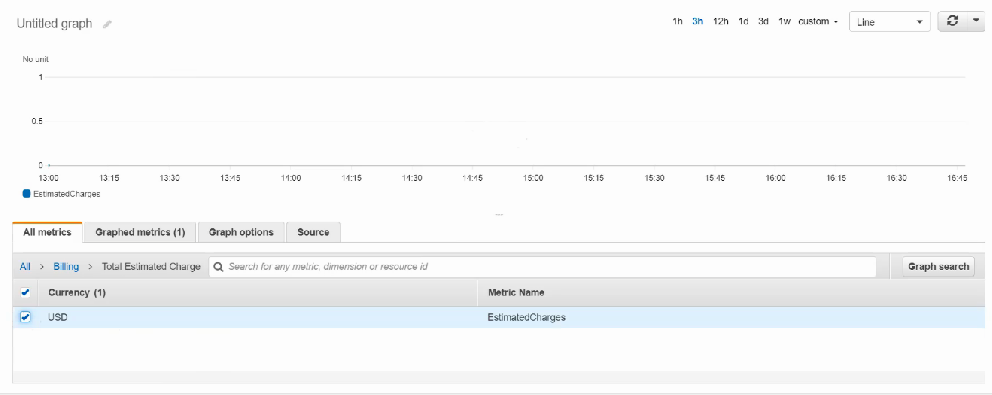
Selecting Metric
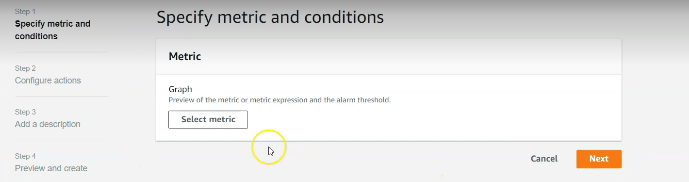
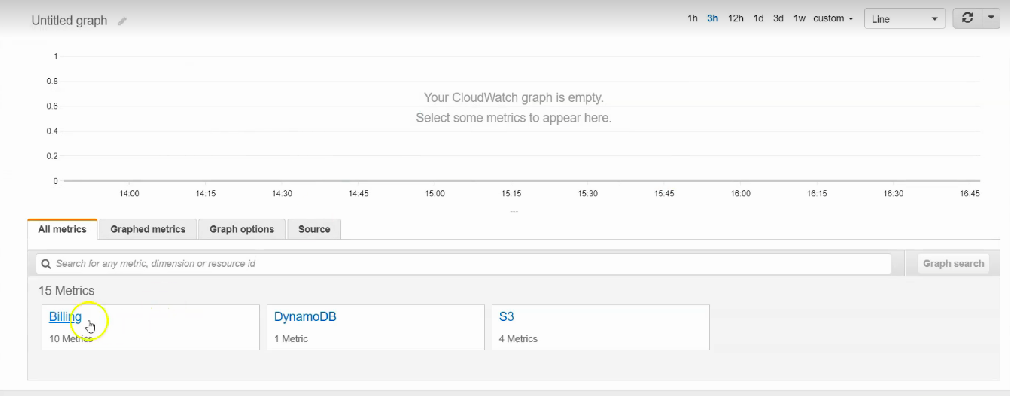
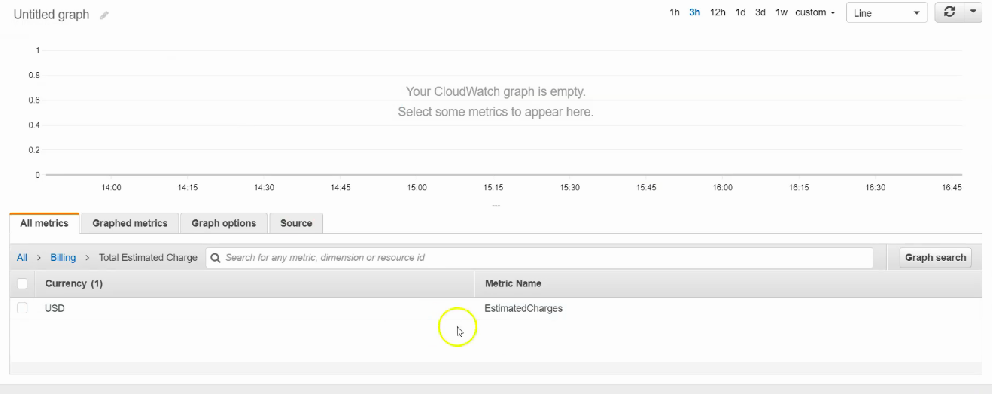
Next, Select metric button then find Billing in metrics list and click on it and Then choose Total Estimated Charges finally choose the currency. Then click on "Select matric" button as shown in below images:
Step 4:
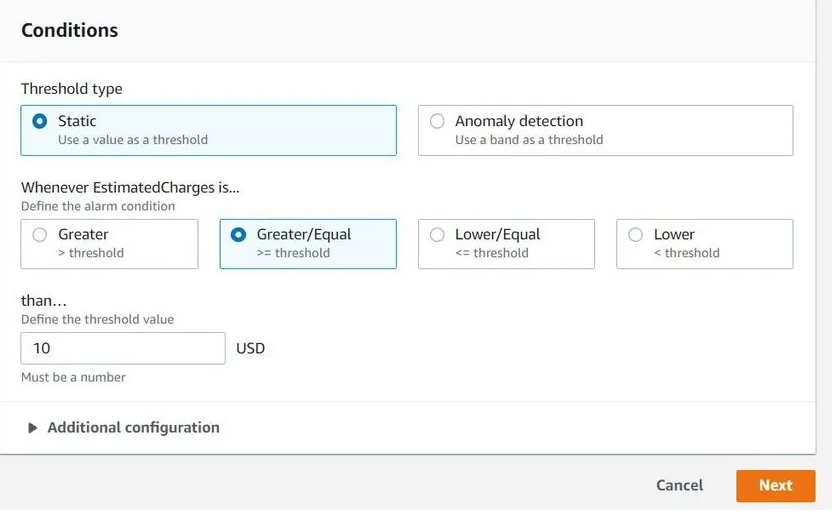
Setting up Conditions
Choose conditions that will trigger alarm. Select the threshold type as Static. Then for an alarm condition, we will choose, "Greater/Equal". Finally, we want to enter the threshold value for our bill. This totally depends on your usage of AWS. In this case, I am keeping it at $10. This means once we have bills greater than or equal to $10, we will get alert from AWS.
Step 5:
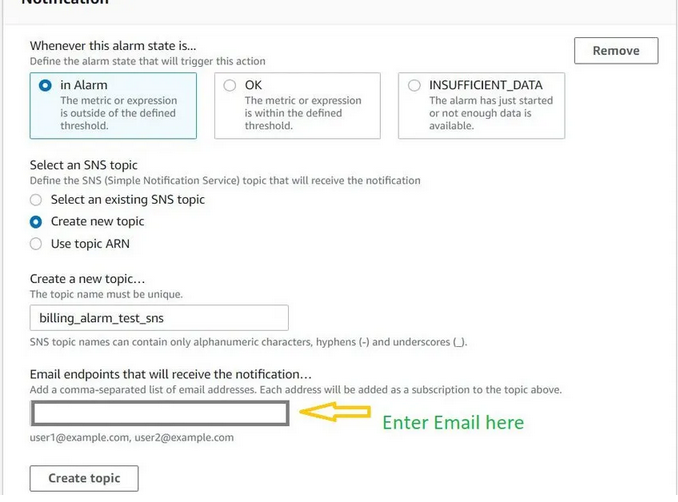
Creating SNS Topic
we need to create SNS (Simple Notification Service) topic to notify when this alarm is triggered. And this SNS topic, in turn, will send us an email alert for this alarm as shown below in images:
Step 6:
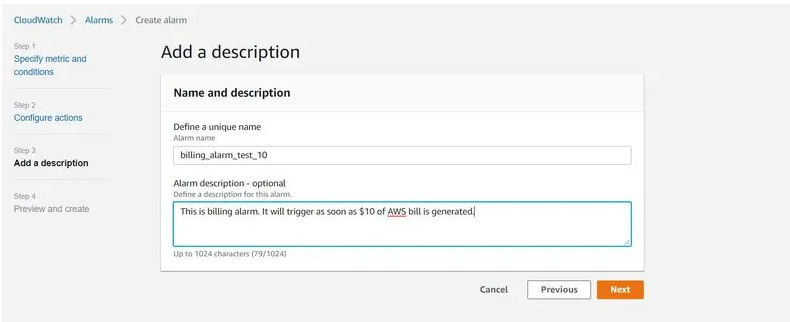
Giving Name to Alarm
Give the appropriate name and description for this alarm. Then click on "Next" button
Step 7:
Verify details And Create Alarm
You need to verify all details and click on "Create alarm" button at the bottom of the screen. We need to verify all the emails that we have entered. AWS will send a verification link to all of those emails. Unless you verify, you will not receive alerts on that email.
Step 8:
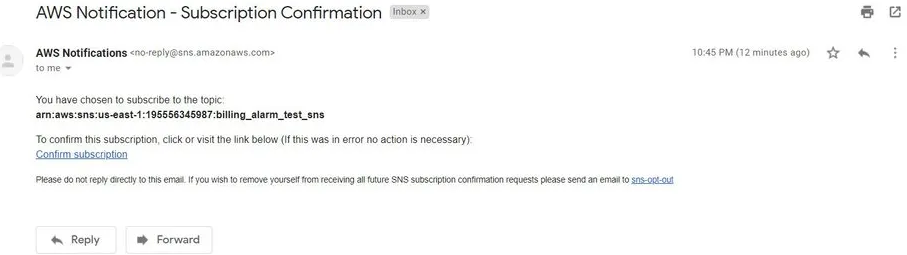
Verifying email
Check inbox for an email that you have entered in the previous step. You should see an email from AWS. Click on "Confirm subscription" link.
Step 9:
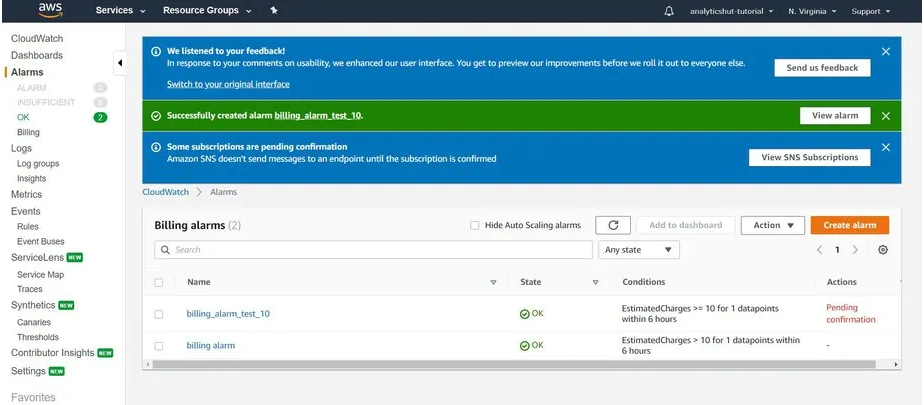
Varying Alarm status
Check there is no more pending confirmation action remaining in front of our alarm. This should complete set up for creating a billing alarm.
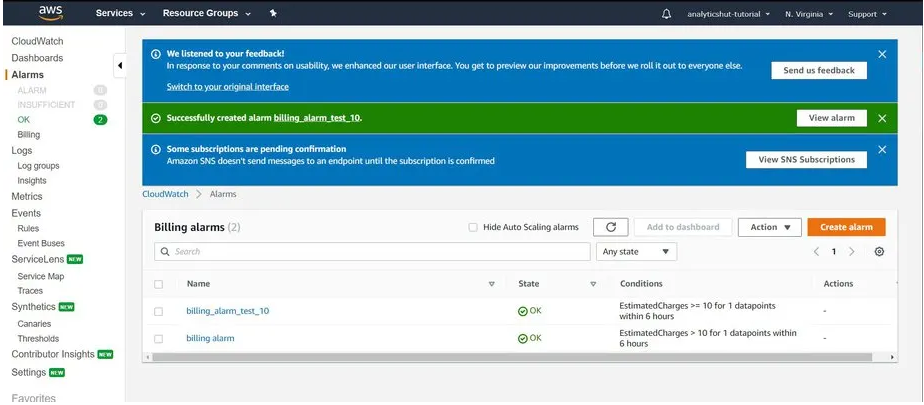
Now, Billing alarm is set up and ready
Adding card and pay bill of AWS
Step1 :
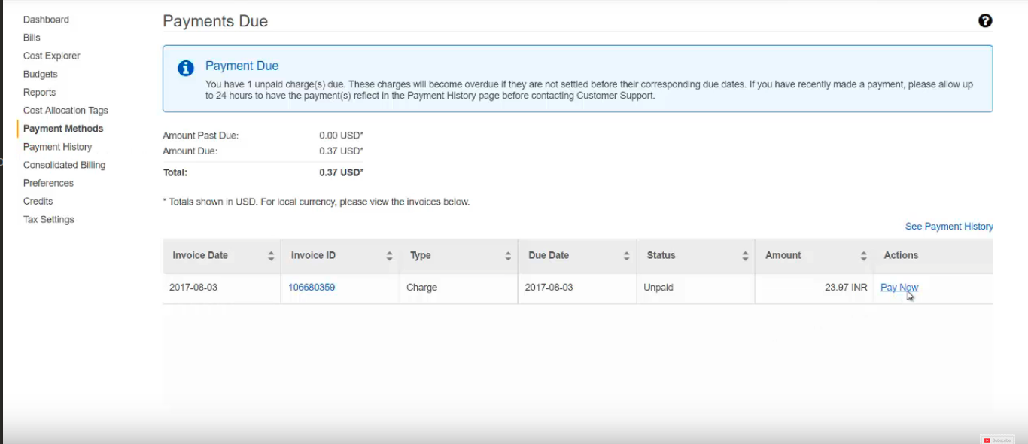
In the billing dashboard, first select payment history as shown below:

Then, Select to Pay Now in the right buttom corner as shown in the below image:
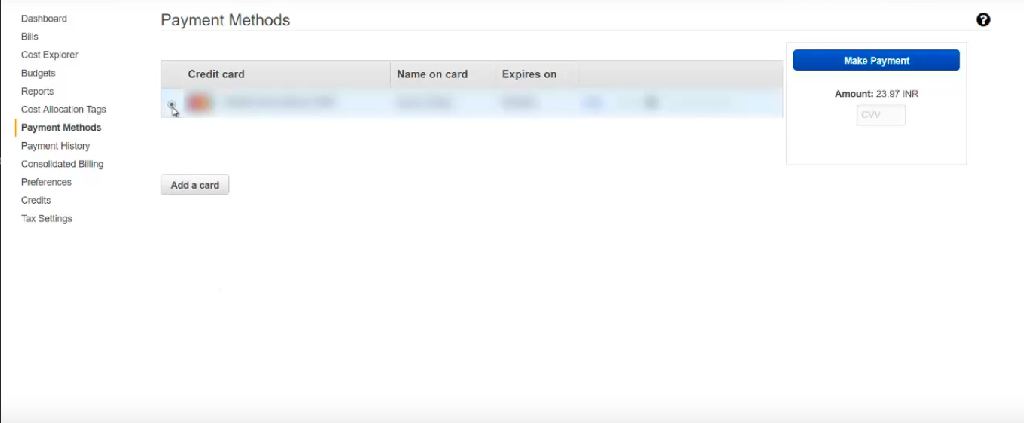
Then, click your credit card or you can add your card for payment as shown below image:
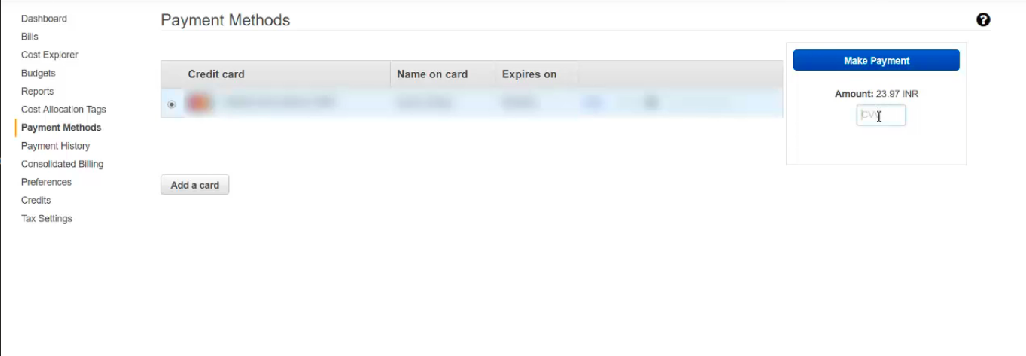
Then, add CVV number of your card in the right top corner as shown below:
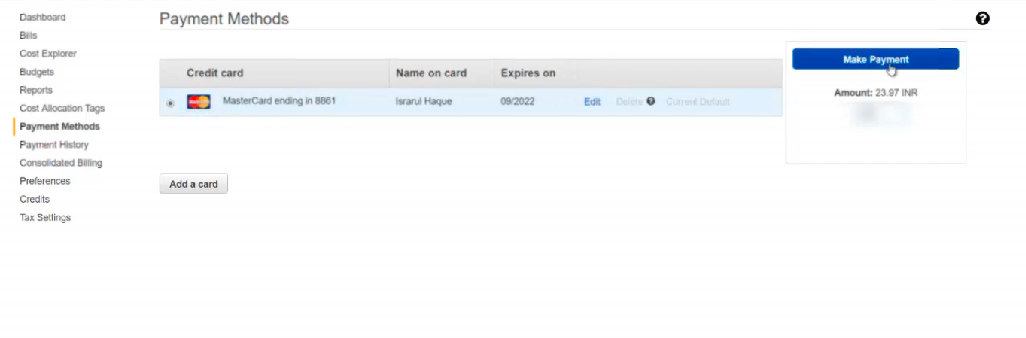
After, all the process done click of Make payment for billing AWS bill.
Looking for commercial support for Jitsi Meet ? Please contact us via hello@meetrix.io
Leave a Comment