
Welcome to the Meetrix Milvus developer guide for Google Cloud Platform! Milvus is the open-source vector database behind many production RAG pipelines, semantic search engines, and recommendation systems. With the Meetrix pre-configured GCP image, you can deploy a production-ready, self-hosted Milvus instance in minutes, without managing the underlying installation and dependencies yourself.
This guide walks you through finding the product on GCP Marketplace, configuring the deployment, verifying it is running, and connecting to it with the pymilvus SDK.
Prerequisites
Before you begin, make sure you have the following:
- Basic Google Cloud Platform knowledge.
- An active Google account with a GCP project and billing enabled.
- Sufficient Compute Engine CPU quota in your target region for the machine type you plan to use.
Launch the Product
Step 1: Find the Product
- Log in to your Google account.
- Go directly to the product page: Milvus Vector Database for AI, RAG & Semantic Search on GCP Marketplace
- You can also browse all Meetrix products at the Meetrix Solutions Page.
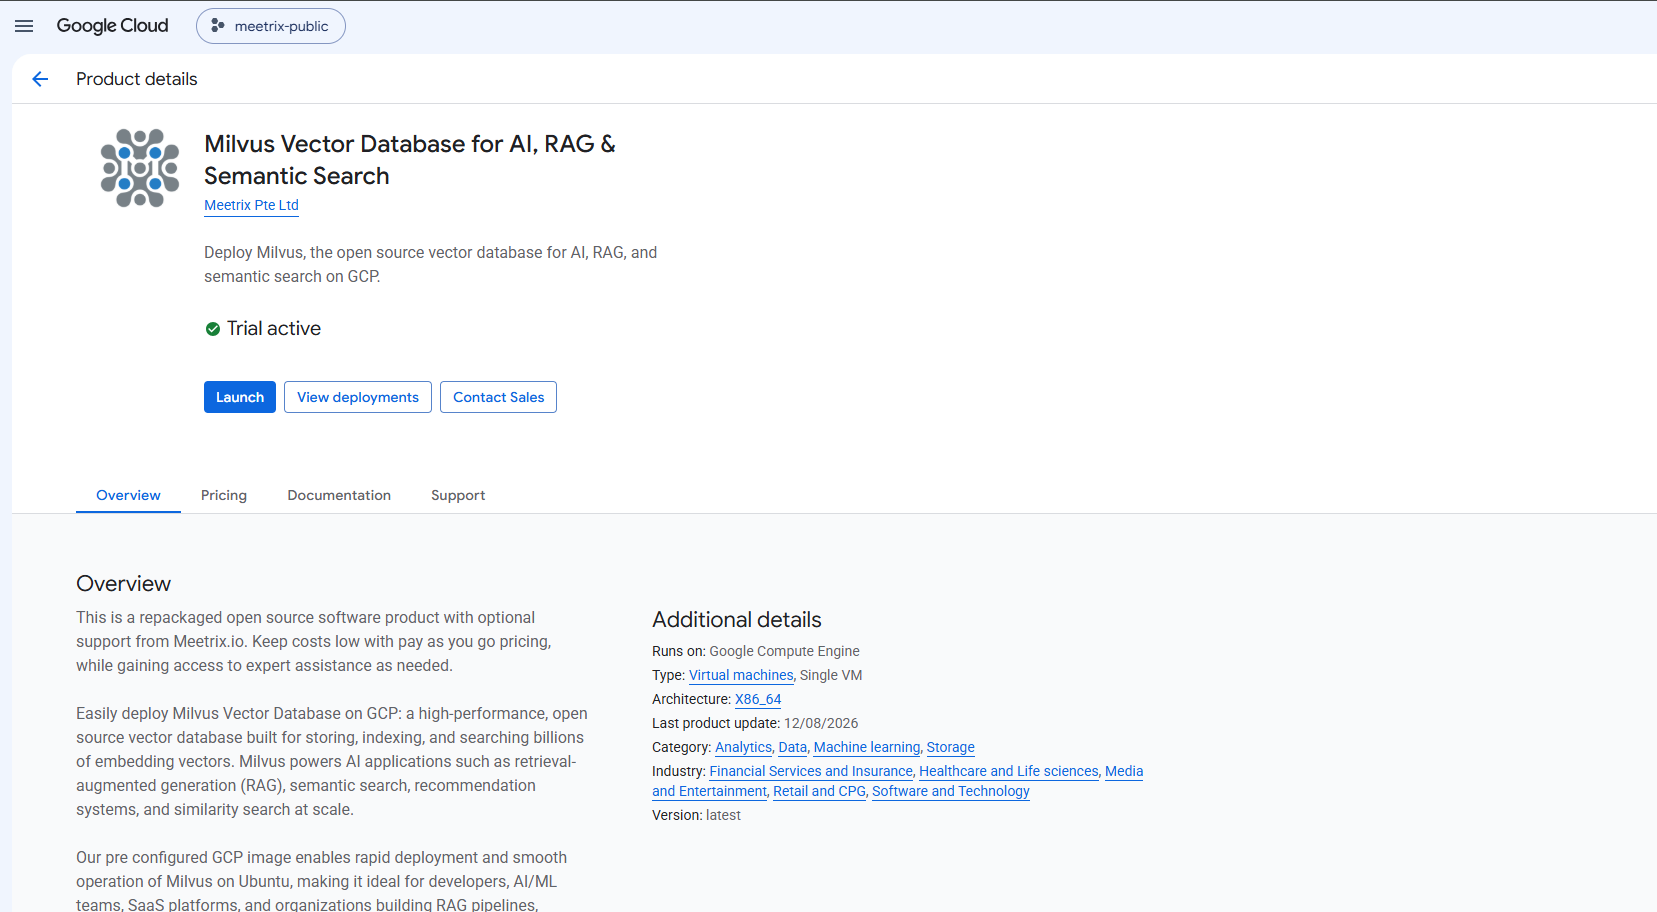
Step 2: Launch the Product
- Select your GCP project from the project selector at the top.
- Click the Launch button.
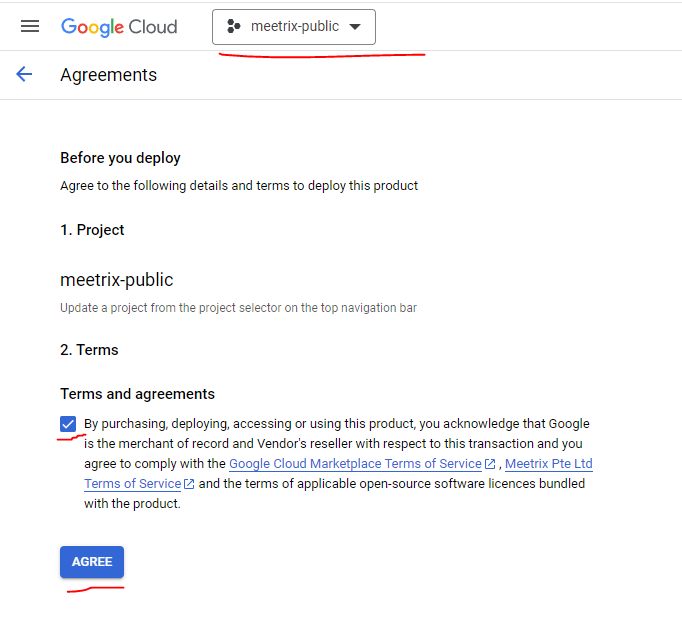
- Review the terms and agreements, tick the acknowledgement checkbox, and click AGREE.
Free Trial
This product includes a 5-day free trial with up to USD 50.00 in licence fee credits. To activate it, tick I accept the solution trial Terms and Conditions before proceeding.

Trial note
Step 3: Configure the Deployment
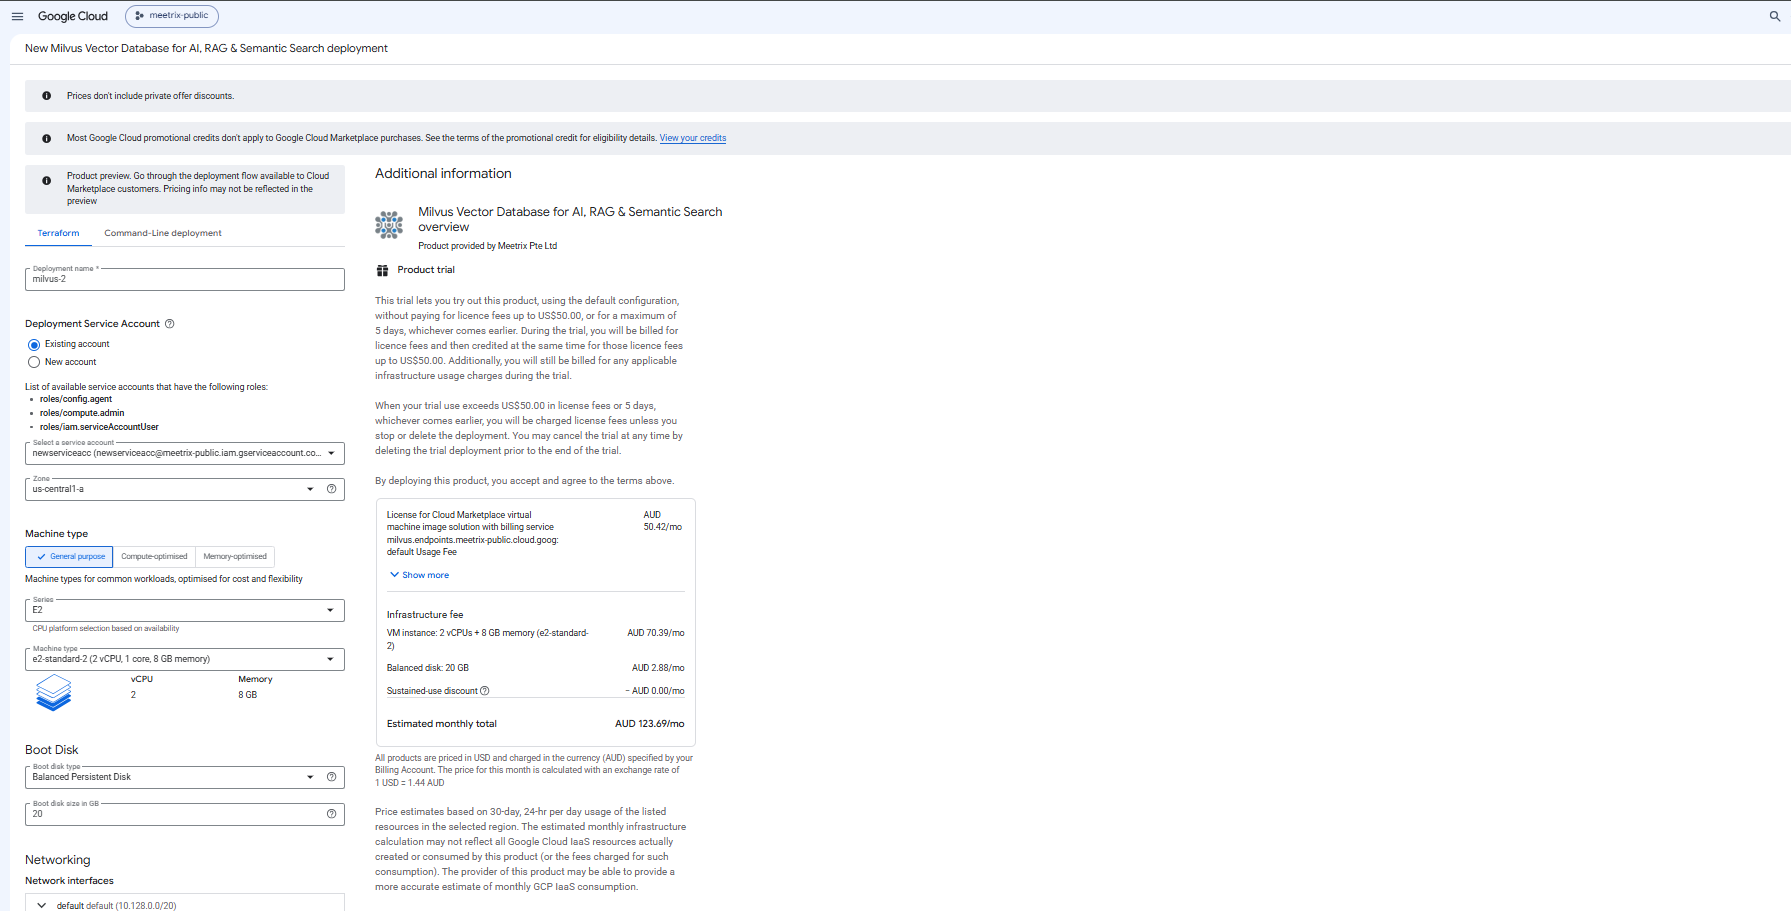
You will see the deployment configuration form. Fill in the fields across the following sections:
General
- Deployment name - A unique name for this deployment (a default is pre-filled).
- Deployment Service Account - Select an existing service account that has the
roles/config.agent,roles/compute.admin, androles/iam.serviceAccountUserroles, or let GCP create a new one for you. - Zone - Select the GCP zone closest to your users (for example
us-central1-a).
Machine Type
- Series - Default
E2under the General purpose tab. - Machine type - Default
e2-standard-2(2 vCPUs, 8 GB memory). Choose a larger type for heavier workloads.
Boot Disk
- Boot disk type - Default
Balanced Persistent Diskis recommended. - Boot disk size - Default 20 GB is sufficient for most setups.
GCP shows an estimated monthly cost, made up of the Meetrix licence fee and the underlying infrastructure fee, based on your selected machine type and disk size before you deploy.
Step 4: Configure Networking
- Network and Subnetwork - Leave as
defaultunless you have a custom VPC. - External IP - Leave as
Ephemeral. SelectNoneonly if you do not need public internet access. - Allow SSH (TCP port 22) from the Internet - Enabled by default. Restrict the source IP range if you want to limit SSH access to specific IPs.
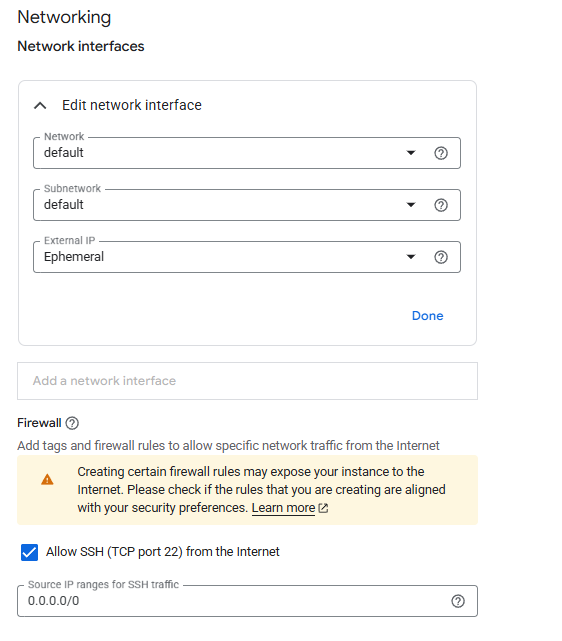
Firewall for the Milvus port
Click DEPLOY and wait a few minutes for the deployment to complete.
Access the Deployment
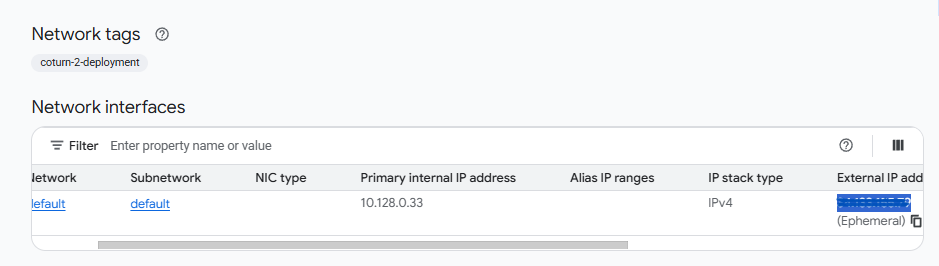
Step 1: Get the External IP
- Once deployment is complete, open the VM instance from the deployment details.
- Copy the External IP from the Network interfaces section.
Step 2: Verify Milvus Is Running
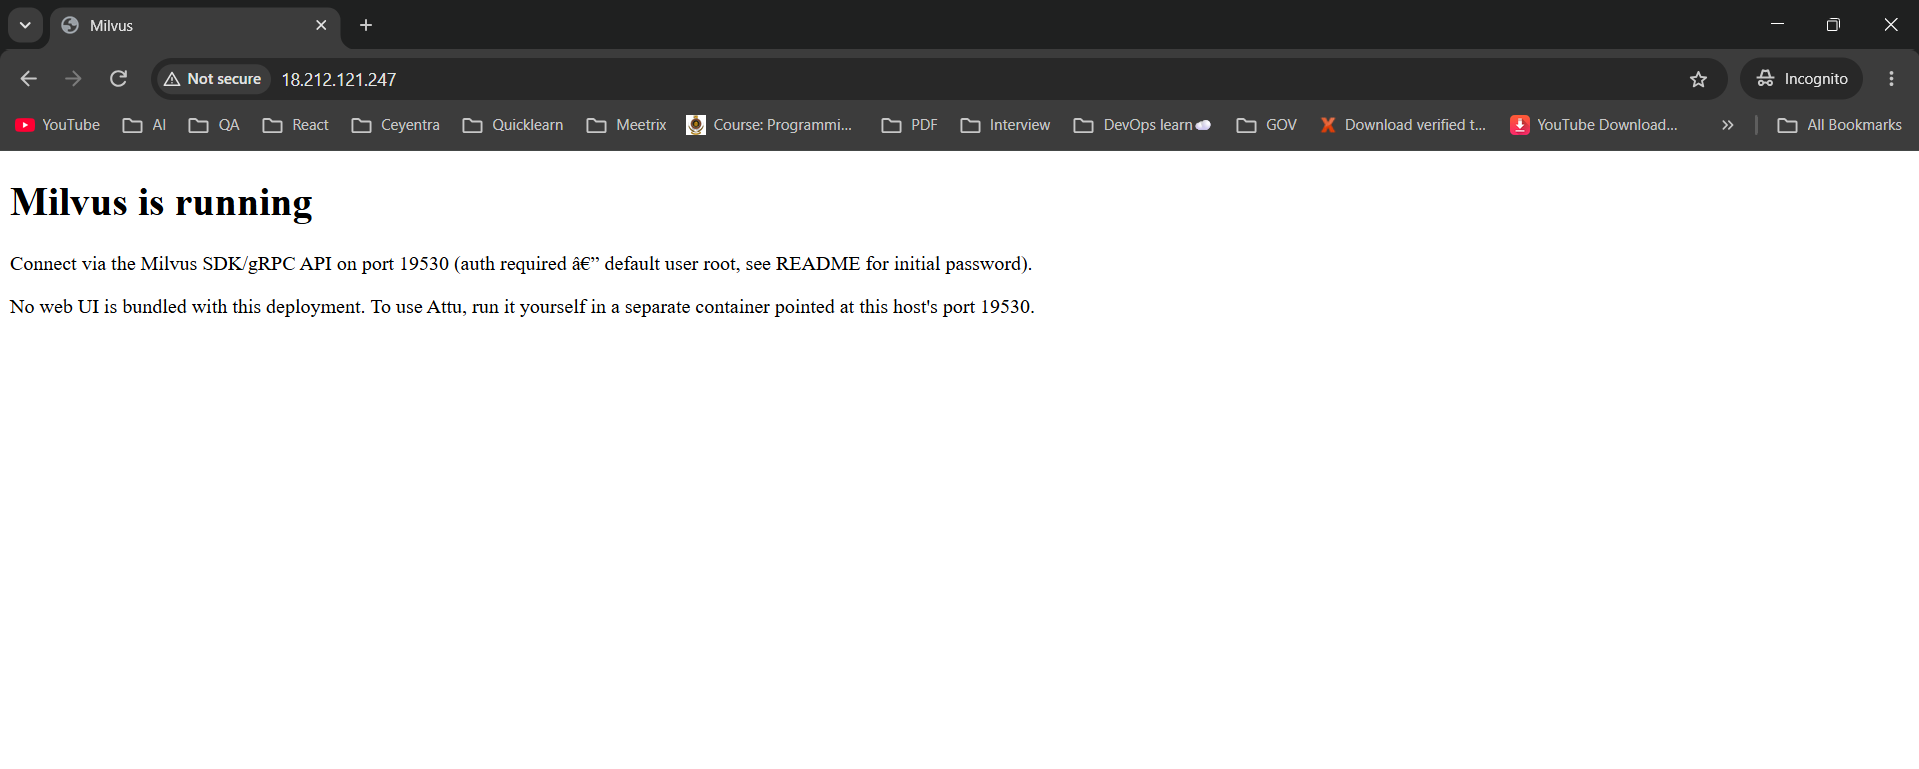
Visit http://<External IP> in your browser. You should see a confirmation page.
Note
Connect to Milvus
Milvus listens on port 19530 and ships with a default admin user, so you can connect immediately using the pymilvus SDK. No web UI is bundled with this deployment - if you want one, run Attu yourself in a separate container pointed at this host's port 19530.
pip install pymilvusfrom pymilvus import connections, utility
connections.connect(
host="<External IP address>",
port="19530",
user="root",
password="Milvus"
)
print("Connected!")
print(utility.list_collections())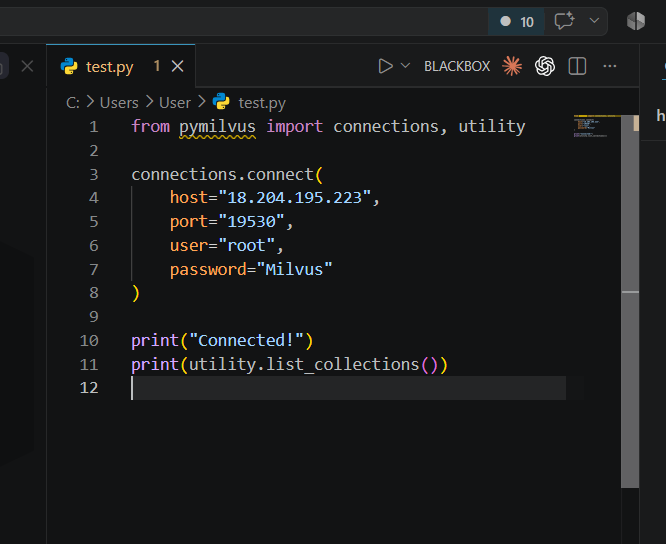
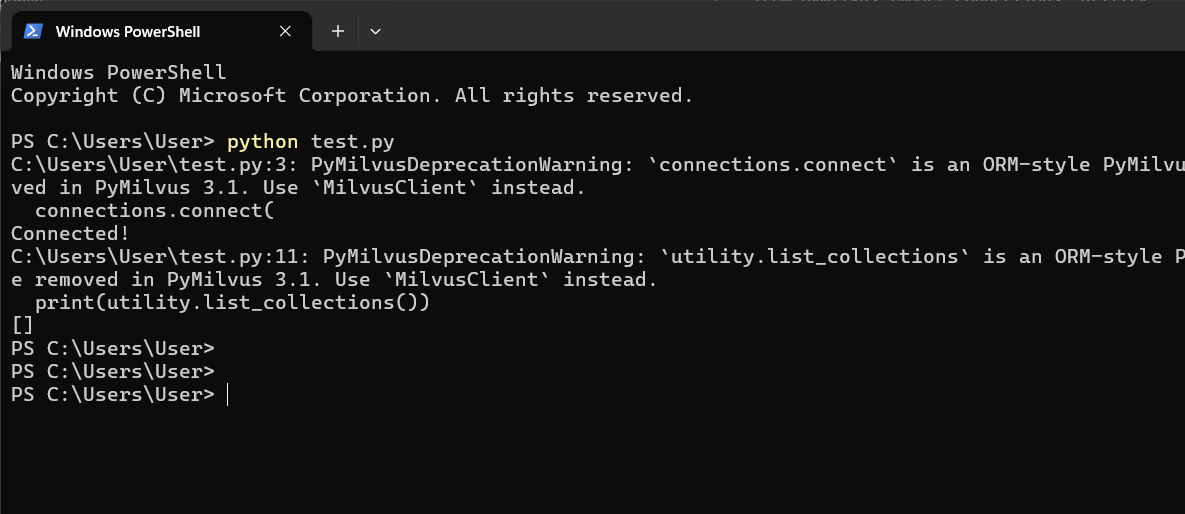
Running the script confirms the connection and lists any existing collections (empty on a fresh instance):
Deprecation notice
connections.connect and utility.list_collections as deprecated ORM-style calls in favor of MilvusClient. The script above still works, but consider migrating to MilvusClient for new projects.
Security
Manage the Deployment
Stop the VM
To stop the VM without deleting it, go to Compute Engine → VM Instances in the GCP console, select your instance, and click Stop. You can restart it later with your data intact.
Delete the Deployment
To fully remove the deployment and stop all billing:
- Go to Solution deployments in the GCP console.
- Find your Milvus deployment.
- Click Delete to remove all associated resources.
Back up any collections or data you need before deleting the deployment.
Upgrades
When a new image version is available in the GCP Marketplace, back up your Milvus data, delete the previous deployment, and relaunch with the new version.
Troubleshoot
Check Server Logs
Open an SSH session to the instance from the GCP console, then check the running containers and their logs:
sudo docker ps

sudo docker logs <container-id-prefix>
Quota or Capacity Errors
GCP enforces regional CPU quotas. If you hit a quota error when deploying, request a Compute Engine API CPU quota increase for that region, or choose a different region or zone with available capacity.
Connection Issues
If pymilvus cannot connect, confirm a firewall rule in VPC Network → Firewall allows inbound TCP traffic on port 19530 from your IP address.
Disk Space
If Milvus becomes unresponsive, check whether the boot disk is full:
df -hIf the root volume is between 90-100% full, resize the persistent disk in the GCP console, then reboot the instance and restart the service.
Conclusion
The Meetrix Milvus Deployment Guide helps you get a self-hosted vector database running on your own GCP project in minutes. Whether you're building a RAG pipeline, a semantic search feature, or a recommendation engine, this guide gives you a secure, scalable starting point.
Technical Support
If you run into any issues, our support team is here to help. Reach out to us at support@meetrix.io and we will respond within 12 hours.
Frequently Asked Questions
What is Milvus?
Milvus is a high-performance, open-source vector database purpose-built for storing, indexing, and searching massive-scale embedding vectors. It powers AI applications such as retrieval-augmented generation (RAG), semantic search, recommendation systems, and image or video similarity search.
What are the prerequisites for installing Milvus on GCP?
You need basic knowledge of Google Cloud Platform, an active Google account with a GCP project and billing enabled, and sufficient Compute Engine CPU quota in your target region to launch the required machine type.
Which machine type is recommended?
e2-standard-2 (2 vCPUs, 8 GB memory) is the vendor-recommended default in the deployment form. Choose a larger General purpose or Compute-optimised machine type for heavier workloads.
How do I connect to Milvus after launching it?
Use the pymilvus SDK to connect to the instance's public IP address on port 19530 with the default root credentials, or point your own client at that endpoint.
What is the default username and password?
The Milvus GCP image ships with the default admin user root and password Milvus. Change this password immediately after your first login for production use.
How do I handle upgrades?
When a new image version is available in the GCP Marketplace, back up your Milvus data, delete the previous deployment, and relaunch with the new version.
How do I get technical support?
Reach out to Meetrix Support at support@meetrix.io for assistance with Milvus issues.
Deploy Milvus Vector Database on GCP in Minutes
Launch a production-ready, self-hosted Milvus vector database on Google Cloud with a pre-configured Meetrix image.
Get Started on GCP Marketplace