Meetrix Easy Diffusion: Step-by-Step Technical Guide

Introduction
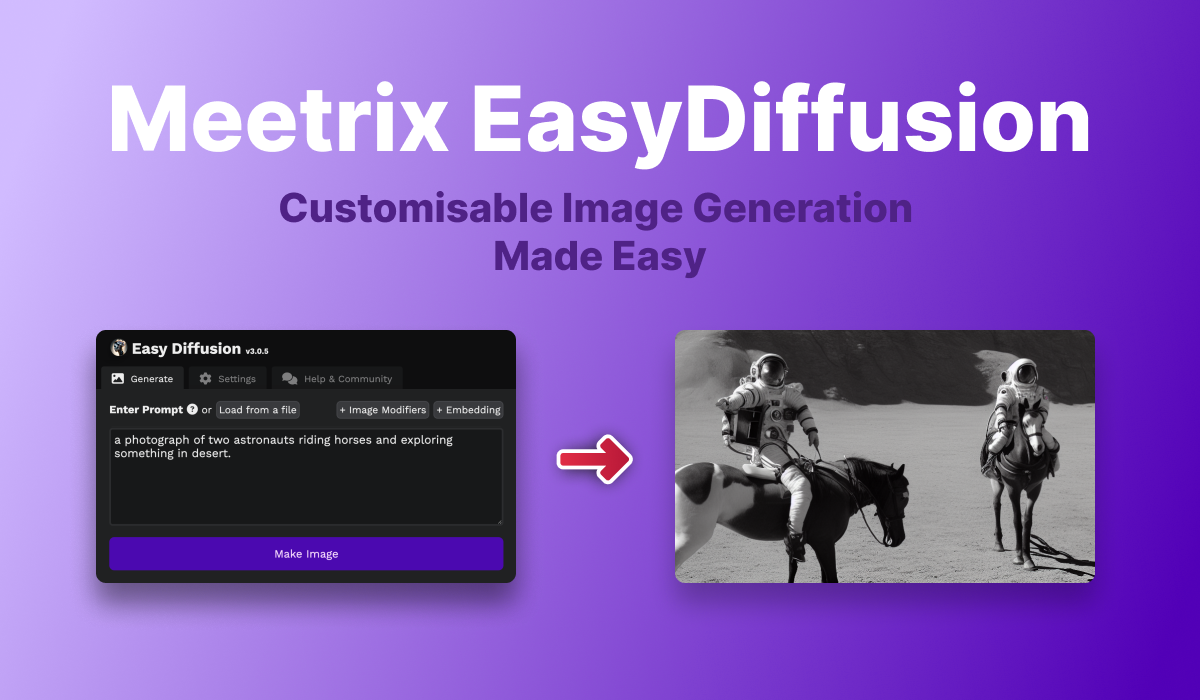
Welcome to Easy Diffusion, your AI-powered image generation solution. As a developer, you can easily integrate AI-generated images into your projects using our simple API. Let's get started!
Product Features:
- Text to Image Generation: Generate images by providing prompts and customizing parameters such as width, height, output format, and more.
- Image to Image Generation: Easily transform one image into another with adjustable parameters for versatile image manipulation.
- Stable Diffusion Engine: Powered by the Stable Diffusion engine, EasyDiffusion produces high-quality and coherent images with impressive results.
- Effortless Setup: The setup process is streamlined, making it easy for users to get started quickly.
Video
Blog
 Kelum Sampath
Installation Guide
Follow this guide to set up EasyDiffusion from AWS Marketplace.
Prerequisites
Before you get started with the EasyDiffusion AMI, ensure you have the following prerequisites:
- Basic knowledge of AWS services, including EC2 instances and CloudFormation.
- An active AWS account with appropriate permissions.
- Enough vCPU limit to create instances
(Follow https://meetrix.io/articles/how-to-increase-aws-quota/ blog to ensure this)
Subscribe to EasyDiffusion
- Visit the EasyDiffusion product page on AWS Marketplace.
- Click the "Continue to Subscribe" button and review the terms of use.
- Click "Accept Terms" to subscribe to EasyDiffusion.
Launch EasyDiffusion
- After subscribing, click "Continue to Configuration" on the AWS Marketplace page.
- Choose your preferred region for deployment.
- Select the desired instance type and configure any additional settings as needed.
- Click "Continue to Launch" and review the launch details.
- Select “Launch from website” in “Choose Action“ dropdown and provide the necessary settings mentioned below.
- EC2 instance type - select the desired instance (recommended: g4dn.xlarge)
- VPC settings - select the default vpc (the shortest one)
- Subnet settings - select the desired subnet or create one
- Security group settings
To set security group settings click “Create New Based On Seller Settings” button.
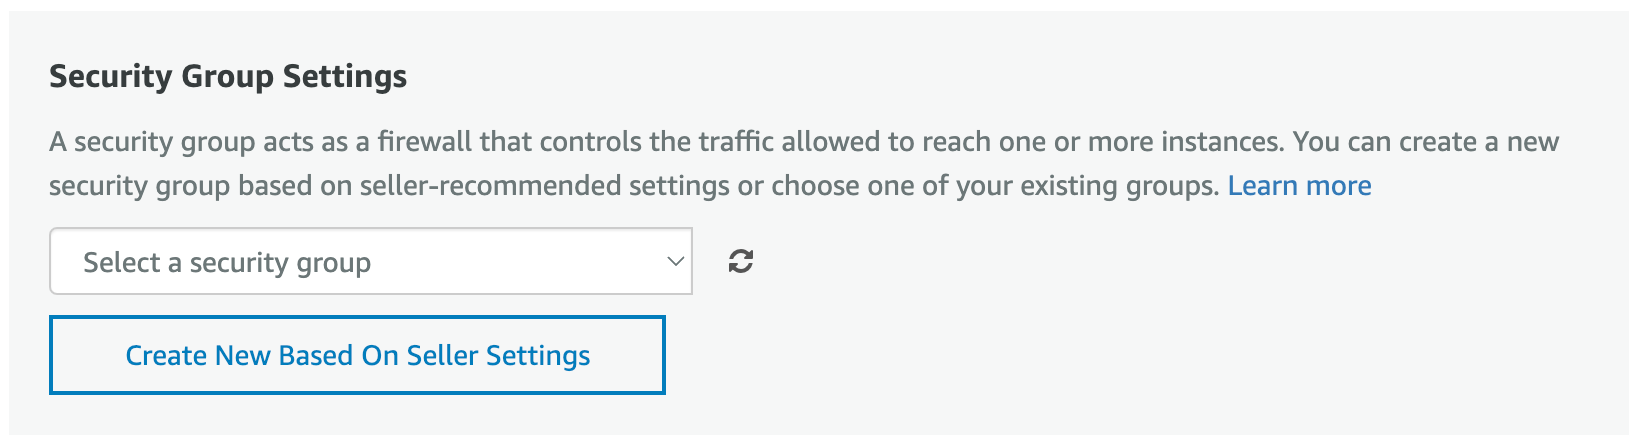
It will show the “Create new based on seller settings”
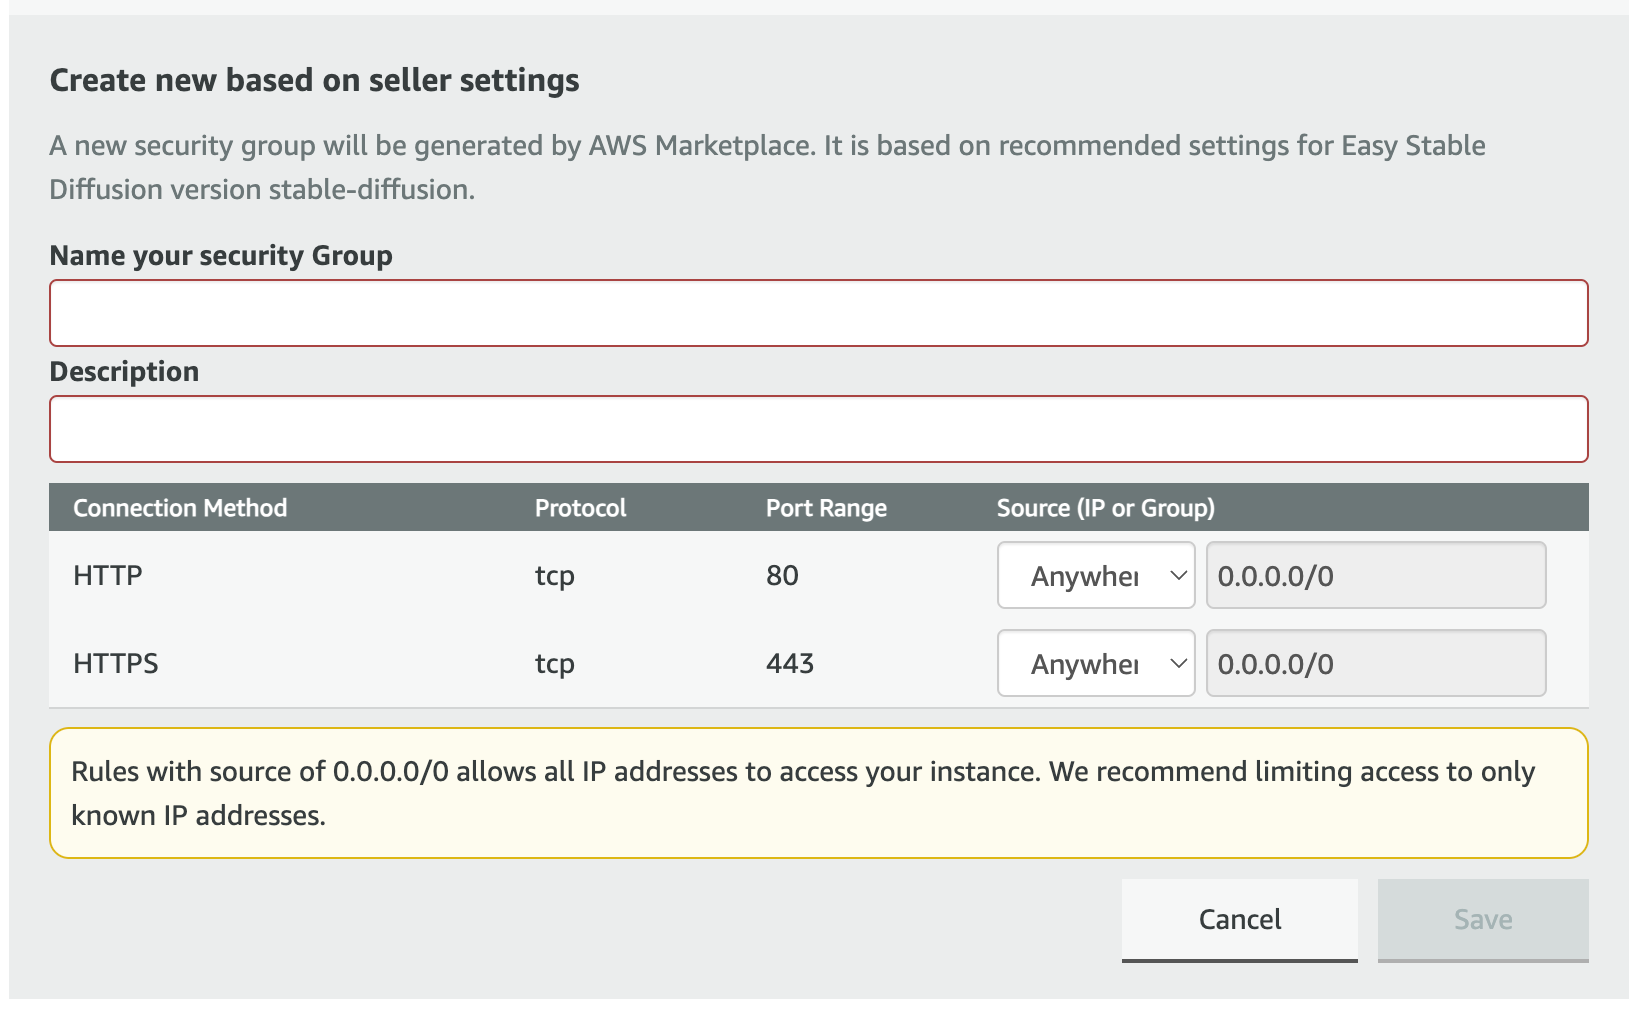
Provide a security group name and description, and leave the IP to "Anywhere" as shown in the image above, and then click 'Save.
- Key pair settings - select your key pair
After setting up the above settings, click “Launch”.
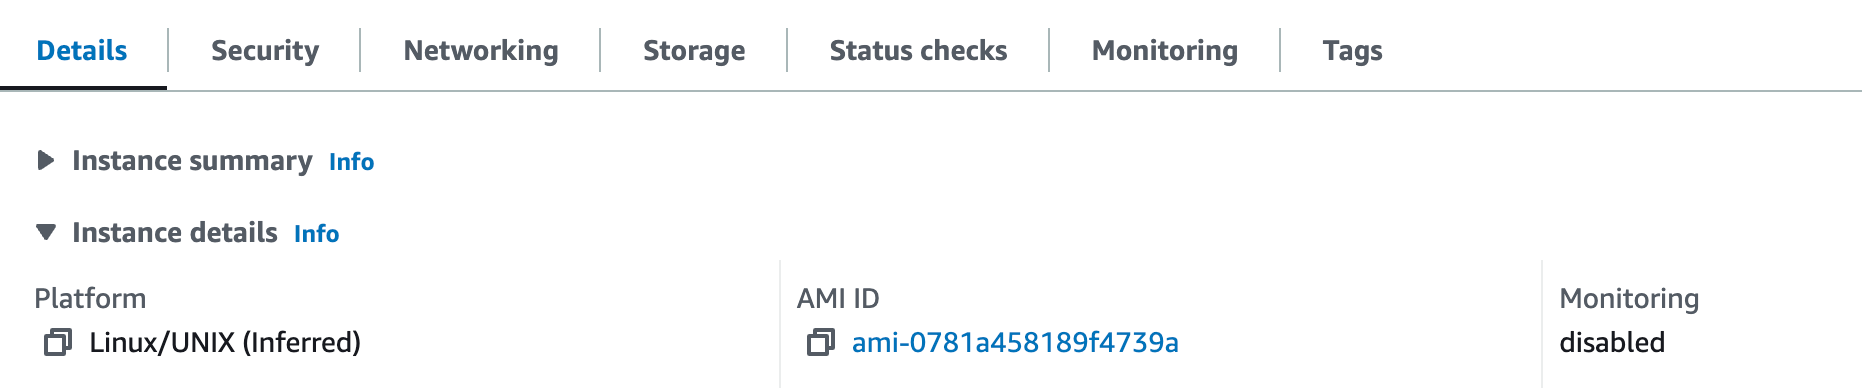
6. The following alert will be appeared and copy the AMI ID from the alert (ex-: "ami-0781a458189f4739a"). Then click “EC2 Console”.

7. Search the copied AMI ID in the search bar and select the instance.

You can cross-check the accuracy of the AMI ID by reviewing it in the "Instance Details" section located within the "Details" tab.
9. Copy the IP address found under the "Public IPv4 address" section within the "Instance summary" on the Details tab. Paste the copied IP address in a new tab, ensuring it begins with "http://".
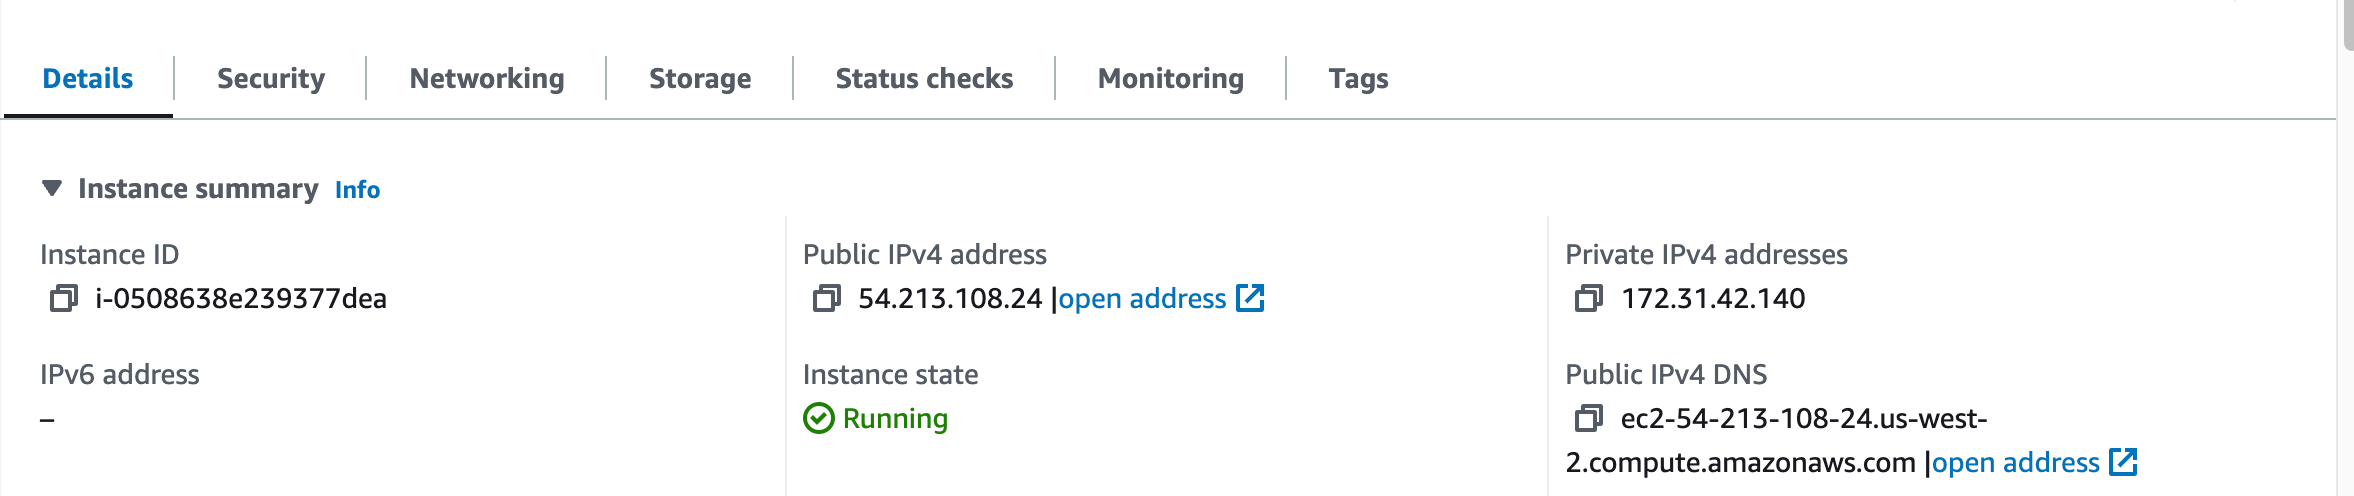
10. You will see the “502 Bad Gateway” error. Wait around 10 minutes and refresh the page. You can see the Easy Diffusion dashboard.
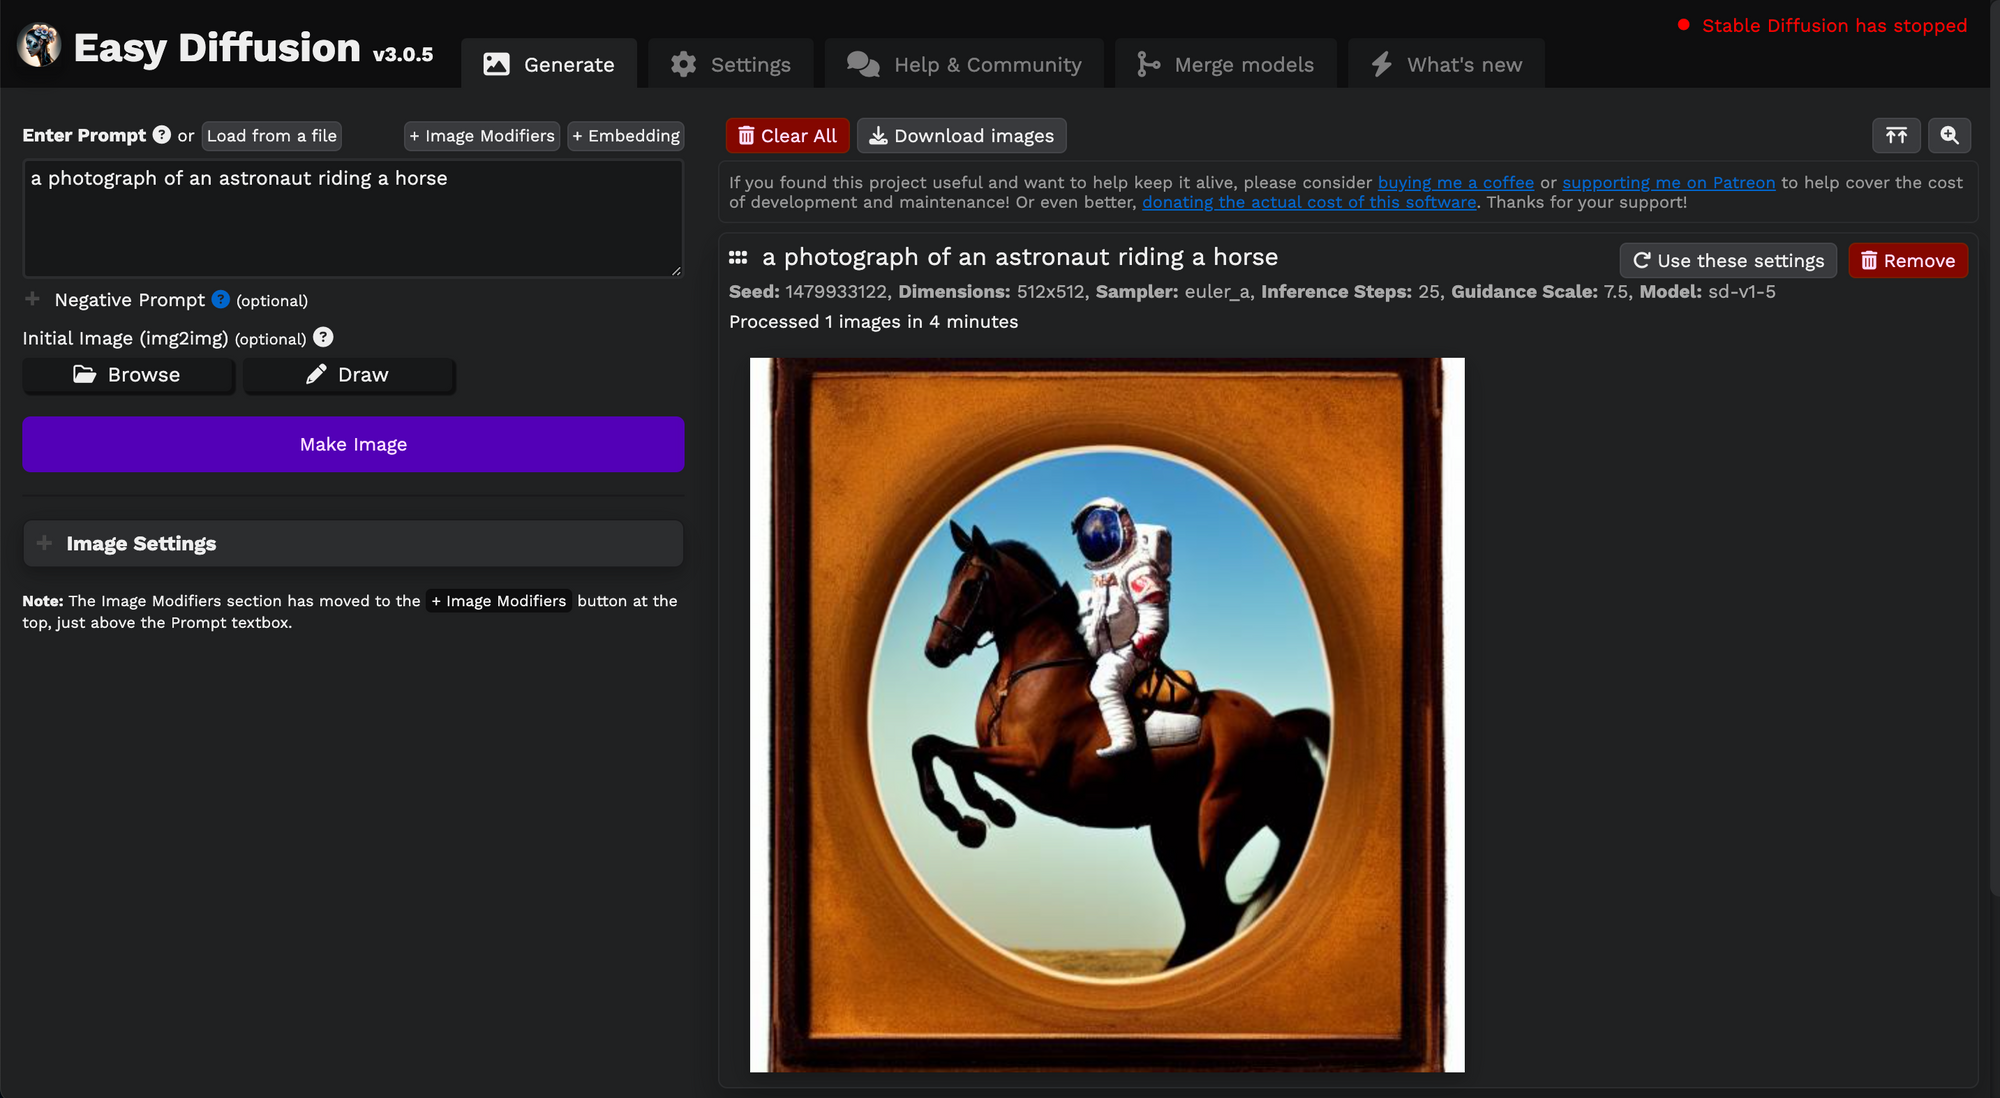
Generate Images
- Enter the prompt to generate image.
- Click “Make Image” button.
Getting Started
Prerequisites
Before using Stable Diffusion, make sure you have the following prerequisites in place:
- An AWS account with access to AWS Marketplace.
- Node.js installed on your local machine. You can download it from nodejs.org.
- Enough vCPU limit to create instances
(Follow https://meetrix.io/articles/how-to-increase-aws-quota/ blog to ensure this)
Installation
To use Stable Diffusion in your Node.js project, follow these steps:
Install Stable Diffusion from AWS Marketplace:
- Log in to your AWS account.
- Navigate to Stable Diffusion AWS Marketplace.
- Follow the instructions to subscribe to Stable Diffusion.
- Obtain the IP address.
Clone the Repository:
- Open your terminal or command prompt.
- Navigate to the directory where you want to clone the repository.
- Run the following command to clone the repository:
git clone https://gitlab.com/meetrix/devops/stable-diffusion/stable-diffusion-api.gitNavigate to the Project Directory:
- Change your working directory to the project folder:
cd stable-diffusion-apiInstall Dependencies:
- Run the following command to install the necessary dependencies:
npm installRun the Application:
- Now that you have installed the dependencies, you can run the application by executing the following command:
npm startProvide Input:
- Above command will start the application, and you will be prompted to enter required parameters which
ip(required),imagePath,session_id, andprompt.
ip (required): Enter with the IP address of your Easy Diffusion server.
imagePath: Replace with the desired local path where you want to save the generated image.
session_id: Set the session ID for your request.
prompt: Specify the image generation prompt.
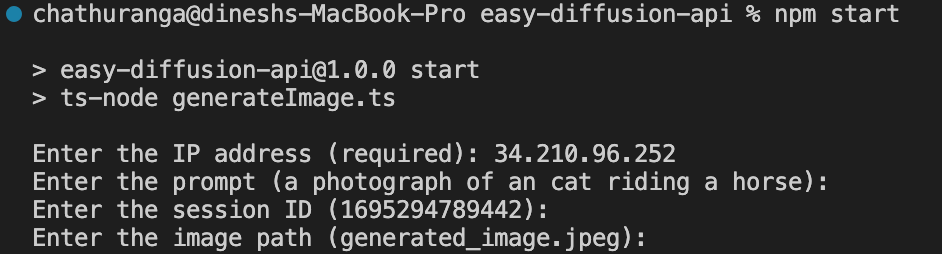
Image Generation:
- Once you have provided all the necessary input, the application will submit the job for image generation.
View the Generated Image:
- If the image generation is successful, the generated image will be saved locally in the specified image path.
console output:
Job submitted successfully.
Image is not generated. Retrying in 5 seconds...
Image is not generated. Retrying in 5 seconds...
Image saved locally as generated_image.jpg.
Close the Application:
- You can close the application by pressing
Ctrl + Cin the terminal where it is running.
API Endpoints
Get a status report from the server. This will contain the server status, and the status of each task.
Endpoint:
GET /ping
Parameters:
- session_id: (query parameter) The session ID associated with the request. Example: 1694578475452
Response:
Status Code: 200 OK
Response Body:
{
    "status": "Online",
    "tasks": {
        "140235312489664": "completed"
    },
    "devices": {
        "all": {
            "cuda:0": {
                "name": "Tesla T4",
                "mem_free": 13.180141568,
                "mem_total": 15.655829504,
                "max_vram_usage_level": "high"
            },
            "cpu": {
                "name": "Intel(R) Xeon(R) Platinum 8259CL CPU @ 2.50GHz"
            }
        },
        "active": {
            "cuda:0": {
				"name": "Tesla T4",
                "mem_free": 13.180141568,
                "mem_total": 15.655829504,
                "max_vram_usage_level": "high"
            }
        },
        "enable_trt": false
    },
    "packages_installed": {},
    "packages_installing": []
}
Response Body Description:
- status (string): The status of the server. In this case, it is "Online".
- tasks (object): An empty object indicating no tasks.
- devices (object): Information about the available and active devices.
- all (object): Information about all available devices.
- cuda:0 (object): Information about a specific CUDA device with ID 0.
- name (string): The name of the device ("Tesla T4").
- mem_free (numeric): The amount of free memory on the device (13.180141568).
- mem_total (numeric): The total amount of memory on the device (15.655829504).
- max_vram_usage_level (string): The maximum VRAM usage level ("high").
- cpu (object): Information about the CPU device.
- name (string): The name of the CPU device ("Intel(R) Xeon(R) Platinum 8259CL CPU @ 2.50GHz").
- active (object): Information about the active devices.
- cuda:0 (object): Information about a specific CUDA device with ID 0.
- name (string): The name of the device ("Tesla T4").
- mem_free (numeric): The amount of free memory on the device (13.180141568).
- mem_total (numeric): The total amount of memory on the device (15.655829504).
- max_vram_usage_level (string): The maximum VRAM usage level ("high").
- enable_trt (boolean): Indicates whether TensorRT (TRT) is enabled (false).
- packages_installed (object): An empty object indicating no installed packages.
- packages_installing (array): An empty array indicating no packages are currently being installed.
Submit a job (queue).
Endpoint:
POST /render
Request Body:
{
    "prompt": "a photograph of an astronaut riding a horse",
    "seed": 1910791075,
    "used_random_seed": true,
    "negative_prompt": "",
    "num_outputs": 1,
    "num_inference_steps": 25,
    "guidance_scale": 7.5,
    "width": 512,
    "height": 512,
    "vram_usage_level": "balanced",
    "sampler_name": "euler_a",
"use_stable_diffusion_model": "sd-v1-5",
    "clip_skip": false,
    "use_vae_model": "",
    "stream_progress_updates": true,
    "stream_image_progress": false,
    "show_only_filtered_image": true,
    "block_nsfw": false,
    "output_format": "jpeg",
    "output_quality": 75,
    "output_lossless": false,
    "metadata_output_format": "none",
    "original_prompt": "a photograph of an astronaut riding a horse",
    "active_tags": [],
    "inactive_tags": [],
    "session_id": "1694578475452"
}
Response:
Status Code: 200 OK
Response Body:
{
    "status": "Online",
    "queue": 1,
    "stream": "/image/stream/140235312489664",
    "task": 140235312489664
}
Response Body Description:
- status (string): The status of the server. In this case, it is "Online".
- queue (integer): The number of tasks currently in the queue (1).
- stream (string): The URL of the image stream This is the URL used for the next request that gets the progress and the final result. ("/image/stream/140235312489664").
- task (integer): The ID of the task (140235312489664).
Endpoint:
GET /image/stream/{task_id}
Parameters:
- task_id: (path parameter) The ID of the task. Example: 140235312489664
Response body may content many JSONs concatenated. These need to be separated before parsing. The below responses are what these individual JSONs can be.
Response 1:
Status Code: 200 OK
Response Body:
{
    "step": 0,
    "step_time": -1,
    "total_steps": 25
}
Response 1 Body Description:
- step (integer): The current step of the image rendering process. In this case, it is 0.
- step_time (float): The time taken for the step in seconds. In this case, it is -1, indicating that the step time is not available.
- total_steps (integer): The total number of steps for the image rendering process. In this case, it is 25.
Response 2:
Status Code: 200 OK
Response Body:
{
    "step": 21,
    "step_time": 0.18938708305358887,
    "total_steps": 25
}
Response 2 Body Description:
- step (integer): The current step of the image rendering process. In this case, it is 21.
- step_time (float): The time taken for the step in seconds. In this case, it is 0.18938708305358887.
- total_steps (integer): The total number of steps for the image rendering process. In this case, it is 25.
Final Response:
Status Code: 200 OK
Response Body:
{
    "status": "succeeded",
    "render_request": {
        "prompt": "a photograph of an astronaut riding a horse",
        "negative_prompt": "",
        "seed": 1910791075,
        "width": 512,
        "height": 512,
        "num_outputs": 1,
        "num_inference_steps": 25,
        "guidance_scale": 7.5,
        "control_alpha": null,
        "prompt_strength": 0.8,
        "sampler_name": "euler_a",
		"hypernetwork_strength": 0,
        "lora_alpha": 0,
        "tiling": null,
        "preserve_init_image_color_profile": false,
        "strict_mask_border": false
    },
    "task_data": {
        "request_id": 140235312489664,
        "session_id": "1694578475452",
        "vram_usage_level": "balanced",
        "use_face_correction": null,
        "use_upscale": null,
        "upscale_amount": 4,
        "latent_upscaler_steps": 10,
        "use_stable_diffusion_model": "sd-v1-5",
        "use_vae_model": "",
        "use_hypernetwork_model": null,
        "use_lora_model": null,
        "use_controlnet_model": null,
        "use_embeddings_model": null,
        "filters": [],
        "filter_params": {},
        "control_filter_to_apply": null,
        "show_only_filtered_image": true,
        "block_nsfw": false,
        "stream_image_progress": false,
        "stream_image_progress_interval": 5,
        "clip_skip": false,
        "codeformer_upscale_faces": false,
        "codeformer_fidelity": 0.5,
        "output_format": "jpeg",
        "output_quality": 75,
        "output_lossless": false,
        "save_to_disk_path": null,
        "metadata_output_format": "none"
    },
    "output": [
        {
            "data": "data:image/jpeg;base64,...",
            "seed": 1910791075,
            "path_abs": null
        }
    ]
}
Final Response Body Description:
- status (string): The status of the rendering process. In this case, it is "succeeded".
- render_request (object): Details of the original rendering request.
- (Various parameters related to the rendering request)
- task_data (object): Additional data related to the task.
- (Various task-related parameters)
- output (array): An array containing the rendered image data.
- data (string): The rendered image data in Base64 format. Truncated for clarity. This is the result you want.
- seed (integer): The seed value used for rendering.
- path_abs (null or string): The absolute path of the rendered image file, if saved to disk. In this case, it is null.
Upgrades
When there is an upgrade, we will update the product with a newer version. You can check the product version in AWS Marketplace. If a newer version is available, you can remove the previous version and launch the product again using the newer version. Remember to backup the necessary server data before removing.
Troubleshoot
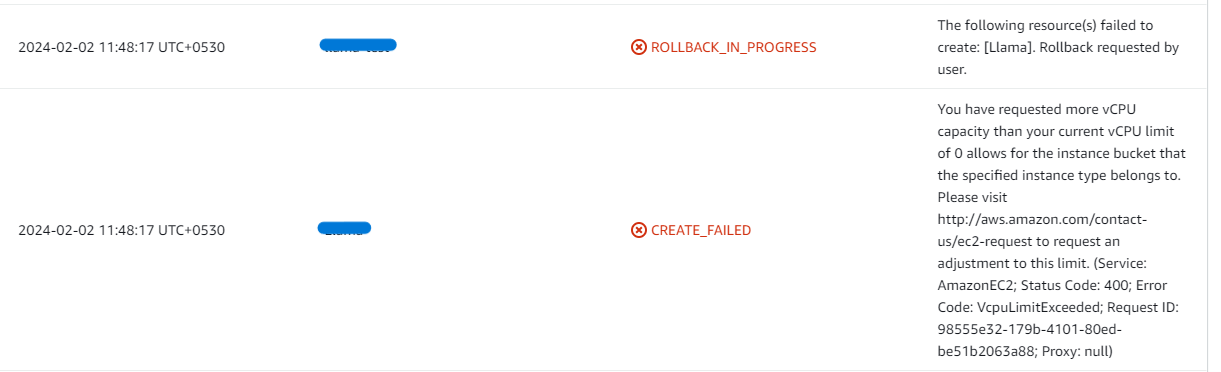
- If you face the following error, please follow https://meetrix.io/articles/how-to-increase-aws-quota/ blog to increase vCPU quota.
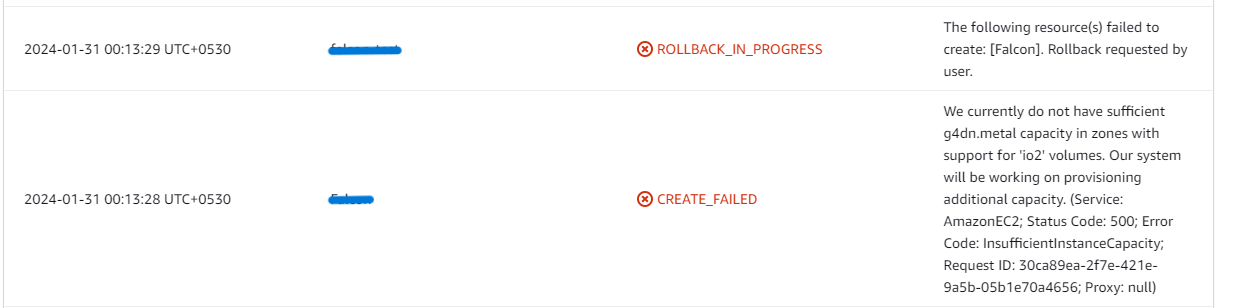
2. If you face the following error (do not have sufficient <instance_type> capacity...) while creating the stack, try changing the region or try creating the stack at a later time.
3. If you face the below error, when you try to access the API dashboard, please wait 5-10 minutes and then try.

Conclusion
Meetrix's EasyDiffusion is a testament to their innovative capabilities and commitment to excellence in the field of AI technology. The harmonious fusion of an intuitive interface, powerful API integration, coupled with the avant-garde Stable Diffusion model, culminates in an image generation platform that redefines industry benchmarks.
Navigating through a plethora of generic images to find the perfect fit can be a draining endeavor. In an age where digital presence is paramount and every visual tells a story, settling for mediocrity can hinder one's creative vision and professional aspirations. At Meetrix, our mission is to revolutionize the digital design landscape, providing tools that simplify and enrich the image creation process, empowering users to breathe life into their unique visions with precision and flair.
We aim to continue advancing EasyDiffusion’s internal system and further equip it with new features in the future. Its capabilities are boundless if used accordingly and are proof that innovation in the right direction can make technology a boon to humankind.
Technical Support
Reach out to Meetrix Support (support@meetrix.io) for assistance with Stable Diffusion issues.