
Welcome to the Meetrix Coturn TURN Server developer guide for Google Cloud Platform! Coturn is an open-source TURN/STUN server that enables NAT traversal for WebRTC, VoIP, and real-time communication platforms. With the Meetrix pre-configured GCP image, you can deploy a production-ready Coturn server in minutes.
This guide walks you through finding the product on GCP Marketplace, configuring the deployment, pointing DNS, generating the SSL certificate, and testing your TURN server.
Prerequisites
Before you begin, make sure you have the following:
- Basic Google Cloud Platform knowledge.
- An active Google account with a GCP project and billing enabled.
- A domain name you can manage DNS records for.
Launch the Product
Step 1: Find the Product
- Log in to your Google account.
- Go directly to the product page: Coturn TURN Server on GCP Marketplace
- You can also browse all Meetrix products at the Meetrix Solutions Page.
- You will see the following product listing page.
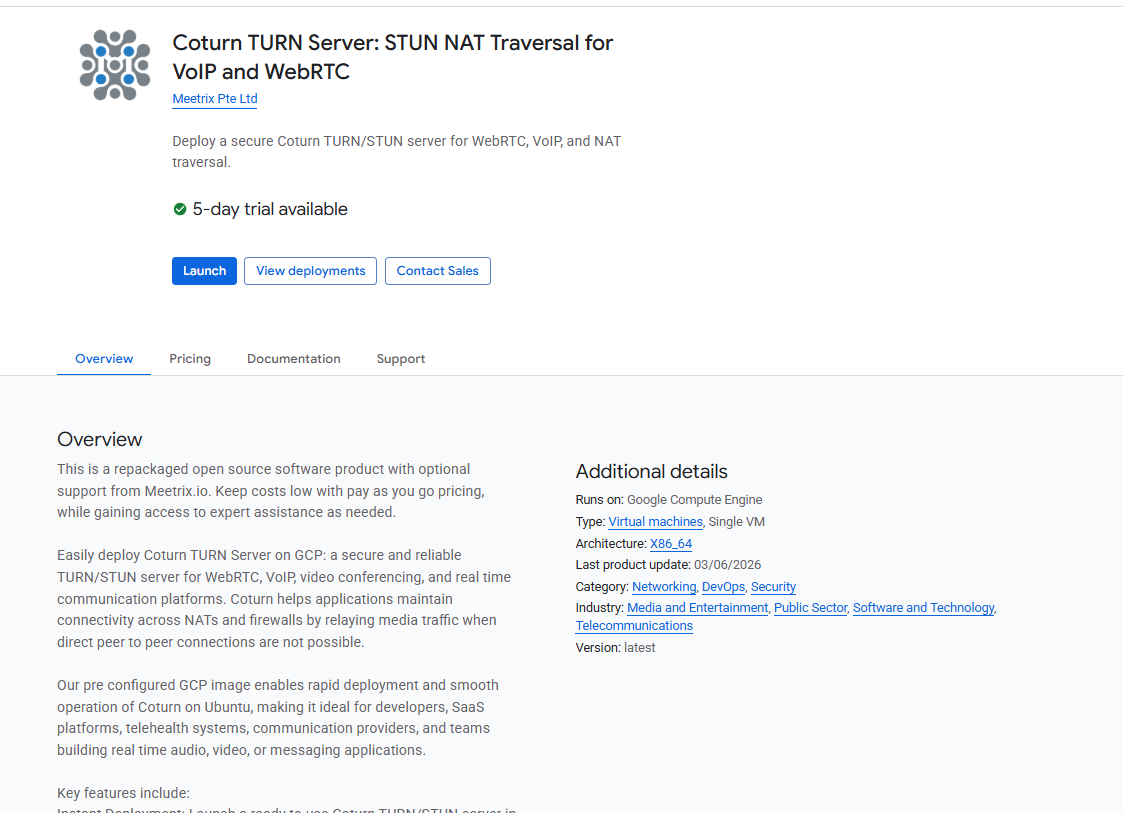
Step 2: Launch the Product
- Select your GCP project from the project selector at the top.
- Review the product description and pricing details.
- Click the GET STARTED button.
- Accept the terms and conditions and click AGREE.
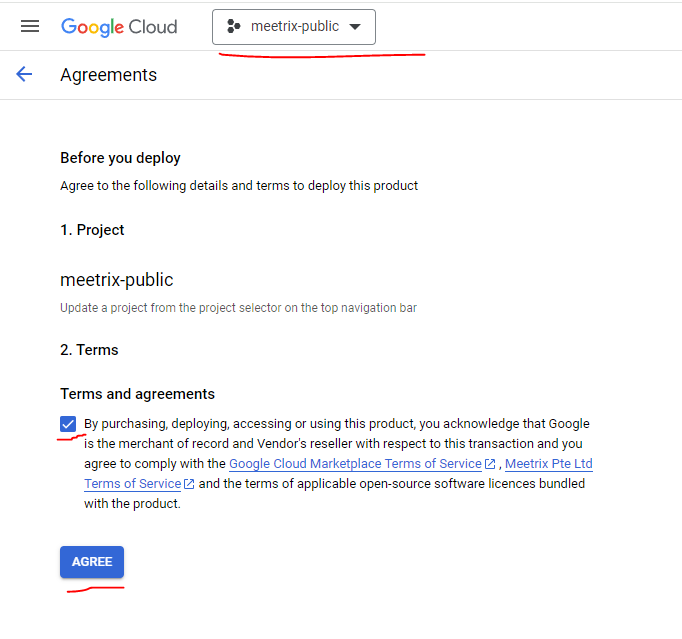
Free Trial
This product includes a 5-day free trial with up to USD 50.00 in licence fee credits. To activate it, tick I accept the solution trial Terms and Conditions on the launch screen before proceeding.

Trial note
Step 3: Configure the Deployment
You will see the deployment configuration form. Fill in the fields across the following sections:
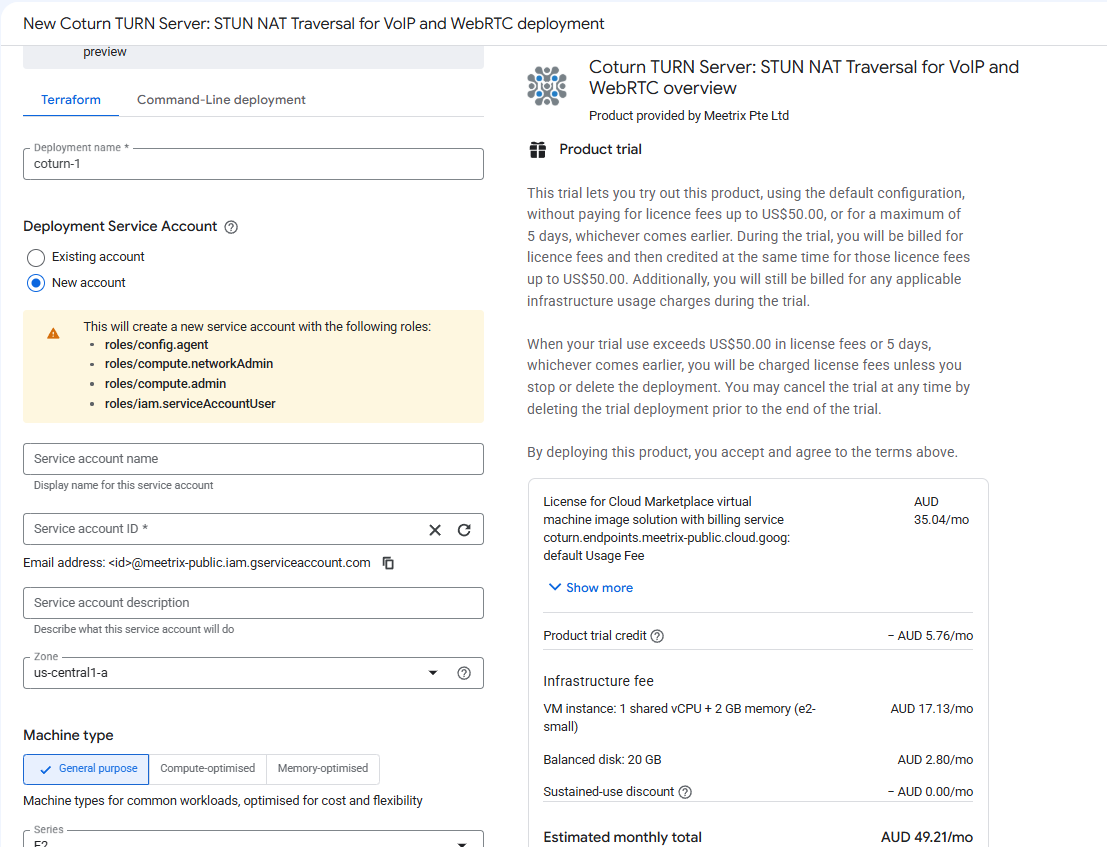
General
- Deployment name — A unique name for this deployment.
- Image version — Leave as default (
coturn-4.12.0). - Machine type — Default
e2-small(1 vCPU, 2 GB RAM) works for most setups. Choose a larger type for high-traffic production use (minimum 1 vCPU, 1 GB RAM). - Zone — Select the GCP zone closest to your users.
Boot Disk
- Boot disk type — Default
Balanced persistent diskis recommended. - Boot disk size — Default 20 GB is sufficient.
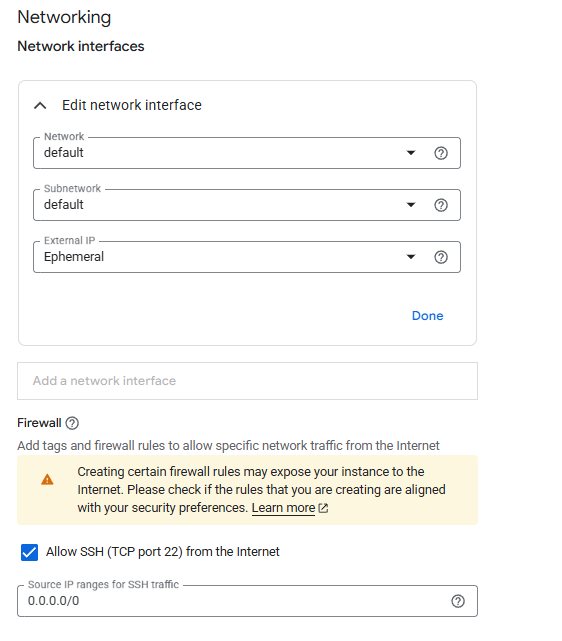
Networking
- Network name — Leave as
defaultunless you have a custom VPC. - External IP — Leave as
Ephemeral. SelectNoneonly if you do not need public internet access (not recommended for a TURN server). - Allow SSH (TCP port 22) — Enabled by default. Restrict the source IP range if you want to limit SSH access to specific IPs.
Application Settings
- Domain name — The domain for your TURN server (e.g.
yourdomain.com). Make sure to point your DNS A record to the instance IP before or shortly after deploying. - Admin email — Used for SSL certificate registration via Let's Encrypt.
- TURN static auth secret — A long random string used to generate TURN credentials via HMAC-SHA1. Keep this secret secure.
- TURN realm — Typically your base domain (e.g.
yourdomain.com).
Click DEPLOY and wait a few minutes for the deployment to complete.
Point DNS to the Server
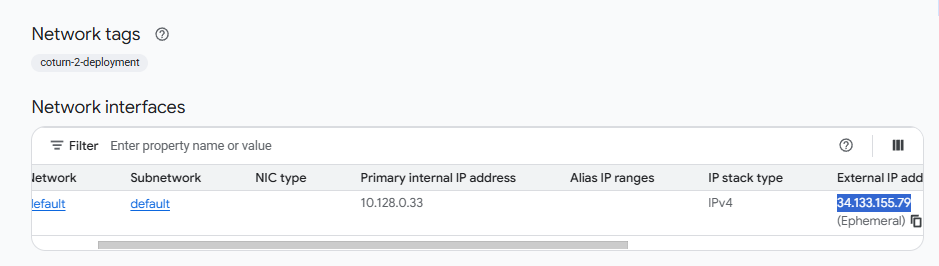
Step 1: Get the External IP
- Once deployment is complete, click the VM instance resource name in the deployment details.
- Copy the External IP from the Network interfaces section.
Step 2: Create a DNS A Record
- Go to your DNS provider.
- Add an A record pointing your TURN domain (e.g.
yourdomain.com) to the copied external IP. - Wait for DNS propagation before proceeding (typically a few minutes to 1 hour).
Generate SSL Certificate
DNS must propagate first
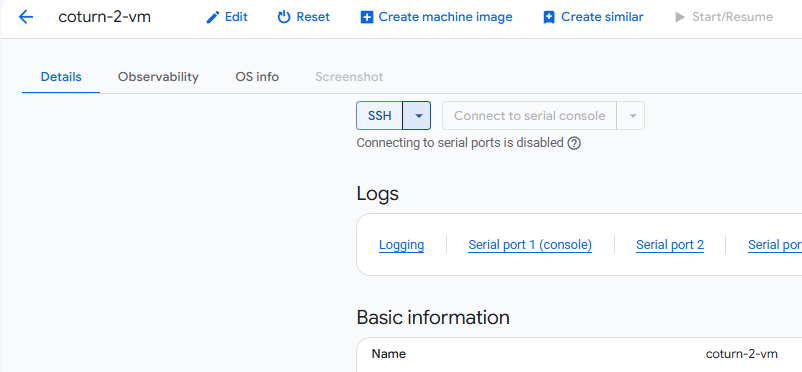
Step 1: SSH into the Server
- Once deployment is complete, go to the VM instance page in the GCP console.
- Click SSH to open a browser-based terminal and authorize access.
Step 2: Run the Certificate Script
The image includes a pre-configured certificate script. Run it with:
sudo bash /root/certificate_generate_standalone.shThis script runs certbot using the domain name and admin email you provided during deployment. Once it completes, restart Coturn:
sudo systemctl restart coturnCoturn is Now Running with SSL
stun:yourdomain.com:3478 and TURN over TLS at turns:yourdomain.com:5349.
Test the TURN Server
Generate Test Credentials
Use the following commands on the server to generate temporary TURN credentials for testing:
SECRET="your-static-auth-secret"
USER=$(( $(date +%s) + 86400 )):testuser
PASS=$(echo -n $USER | openssl dgst -binary -sha1 -hmac $SECRET | openssl base64)
echo "Username: $USER"
echo "Password: $PASS"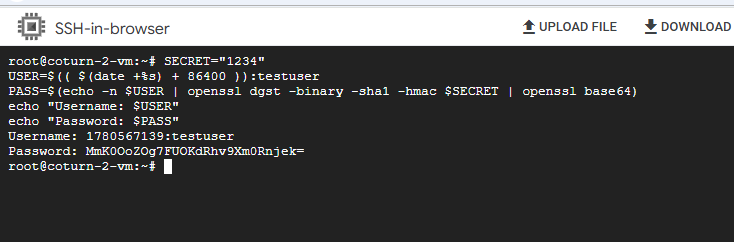
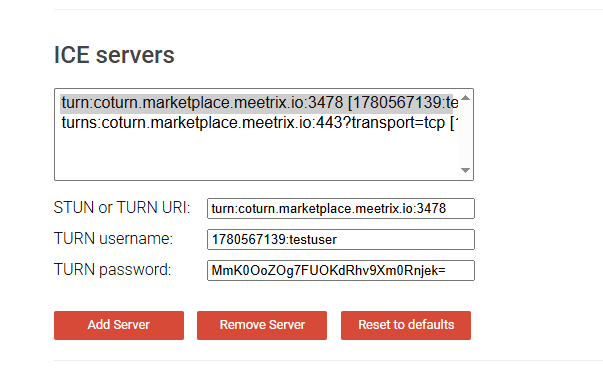
Test with Trickle ICE
- Open Trickle ICE in your browser.
- Add the following ICE server URLs:
- STUN:
stun:yourdomain.com:3478 - TURN UDP:
turn:yourdomain.com:3478 - TURNS TLS:
turns:yourdomain.com:5349
- STUN:
- Enter the generated username and password.
- Click Gather candidates. You should see
relaytype candidates appear, confirming TURN is working.
Manage the Server
Check Coturn Status
sudo systemctl status coturnStop and Start Coturn
sudo systemctl stop coturn
sudo systemctl start coturn
Shut Down the VM
To stop the VM without deleting it, go to Compute Engine → VM Instances in the GCP console, select your instance, and click Stop.
Delete the Deployment
To fully remove the deployment and stop all billing:
- Go to Deployment Manager in the GCP console.
- Find your Coturn deployment.
- Click Delete to remove all associated resources.
Troubleshoot
Check Coturn Logs
sudo tail -f /var/log/turnserver.logCheck Service Status
sudo systemctl status coturnVerify Firewall Ports
In the GCP console, go to VPC Network → Firewall and confirm the following rules exist for your VM:
- Port 3478 — UDP and TCP (STUN/TURN)
- Port 5349 — TCP (TURNS/TLS)
- Ports 49152–65535 — UDP (relay range)
SSL Certificate Issues
If certbot fails, ensure DNS has propagated before running certbot and that port 80 is open on the firewall for the ACME HTTP challenge.
Technical Support
If you run into any issues, our support team is here to help. Reach out to us at support@meetrix.io and we will respond within 12 hours.
Frequently Asked Questions
What ports does Coturn need open on GCP?
Coturn requires ports 3478 (UDP and TCP) for STUN/TURN, port 5349 (TCP) for TURNS over TLS, and the UDP relay range 49152–65535. The Meetrix GCP image configures these firewall rules automatically during deployment.
Can I use this Coturn server with Jitsi Meet?
Yes. Point your Jitsi Meet configuration to this Coturn server by setting the TURN server URL and static-auth-secret in your Jitsi prosody or config.js settings.
How do I add or rotate the TURN authentication secret?
Edit /etc/turnserver.conf and update the static-auth-secret value, then restart Coturn with: sudo systemctl restart coturn
What is the default instance type and can I change it?
The default configuration uses an e2-small instance (1 shared vCPU, 2 GB RAM). You can select a larger instance type during deployment in the GCP Marketplace configuration form.
How do I renew the SSL certificate?
SSL certificates issued by Let's Encrypt expire every 90 days. Run: sudo certbot renew && sudo systemctl restart coturn. You can also set up a cron job to auto-renew.
Deploy Coturn TURN Server on GCP in Minutes
Launch a production-ready Coturn TURN/STUN server on Google Cloud with a pre-configured Meetrix image.
Get Started on GCP Marketplace