Setup Jitsi Meet on GCP - Developer Guide
Learn how to install and configure Jitsi Meet on GCP with our detailed developer guide. This guide walks you through the deployment process, configuration options, and best practices to ensure a secure and high-performing video conferencing solution for your users.


Set up your own jitsi video conferencing platform for one hundred concurrent users and unlimited hosts. This setup has been tested to run as expected using the best in class open source WebRTC video conferencing platform, Jitsi Meet.
This guide will help you to setup jitsi meet in gcp environment.
Video
Blog
 Kelum Sampath
Prerequisites
Before you begin, make sure you meet the following prerequisites:
- Basic GCP Knowledge
- An active google account with appropriate permissions.
Launch the Product
Step 1: Find the product
- Log in to your Google account.
- Follow the provided link to access Marketplace
https://console.cloud.google.com/marketplace?hl=en - Find the Jitsi Meet solution according to your need.
You may also find the solution by visiting the Meetrix Solutions Page
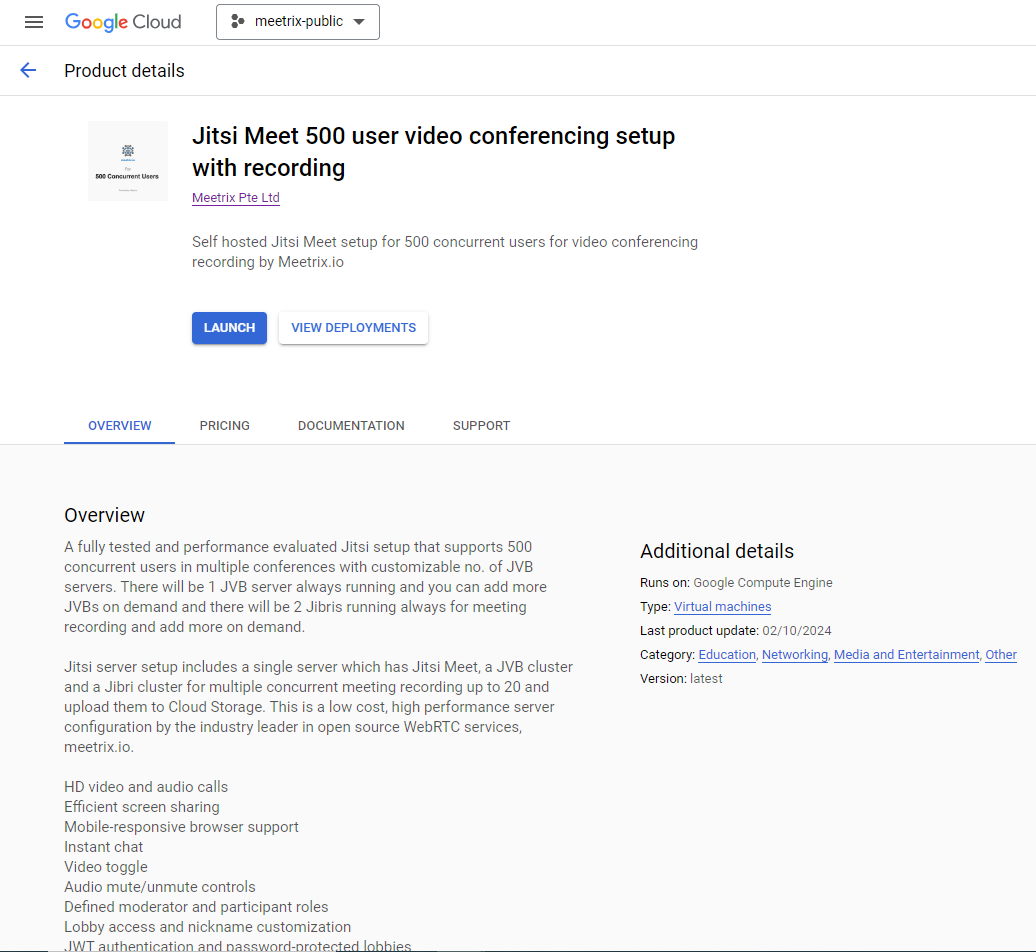
Meetrix Pte Ltd - You will see the following screen. (For this guide, we will take the 500 concurrent setup as the example)
Step 2: Launch the product
- Select the Project.
- Read all the description and pricing
- After that click on GET STARTED button
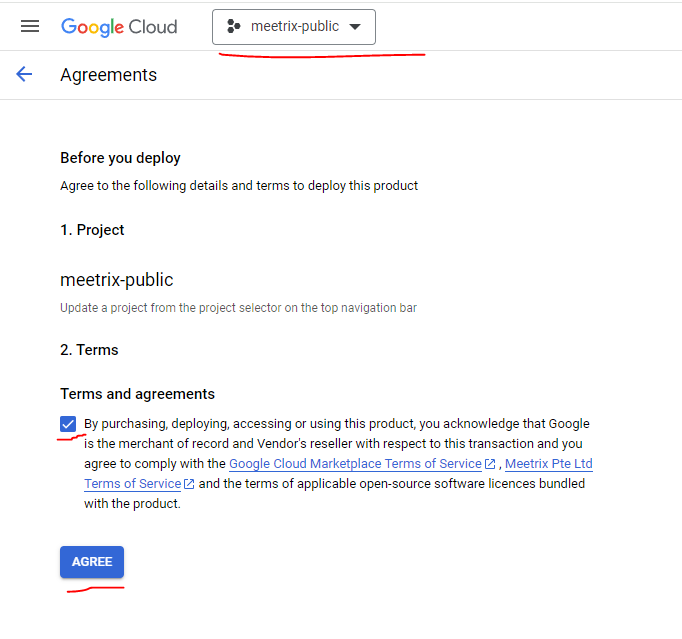
- Select the project, accept the terms and click on AGREE
4. You will see a screen like below. Fill the metadata.
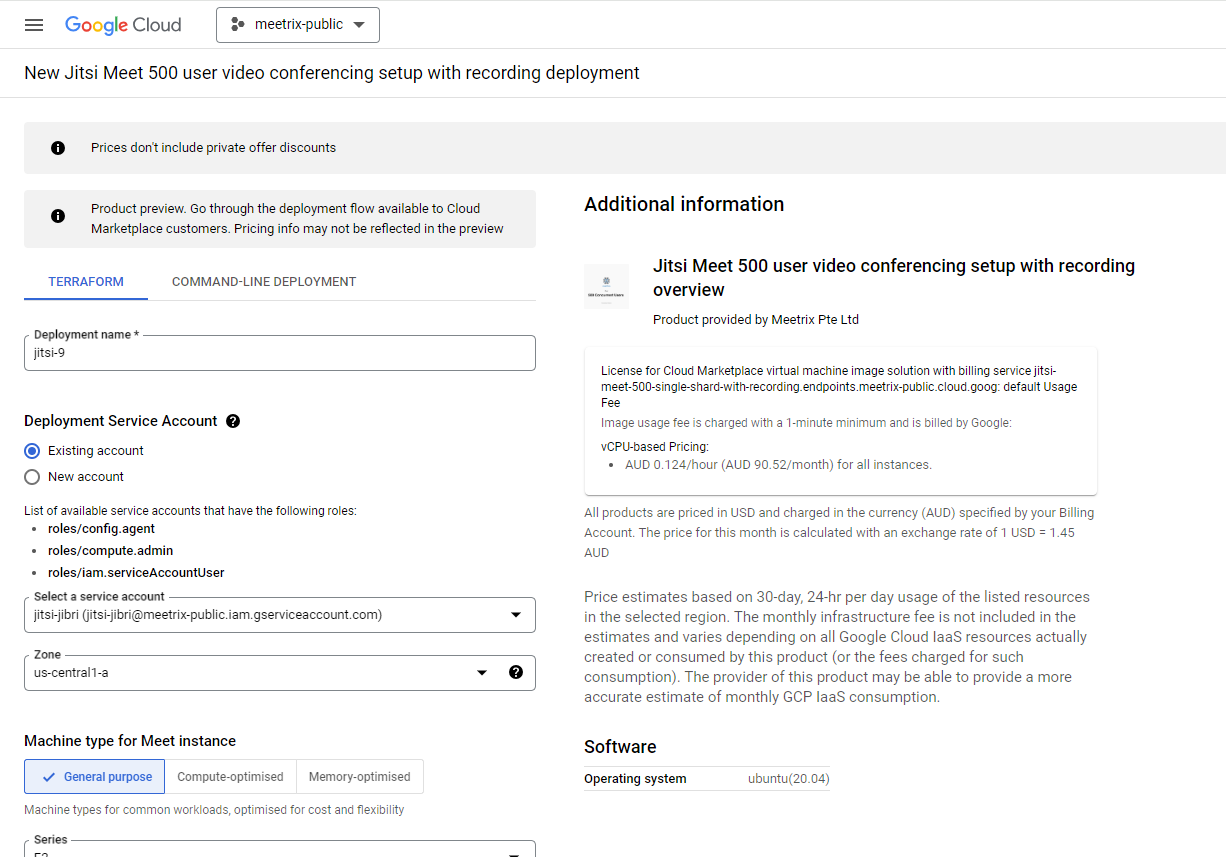
- Add Deployment name
- You can choose an existing service account or create a new account
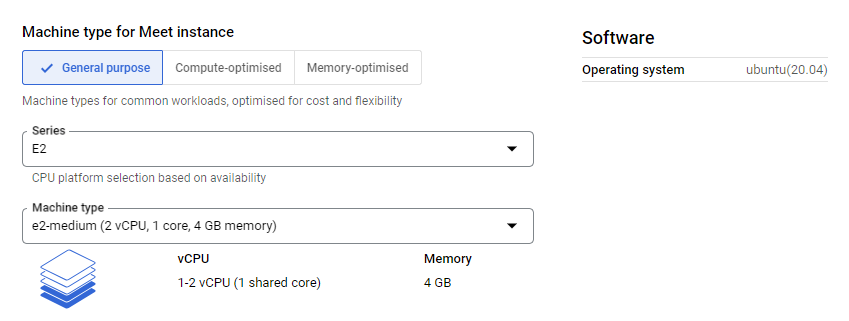
- Choose an instance type for Jitsi Meet.
- If your setup is 50 users or 100 users, Jitsi Meet and JVB both will be available in a single server. Thus please choose a high performance server.
- If your setup is 250 users or 500 users, you can select general purpose server .

If your setup is 250 users or 500 users:
- JVB will be available as separate servers. Please choose an instance type for JVBs.
- If your setup is 500 user setup: You can customize the JVB server count.
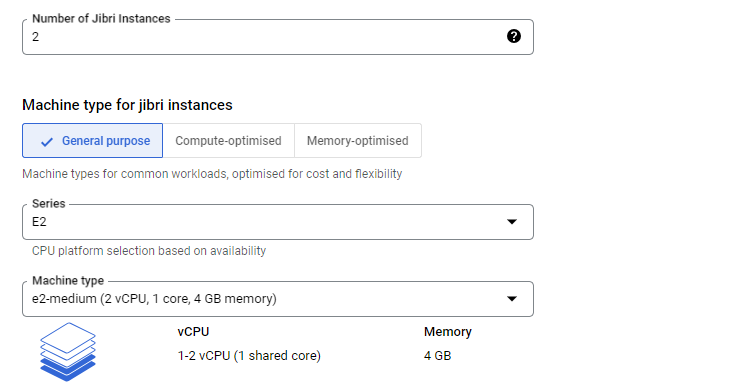
If your setup has Jibri:
- Select the preferred instance type for Jibri.
- According to your product, their might be a option available to customize the number of jibris. Please add your preferred jibri instance count (this option is available for 500 user product)
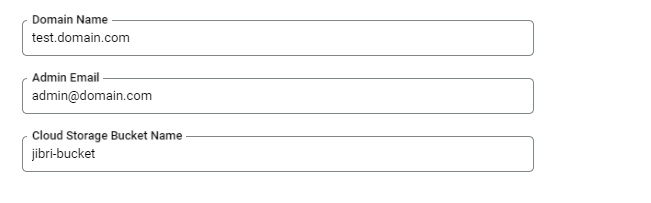
- Choose Domain according to your preference
- Enter Admin email to install the SSL Certificate
- Please create a cloud storage bucket separately to store jibri recordings. Add the Bucket name here. (This option is relevant only to Jibri Setups)
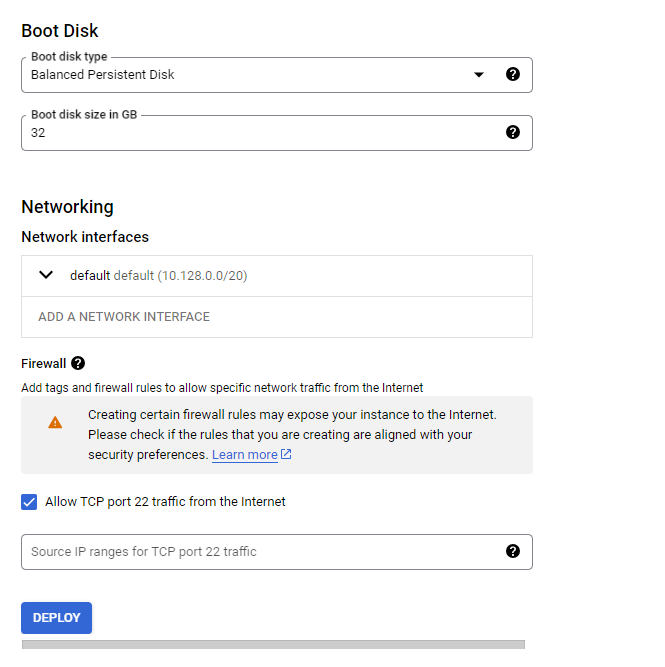
- You can customize the Boot Disk size
- If you want to restrict SSH access, add the IP or IP range under the Firewall settings.
5. Click on DEPLOY. You have to wait several minutes until the deployment is finished.
Install SSL
1. Point DNS
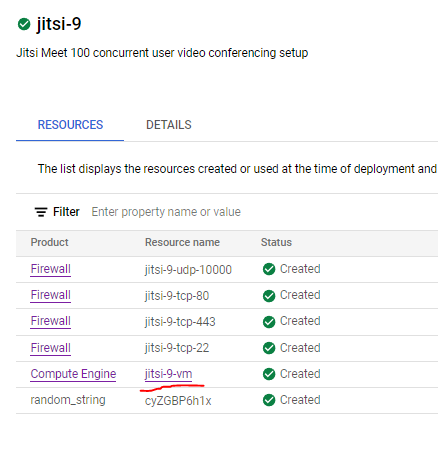
- After the deployment is ready click on compute engine resource name
2. Copy the External Ip under the Network interfaces section
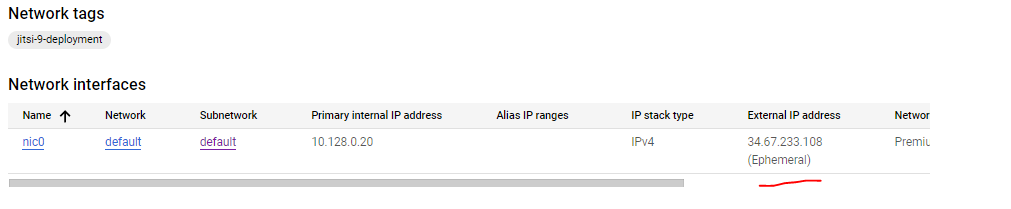
3. Go to your DNS provider and add simple A Record for the jitsi domain and the copied IP.
2. Access the server
1. In the VM instance page, Click on SSH
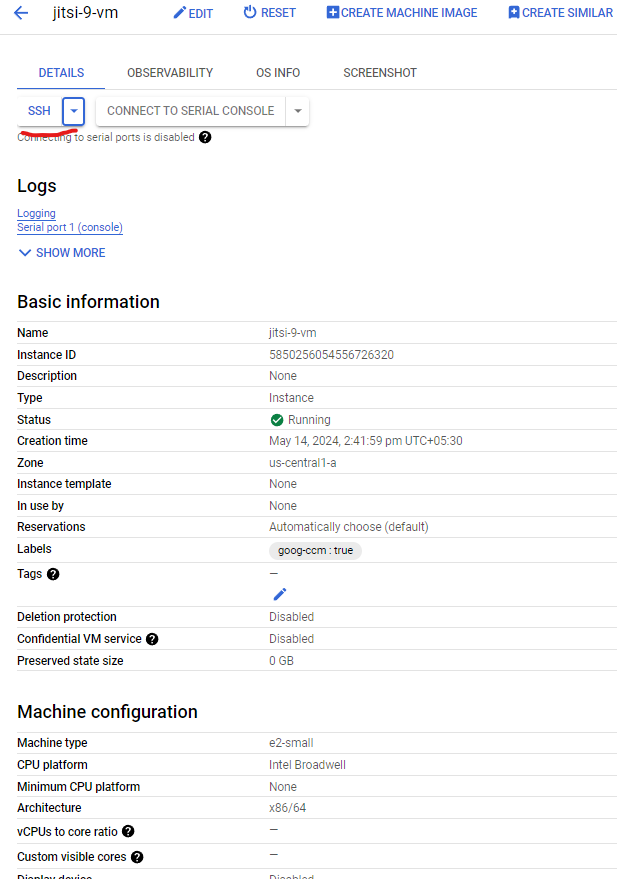
2. Authorize and continue to log into the server.
3. Run certbot
1. Type the following command and continue
sudo certbot --nginx
2. Follow the instructions accordingly
Add email,
Agree to the Terms and condition,
Agree/Disagree to share email with foundation,
Select the domain name
3. Now the SSL is installed. Make sure to renew it before expire (within 90 days)
4. Start a Meeting
Open a new browser tab using the domain and enjoy Jitsi Meet
Troubleshoot
a. Check the server logs
To check logs, log into the server and use the following commands
sudo tail -f /var/log/jitsi/jicofo.log
sudo tail -f /var/log/prosody/prosody.log
sudo tail -f /var/log/prosody/prosody.err
sudo tail -f /var/log/nginx/access.log
sudo tail -f /var/log/nginx/error.log
sudo tail -f /var/log/syslog
sudo tail -f /var/log/jitsi/jvb.log
b. Check console logs
You can open the browser console in the meeting page and check for any visible errors
Technical Support
Reach out to Meetrix Support (support@meetrix.io) for assistance with Jitsi Meet issues.