Meetrix Transcriber: Developer Guide


Welcome to the Meetrix Transcriber! Meetrix Transcriber is a powerful video transcription software available on AWS Marketplace, designed to effortlessly and accurately convert your audio and video content into written text.
Video
Blog
 Kelum Sampath
Setup Guide
Follow this guide to set up Meetrix transcriber from AWS Marketplace.
Prerequisites
Before you get started with the Transcriber AMI, ensure you have the following prerequisites:
- Basic knowledge of AWS services, including EC2 instances and CloudFormation.
- An active AWS account with appropriate permissions.
- Enough vCPU limit to create instances
(Follow https://meetrix.io/articles/how-to-increase-aws-quota/ blog to ensure this)
1. Subscribe to Meetrix transcriber
- Visit the Meetrix transcriber product page on AWS Marketplace.
- Click the "Continue to Subscribe" button and review the terms of use.
- Click "Accept Terms" to subscribe to Meetrix transcriber.
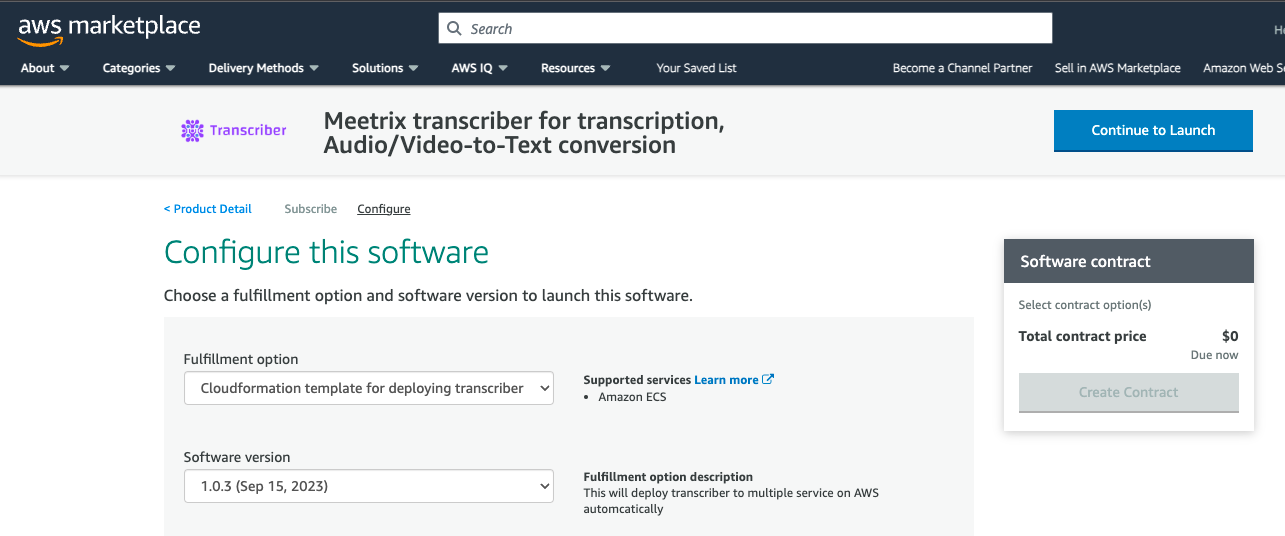
2. Launch Meetrix transcriber
- After subscribing, click "Continue to Configuration" on the AWS Marketplace page.
- Click "Continue to Launch" and review the launch details.
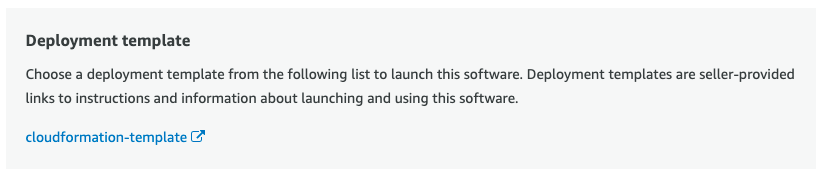
3. Click on the “cloudformation-template” link under “Deployment template”, which will redirect you to the “Quick Create Stack”.
4. Provide necessary parameters including DeploymentName, KeyName, PythonServicesInstanceType, SSHLocation and then click “Create stack”.
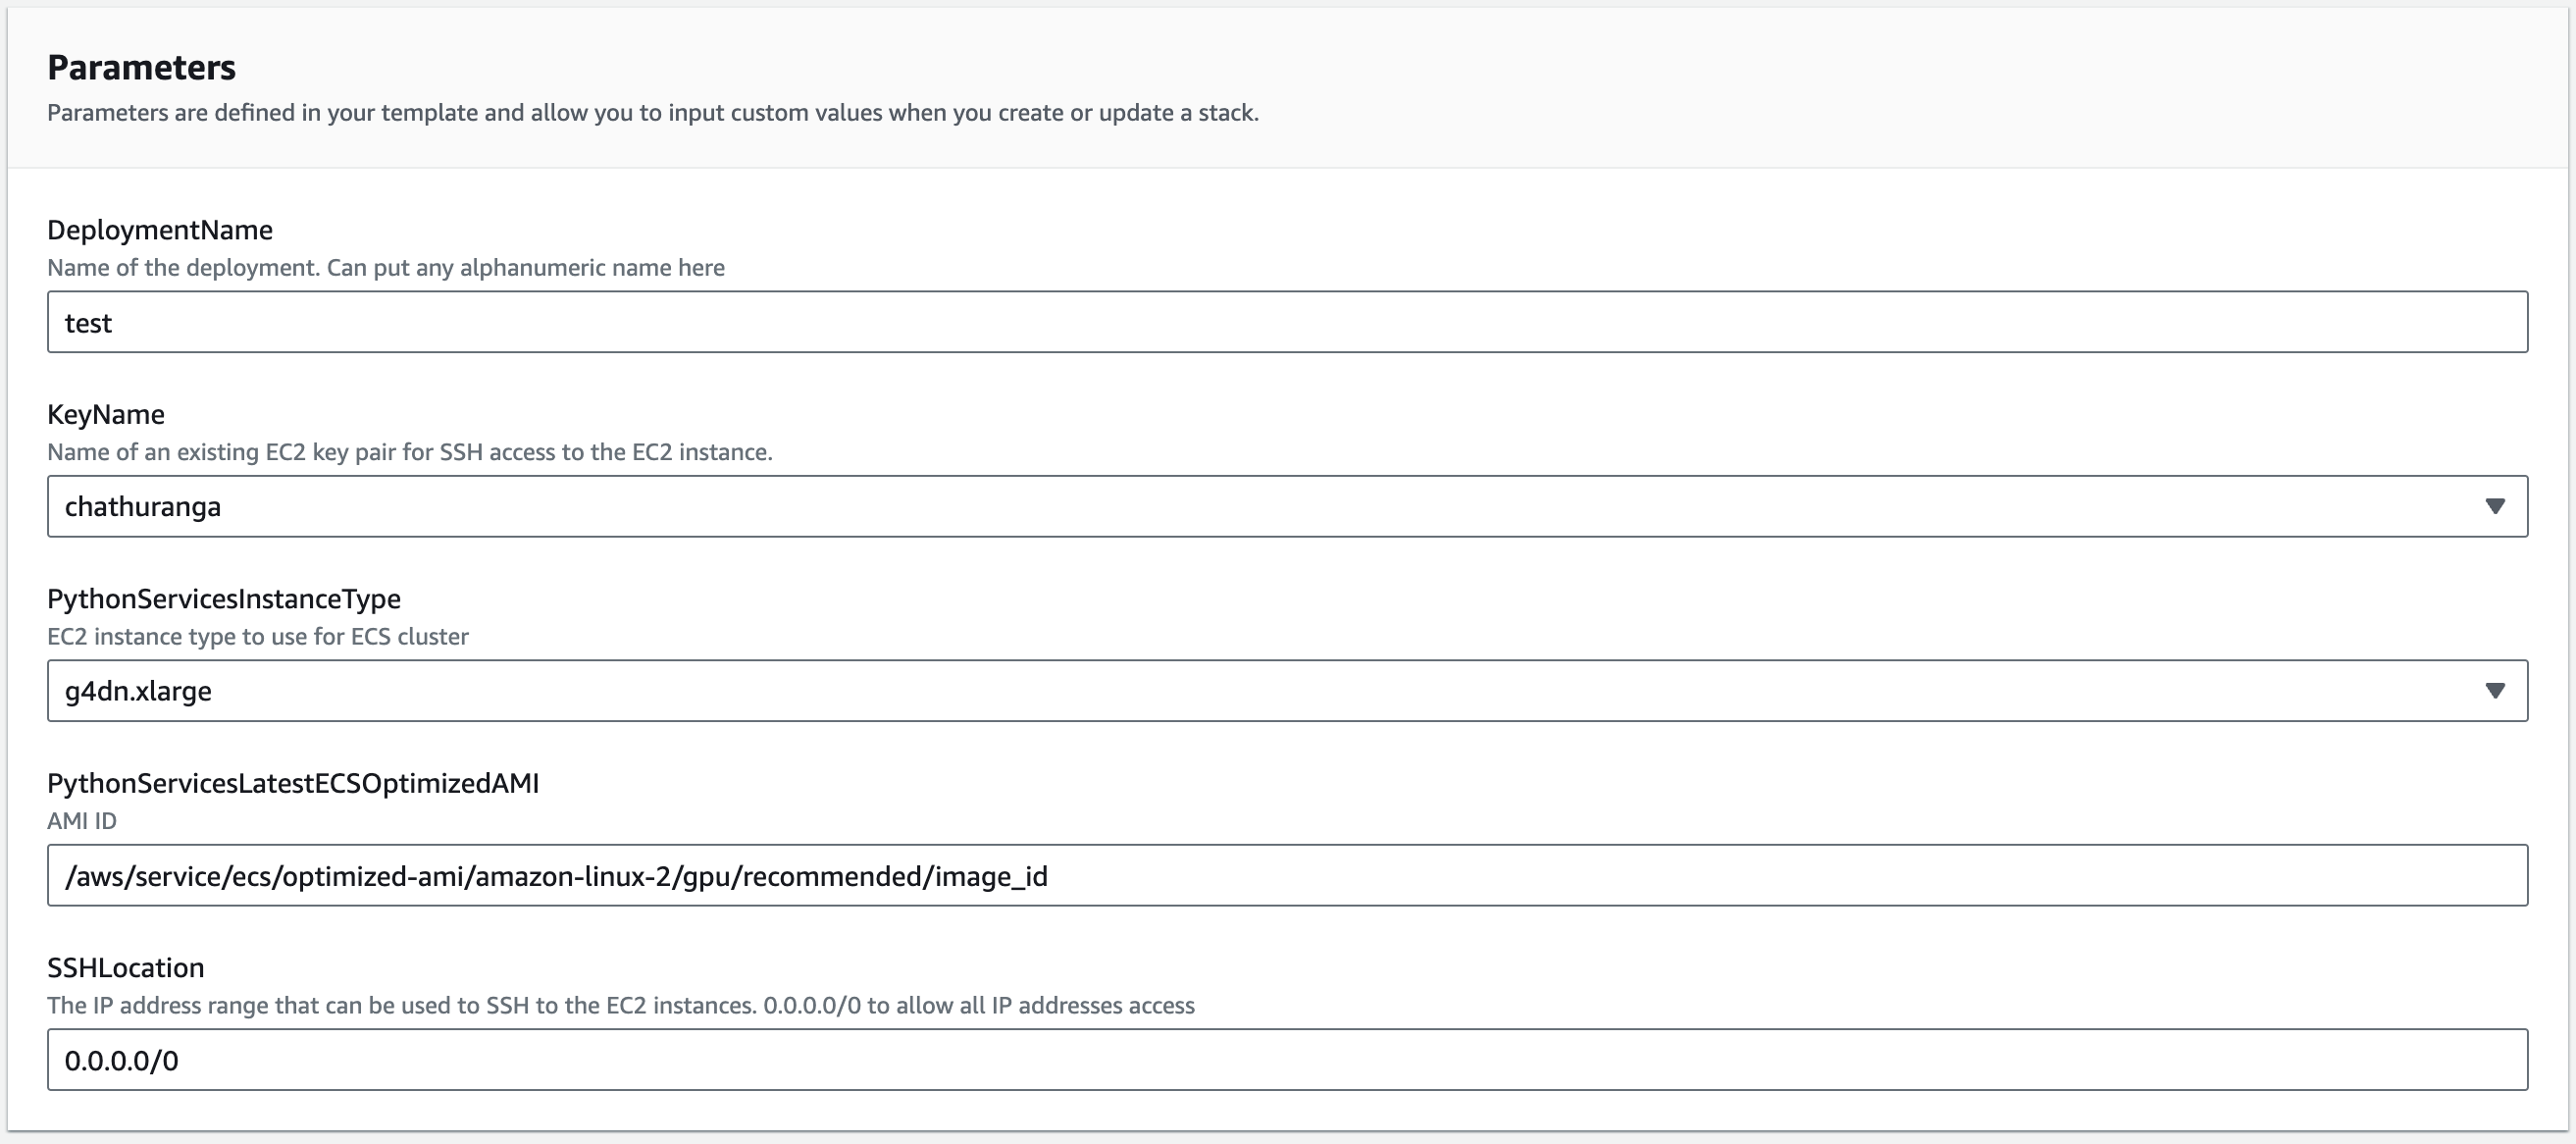
It will take about 10 minutes for creating the stack.
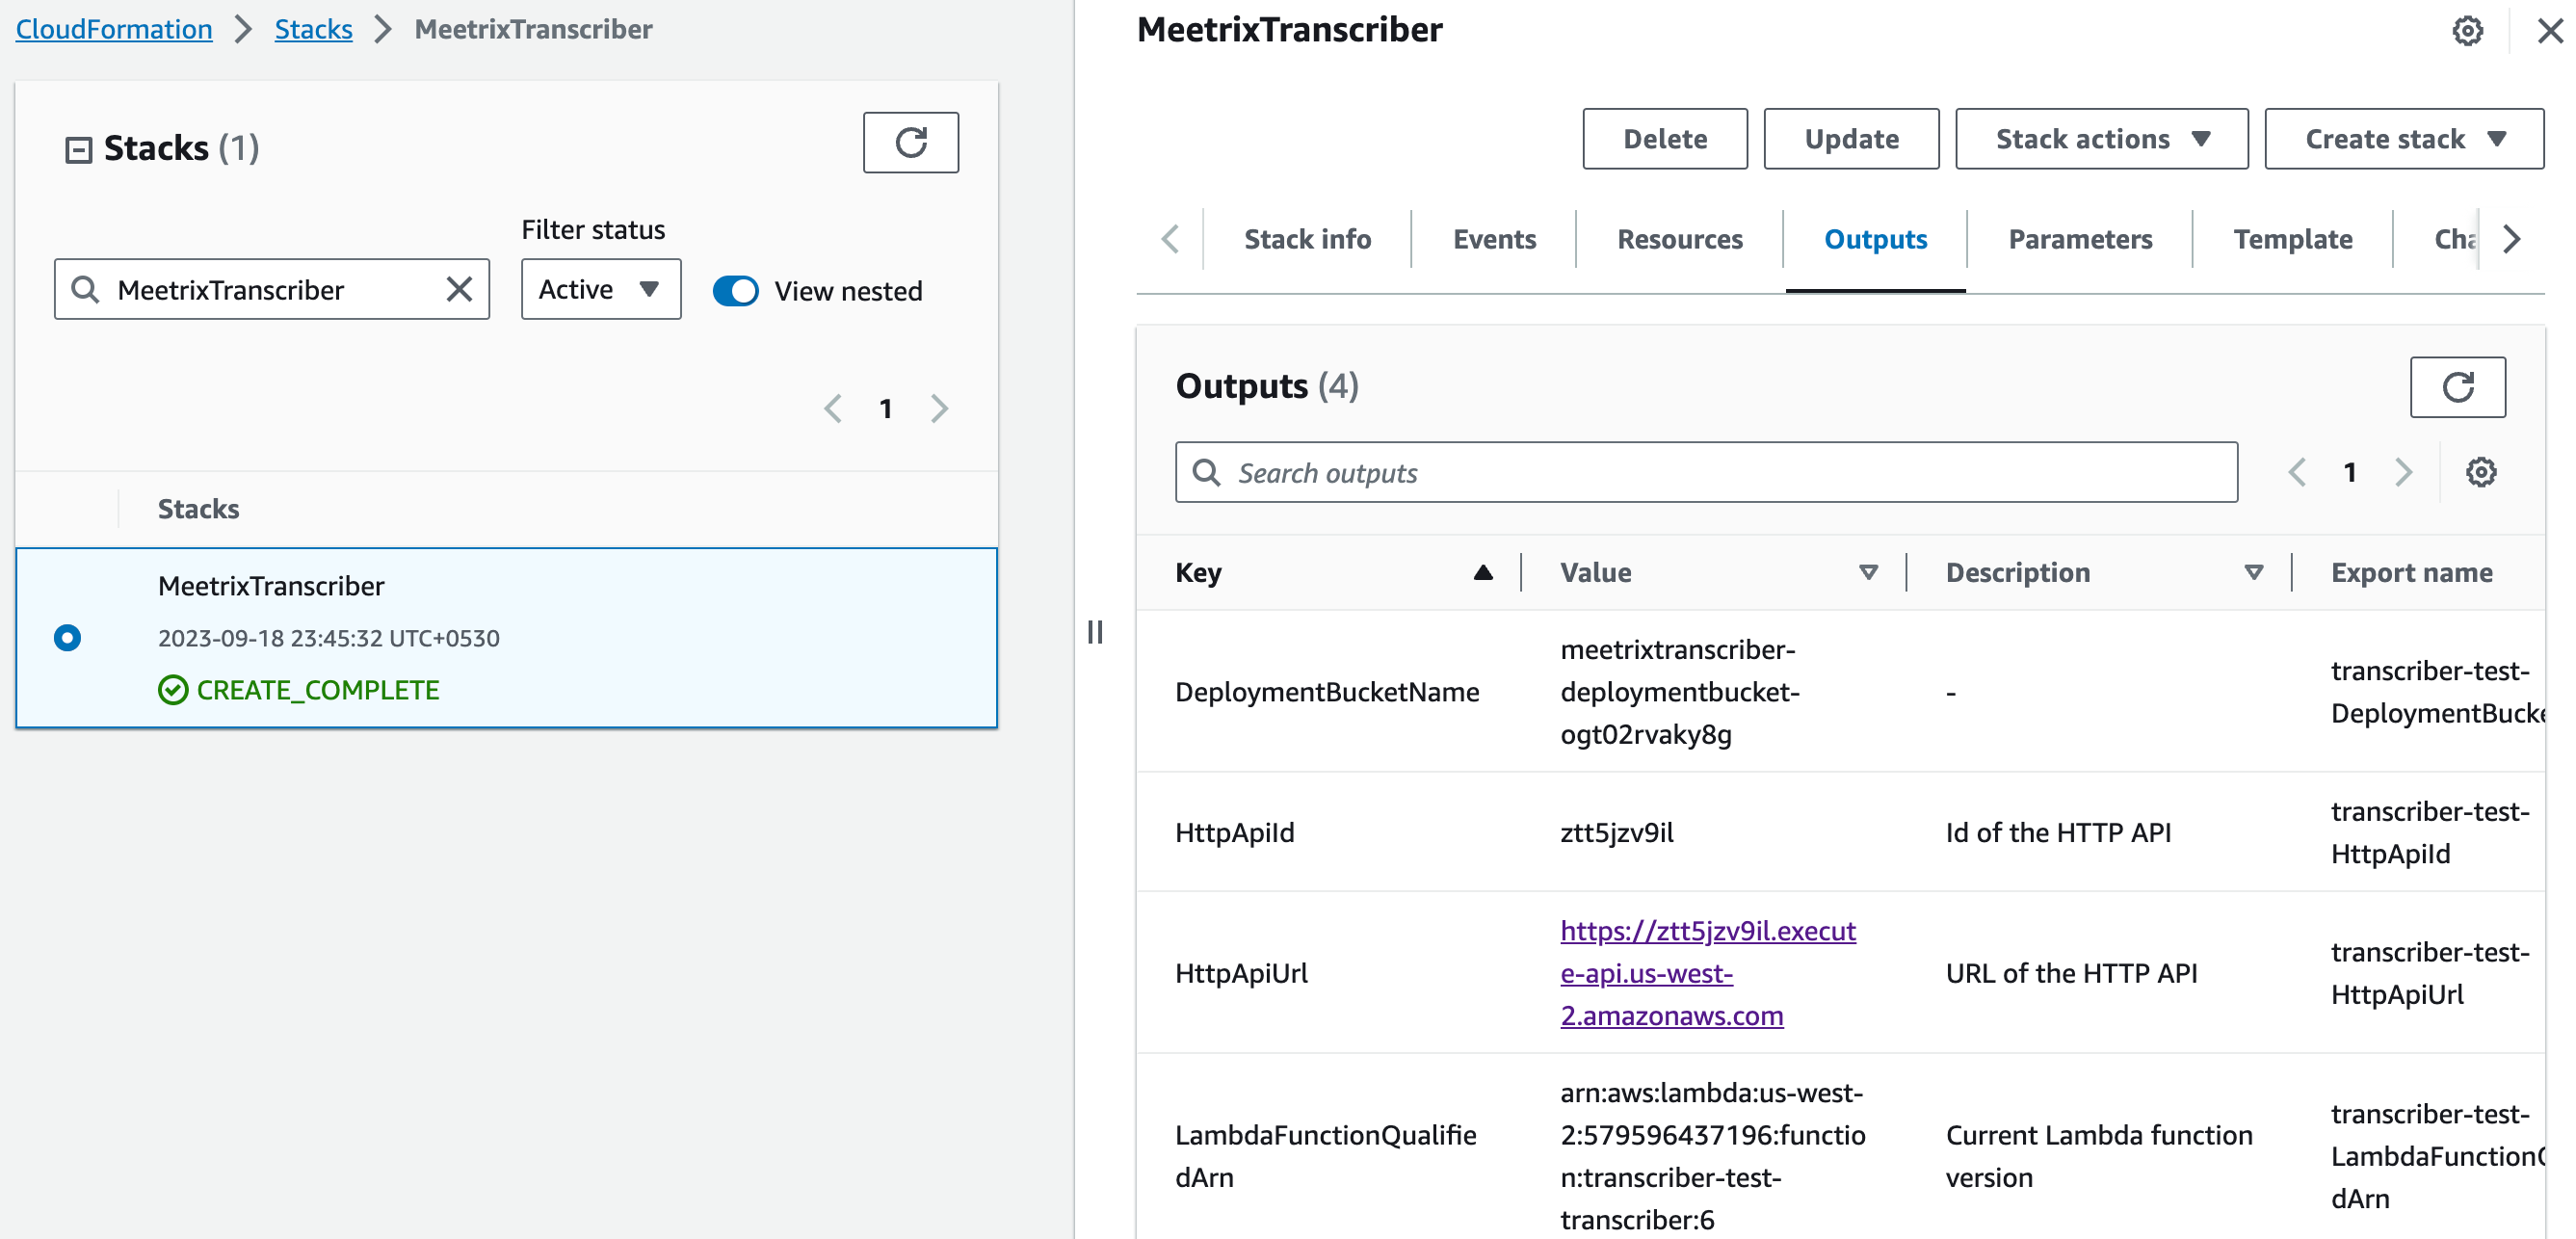
5. After the stack creation is complete, navigate to the “Outputs” tab, and click on the 'HttpApiUrl' link. This will take you to the Transcriber dashboard.
Transcriber dashboard
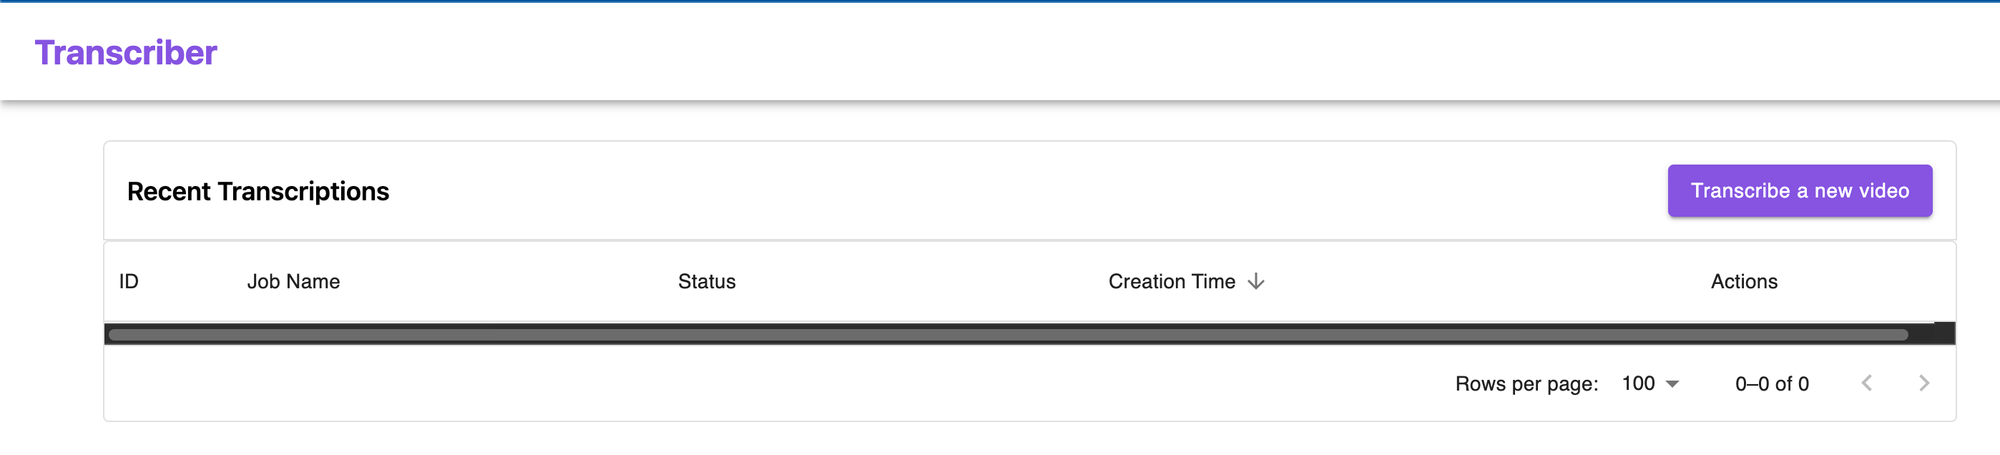
3. Transcribe a video
- Click “Transcribe a new video“.
- Enter the required details and provide the video url.
Please ensure that you provide a bucket name that exists within the current region you are in.
(To find the list of S3 buckets in a particular AWS region using the AWS Console, navigate to the S3 service, select the desired region from the region selector in the top-right corner, and you will see the list of S3 buckets specific to that region in the S3 dashboard).
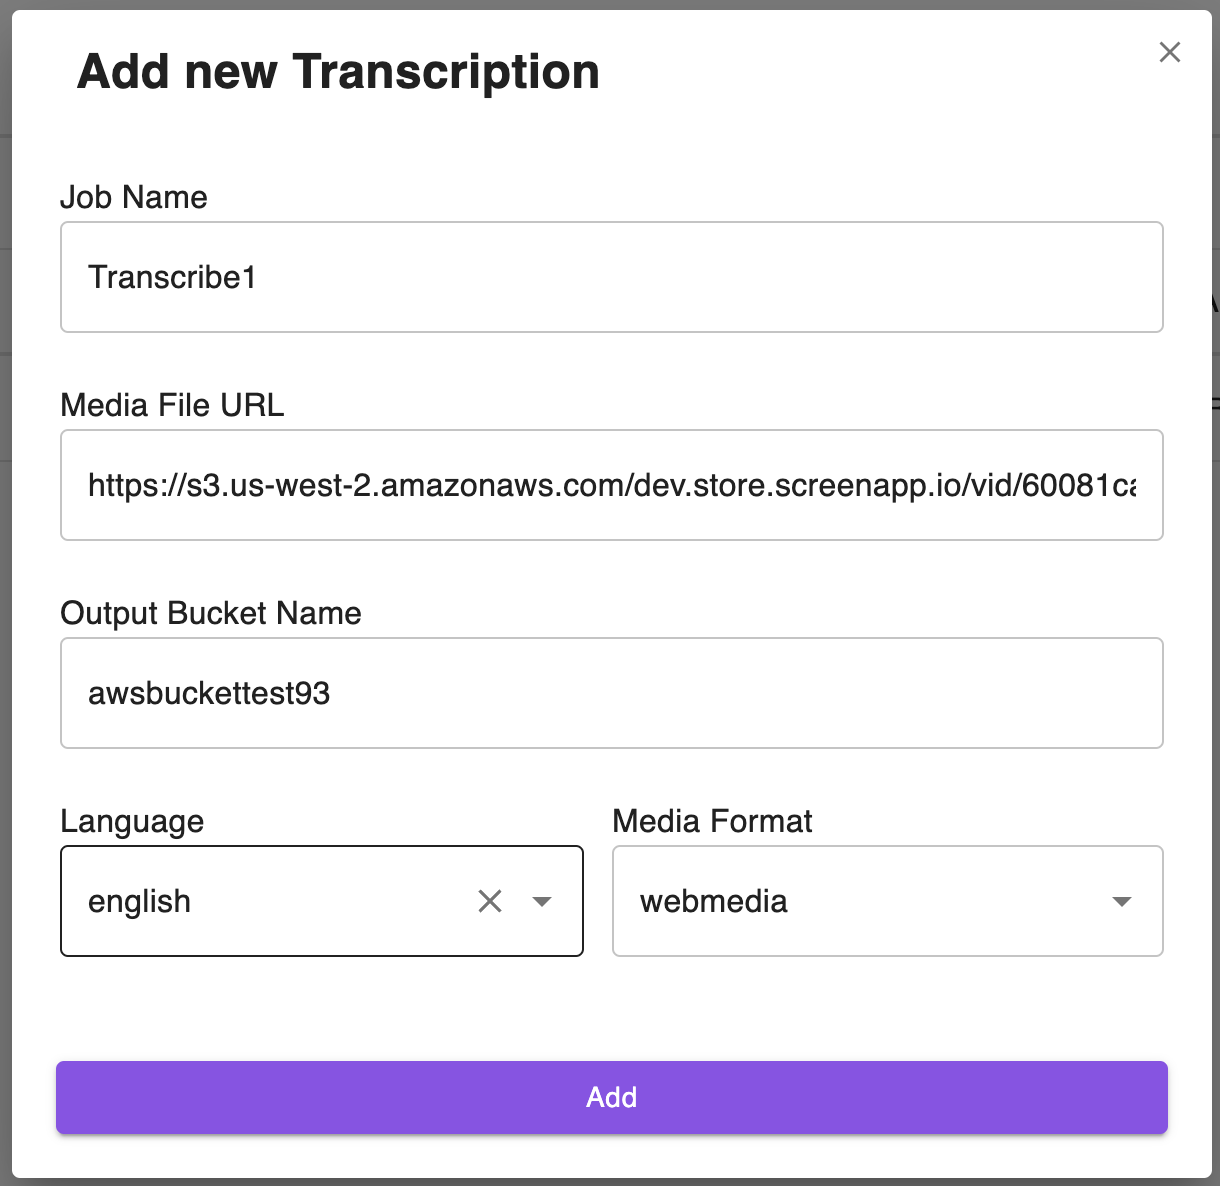
- Click “Add”.
- In a few minutes refresh the page and the transcription will be completed.
You can download the transcription file in JSON format upon completion of the transcription job. Additionally, the transcription file will be automatically uploaded to an S3 bucket for your convenience.

API Documentation
Getting Started
Prerequisites
Before using Meetrix Transcriber, make sure you have the following prerequisites in place:
- An AWS account with access to AWS Marketplace.
- Node.js installed on your local machine. You can download it from nodejs.org.
Installation
To use Stable Diffusion in your Node.js project, follow these steps:
Install Stable Diffusion from AWS Marketplace:
- Log in to your AWS account.
- Navigate to Meetrix Transcriber AWS Marketplace.
- Follow the Setup Guide to subscribe.
- Obtain the 'HttpApiUrl' link.
Install the AWS SDK:
- aws-sdk is used to interact with AWS Transcribe programmatically. To install it, you can use npm:
npm install aws-sdk
1. Create a Transcription Job
Below is a code snippet that demonstrates how to create a transcription job. You have to define the following parameters,
region
- Specify your desired region.
- e.g. "us-east-1"
endPoint
- Enter the endpoint url ( HttpApiUrl you obtained earlier).
- e.g. "https://jkdnbj2z17.execute-api.us-west-2.amazonaws.com/transcription".
transcriptionJobName
- e.g. "TranscriptionJob1".
languageCode
- e.g. for English, the language code used is "en".
mediaFormat
- Specify the format of the video you intend to transcribe.
- Should be “mp4” or “webm”.
mediaFileUri
- Provide the URL of the video that you would like to transcribe.
outputBucketName
- Specify the name of your Amazon S3 bucket where you want the transcribed file(.json) to be stored.
create.js
import { StartTranscriptionJobCommand } from "@aws-sdk/client-transcribe";
import { TranscribeClient } from "@aws-sdk/client-transcribe";

// Define the parameters
const region = "us-east-1";

const endPoint = "https://jkdnbj2z17.execute-api.us-west-2.amazonaws.com/transcription";

const transcriptionJobName = "TestJob2";
const languageCode = "en";
const mediaFormat = "webm";
const mediaFileUri = "https://s3.us-west-2.amazonaws.com/dev.store.screenapp.io/vid/60081ca49e4bb900110abd73/89b09c12-6539-4828-8d41-e493f62caa30.webm?AWSAccessKeyId=AKIAYN4VDY3GKRDG5VY7&Expires=1695668525&Signature=oCQTZSFNEIPrBKDiMTGRkuqyjAw%3D&response-content-disposition=attachment%3B%20filename%3D%22file.webm%22%3B%20filename%2A%3D%20UTF-8%27%27Recording_1684726689229.webm%3B";
const outputBucketName = "awsbuckettest93";

// Create an Amazon Transcribe service client object.
const transcribeClient = new TranscribeClient({
  endpoint: endPoint,
  region: region,
});

// Set the parameters
export const params = {
  TranscriptionJobName: transcriptionJobName,
  LanguageCode: languageCode,
  MediaFormat: mediaFormat,
  Media: {
    MediaFileUri: mediaFileUri,
  },
  OutputBucketName: outputBucketName,
};

export const run = async () => {
  try {
    const data = await transcribeClient.send(
      new StartTranscriptionJobCommand(params)
    );
    console.log("Success - put", data);
    return data; // For unit tests.
  } catch (err) {
    console.log("Error", err);
    console.log({err}.$response);
  }
};
run();
Run the file, if the transcription job is successfully initiated, the following response will be printed in the console:
Success - put {
  '$metadata': {
    httpStatusCode: 200,
    requestId: undefined,
    extendedRequestId: undefined,
    cfId: undefined,
    attempts: 1,
    totalRetryDelay: 0
  },
  TranscriptionJob: {
    CreationTime: 2023-09-19T10:30:22.593Z,
    LanguageCode: 'en',
    Media: {
      MediaFileUri: 'https://s3.us-west-2.amazonaws.com/dev.store.screenapp.io/vid/60081ca49e4bb900110abd73/89b09c12-6539-4828-8d41-e493f62caa30.webm?AWSAccessKeyId=AKIAYN4VDY3GKRDG5VY7&Expires=1695668525&Signature=oCQTZSFNEIPrBKDiMTGRkuqyjAw%3D&response-content-disposition=attachment%3B%20filename%3D%22file.webm%22%3B%20filename%2A%3D%20UTF-8%27%27Recording_1684726689229.webm%3B'
    },
    MediaFormat: 'webm',
    StartTime: 2023-09-19T10:30:22.593Z,
    TranscriptionJobName: 'TestJob2',
    TranscriptionJobStatus: 'IN_PROGRESS'
  }
}
2. List Transcription Jobs
The List.js script shows how to list transcription jobs, providing visibility into the status and progress of your jobs. Monitoring and managing transcription jobs is crucial for real-time applications and maintaining data accuracy.
You have to define the following parameters,
region
- Specify your desired region.
- e.g. "us-east-1"
endPoint
- Enter the endpoint url.
- e.g. "https://jkdnbj2z17.execute-api.us-west-2.amazonaws.com/transcription".
jobNameContains
- Not required.
- This parameter allows you to filter the results and retrieve only those transcription jobs whose names contain the specified string.
list.js
// Import the required AWS SDK clients and commands for Node.js
import { ListTranscriptionJobsCommand } from "@aws-sdk/client-transcribe";
import { TranscribeClient } from "@aws-sdk/client-transcribe";

// Define the parameters
const region = "us-east-1";
const endPoint = "https://jkdnbj2z17.execute-api.us-west-2.amazonaws.com/transcription";
const jobNameContains = "";

// Create an Amazon Transcribe service client object.
const transcribeClient = new TranscribeClient({
    endpoint: endPoint,
  region: region,
});

// Set the parameters
export const params = {
   JobNameContains: jobNameContains,
};

export const run = async () => {
  try {
    const data = await transcribeClient.send(
      new ListTranscriptionJobsCommand(params)
    );
    console.log("Success", data);
    return data; // For unit tests.
  } catch (err) {
    console.log("Error", err);
  }
};
run();
In the response, you can observe the transcription jobs that you initiated, accompanied by comprehensive details including their status, language code, start time, completion time, and output location type.
Success {
  '$metadata': {
    httpStatusCode: 200,
    requestId: undefined,
    extendedRequestId: undefined,
    cfId: undefined,
    attempts: 1,
    totalRetryDelay: 0
  },
  TranscriptionJobSummaries: [
    {
      CompletionTime: 2023-09-19T10:32:58.559Z,
      CreationTime: 2023-09-19T10:30:22.593Z,
      LanguageCode: 'en',
      OutputLocationType: 'CUSTOMER_BUCKET',
      StartTime: 2023-09-19T10:30:22.593Z,
      TranscriptionJobName: 'TestJob2',
      TranscriptionJobStatus: 'COMPLETED'
    },
    {
      CompletionTime: 2023-09-19T10:07:37.845Z,
      CreationTime: 2023-09-19T09:49:36.621Z,
      LanguageCode: 'en',
      OutputLocationType: 'CUSTOMER_BUCKET',
      StartTime: 2023-09-19T09:49:36.621Z,
      TranscriptionJobName: 'TestJob1',
      TranscriptionJobStatus: 'COMPLETED'
    },
  ]
}
3. Deleting Transcription Jobs
You can delete jobs that are no longer needed to free up resources and maintain a tidy environment. The provided delete.js script demonstrates how to delete a Transcribe job programmatically.
You have to define the following parameters,
region
- Specify your desired region.
- e.g. "us-east-1"
endPoint
- Enter the endpoint url.
- e.g. "https://jkdnbj2z17.execute-api.us-west-2.amazonaws.com/transcription".
transcriptionJobName
- Required.
- Enter the job name you wish to delete.
delete.js
// Import the required AWS SDK clients and commands for Node.js
import { DeleteTranscriptionJobCommand } from "@aws-sdk/client-transcribe";
import { TranscribeClient } from "@aws-sdk/client-transcribe";

// Define the parameters
const region = "us-east-1";
const endPoint = "https://jkdnbj2z17.execute-api.us-west-2.amazonaws.com/transcription";
const transcriptionJobName = "TestJob1";

// Create an Amazon Transcribe service client object.
const transcribeClient = new TranscribeClient({
    endpoint: endPoint,
    region: region,
});

// Set the parameters
export const params = {
  TranscriptionJobName: transcriptionJobName,
};

export const run = async () => {
  try {
    const data = await transcribeClient.send(
      new DeleteTranscriptionJobCommand(params)
    );
    console.log("Success - deleted");
    return data; // For unit tests.
  } catch (err) {
    console.log("Error", err);
  }
};
run();
Upgrades
When there is an upgrade, we will update the product with a newer version. You can check the product version in AWS Marketplace. If a newer version is available, you can remove the previous version and launch the product again using the newer version. Remember to backup the necessary server data before removing.
Troubleshoot
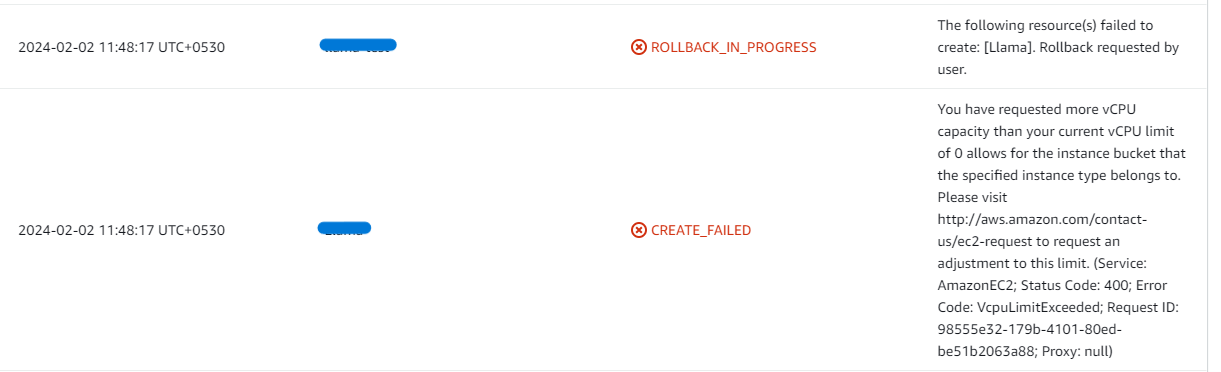
- If you face the following error, please follow https://meetrix.io/articles/how-to-increase-aws-quota/ blog to increase vCPU quota.
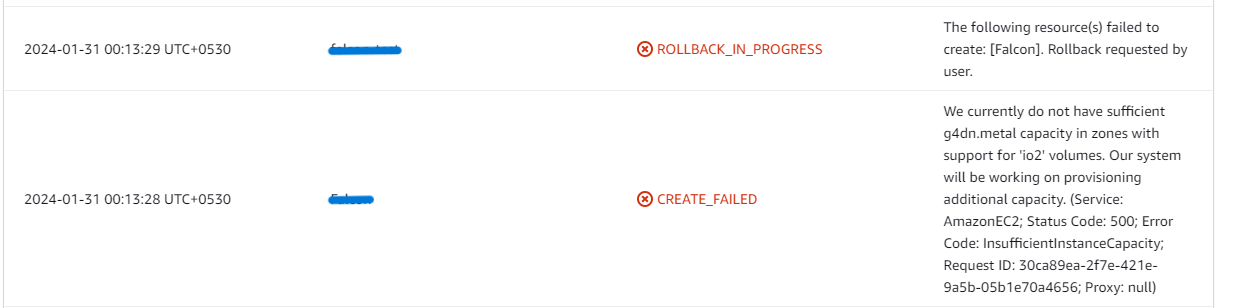
2. If you face the following error (do not have sufficient <instance_type> capacity...) while creating the stack, try changing the region or try creating the stack at a later time.
3. If you face the below error, when you try to access the API dashboard, please wait 5-10 minutes and then try.
Conclusion
The Meetrix Transcriber Developer Guide provides detailed, step-by-step instructions for seamlessly integrating Transcriber into your AWS environment. As a powerful video transcription software, Meetrix Transcriber converts audio and video content into written text effortlessly and accurately. Leveraging Meetrix's expertise in technological deployments, Transcriber offers rapid processing and comprehensive transcriptions, enhancing accessibility, content optimization, and data analysis. With its user-friendly, intuitive interface, Transcriber ensures even tech novices can efficiently generate transcriptions.
Technical Support
Reach out to Meetrix Support (support@meetrix.io) for assistance with Transcriber issues.